Application Control
This page refers to an older version of the product.View the current version of the online Help.
Group ManagementGroup Management is a library for compiling reusable groups of files, folders, drives, signatures and network connections that can be associated with rules in the configuration. For example, Groups can be used to manage licenses for a suite of software or common sets of applications for assigning to certain user groups.
Use Groups to help manage long lists of related items for an application, for example, all the File, Folder, Drive, Signature, Windows Store Apps, and Network Items. Add the groups to rules to allow or restrict access. Groups can include any combination of these items. For example, you can group a number of items for one particular application and then add the group to the Allowed or Denied Lists.
If the Group Name is amended, it automatically updates in any rule where the group is applied.
In this section:
- Create a Group
- Add Items to Groups
- Add Groups to Rule Items
- Remove Groups from Rule Items
- Delete Groups
- Capture Signatures within Groups
Create a Group
Two groups cannot have the same name. Naming two groups the same will display an error message informing that a group with the same name exists. You cannot save the group until you specify a unique name.
Renaming a group reflects in all rules that use that group.
- Navigate to the Group Management node.
- Select Add Group on the Groups ribbon.
- The new group with the default name, New Group, is added below the Group Management node.
- To rename the group, double-click it to make the name editable and enter a new meaningful name, for example, Microsoft Applications.
- To sort the groups, right-click the Group Management node and select Sort Ascending or Sort Descending.
Add Items to a Group
- Any combination of Files, Folders, Drives, Signature Files, Windows Store Apps and Network Connections can be added to a group. For example, all items that belong to a single application.
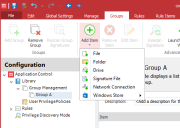
- Navigate to the Group Management node and select the group you want to add items to.
-
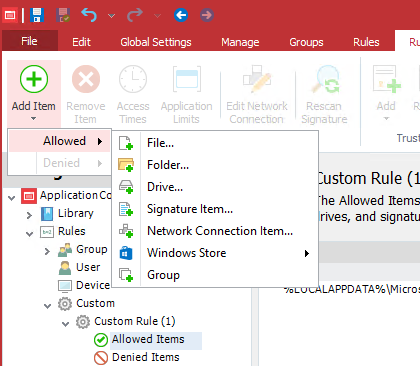
Click the Add Item drop-down arrow on the Groups ribbon.
- Do one or more of the
following:
- To add a file, select Add > File
- To add a folder, select Add > Folder
- To add a drive, select Add > Drive
- To add a signature file, select Add > Signature File
- To Add a Network Connection item, select Add > Network Connection Item
- To Add a Windows Store App, select Add > Windows Store App

To populate a group, you can also do the following:
- Right-Click a group and select Add Items.
- Add multiple files at once.
- Drag and drop items from Internet Explorer. Note dragging and dropping files also includes any dependencies.
- Cut, copy and paste between groups.
You cannot add duplicate items to a group.
If you have an item in a group that you want to temporarily disable you can toggle state, to do this select the item in the group, right-click > Change State > Disable/Enable. This saves you from having to remove the item and then re-add it.
Add Groups to a Rule Item
Groups can contain a number of items, for example, all the File, Folder, Drive, Signatures, Windows Store Apps and Network Items for a single application.
You can add groups to the Allowed Items, Denied Items, and User Privileges rule items, eliminating the need to add items individually to the lists.
-
Select either an Allowed Items, Denied Items or User Privileges rule item.
The rule item work area displays.
- Click Add
Item, and then select the menu path to add a group as follows:
To add an Allowed Item, select Allowed > Group.
- To add a Denied Item, select Denied > Group.
To add a User Privileges Item, select either Application > Group or Self-Elevation > Group.
The group selection dialog displays.
- Select the group you want to add and click OK.
The group is added to the rule.
Remove Groups from a Rule Item
You can remove a group from a rule. All items within the group are also removed from the rule item. The group is not deleted and still remains under the Group Management node.
-
Select the Allowed Items, Denied Items or Privilege Management rule item within the rule that contains the group you want to remove.
The work area displays.
-
Select the group you want to remove and select Remove Item in the Rule Items ribbon.
The Remove Items dialog box displays.
- Click Yes.
The group is removed.
Delete a Group
You can delete a group. When a group is deleted all items within the group are also deleted. If you try to delete a group that is currently used by a rule, a dialog displays that tells you where the rule where the rule is used. Remove the group from the rule before you delete the group. A message is displayed when the group contains items such as File, Folder, Drive, Signatures, Windows Store Apps, and Network Items.
- Select the group you want to delete.
- Select Remove Group on the Groups ribbon.
- One of the following
occurs:
- The Confirm Removal dialog displays. Click Yes. The group and the items it contains are deleted.
- The Group in use dialog displays providing the location of the rules that reference the group. Click OK and remove the group form the rule. Select Remove Group on the Groups ribbon, and click OK in the Confirm Removal dialog.
Capture Signatures in a Group
Use the Signature Wizard to capture multiple signature files.
- Select the group that you want to add signatures to.
-
Select Launch Signature Wizard on the Groups ribbon.
The Signature Wizard displays.
-
Click Next.
The Search method window displays.
- Do one of the following:
- To search for files in a particular folder, go to Step 5. If you wish to examine a specific process, make sure you have launched the relevant application before proceeding.
- To examine files used by one of the processes running on the computer, go to Step 10.
-
Select Search Folders and click Next.
The Searching Folders window displays.
- Browse to and select the folder you wish to search and click OK.
-
Select the Include subfolders option as required and click Next to begin the search.
The Review Files window displays.
-
Review the files and click Next to capture the signatures.
The Signature Generation window displays
- Go to Step 14.
- Select Examine a running process.
-
Click Next.
The Examine a running process window displays showing all the running processes.
-
Select the process to examine and click Next.
The Review Files window displays
- Review the files and click Next to capture the signatures.
- Allow the generation to complete then click Next and Finish.
This page refers to an older version of the product.View the current version of the online Help.
The topic was:
Inaccurate
Incomplete
Not what I expected
Other
Copyright © 2019, Ivanti. All rights reserved.