Self-Elevation
In this section:
- About Self-Elevation
- Configure Self-Elevation
- Self-Elevation Options
- Self-Elevation File Associations
- Self-Elevation Message Settings
About Self-Elevation
Self-Elevation can be applied to signatures, files, and folders that usually require administrative privileges to run and function. Self-Elevation provides an option from the Windows Explorer shortcut menu to run an item with elevated rights. When a user attempts to elevate a specified item, a prompt displays to request that the user enters a reason for the elevation before it is applied.
Note that historically self-elevation options are applied to rule items matched within the policy. As of Application Control 2020.3, alternative methods are now available that allow for more granular control:
• Rule Item Applications enables control over the options for specific items - including the application of the User Privilege Policy. It can be configured to prompt the user to choose if the elevation should be applied or not, and the user can be required to provide a reason if they choose to elevate. Refer to Rule Items for further information.
•Self elevation allows for custom tokens to be configured and applied. Refer to Self-Elevation Options below.
Self-Elevation is audited so you can monitor the types of applications that users typically want to self-elevate. Auditing enables you to identify and add items to the appropriate User Privileges node in a configuration so users can access them without request.
In environments where User Access Control (UAC) is disabled, you can enable the self-elevation of Windows Explorer file and folder properties using the custom setting, SelfElevatePropertiesEnabled. In this case, you can customize the Windows Explorer shortcut menu option text using the custom setting, SelfElevatePropertiesMenuText.
Configure Self-Elevation
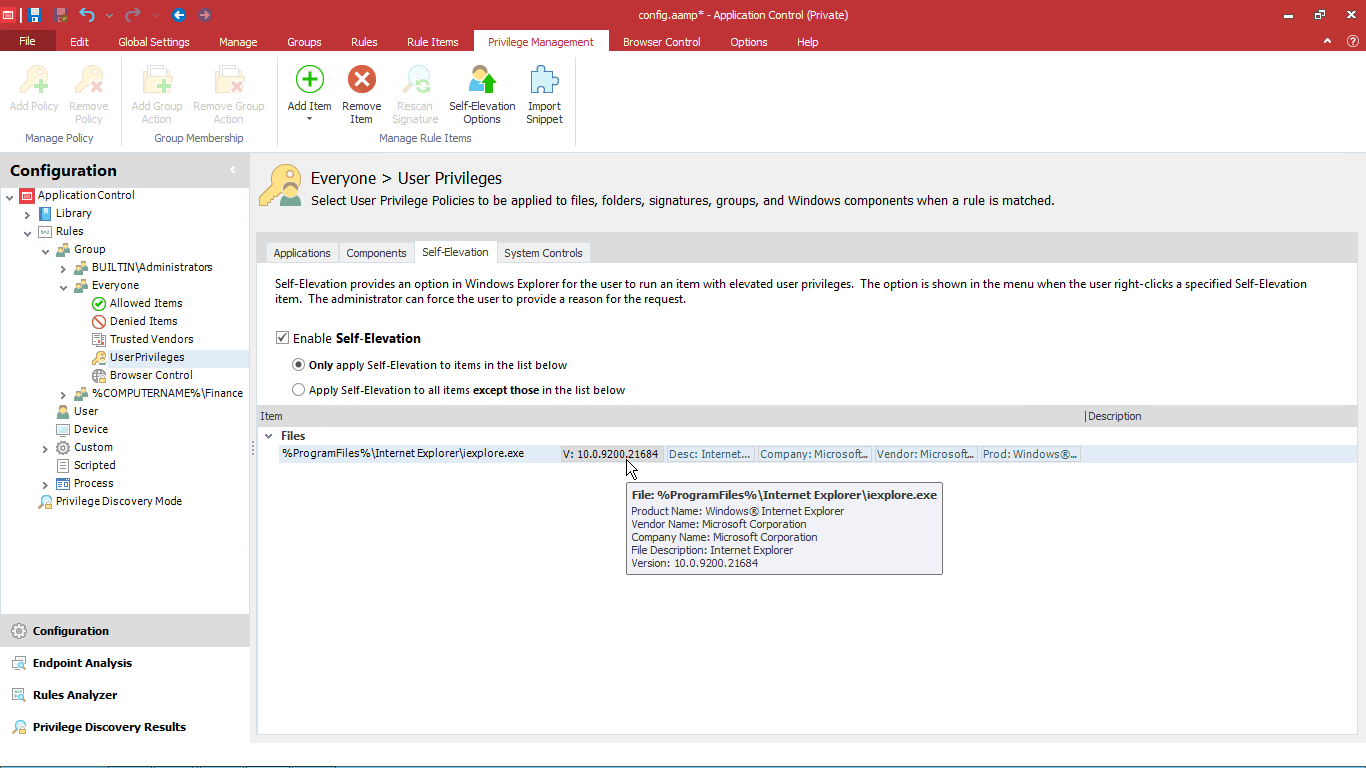
- Select the User Privileges node for the applicable group, for example, the Everyone group.
- Select the Self-Elevation tab.
- Select Enable
Self-Elevation and apply the required setting:
- Only apply Self-Elevation to items in the list below
Apply Self-Elevation to all items except those in the list below
- In the Manage ribbon, select Add Item > Self-Elevation and enter or choose a file, folder, signature, or group.
Any file type can be self-elevated if it is included on the Self-Elevation File Associations list.
-
To add further validation, click the Metadata tab and enter details about the description, vendor, and version number of the file and product.
Leave the fields blank if you do not want to restrict which files can be self-elevated. Where metadata has been applied, items must match that metadata to be self-elevated.
- Save the configuration.
Self-Elevation Options
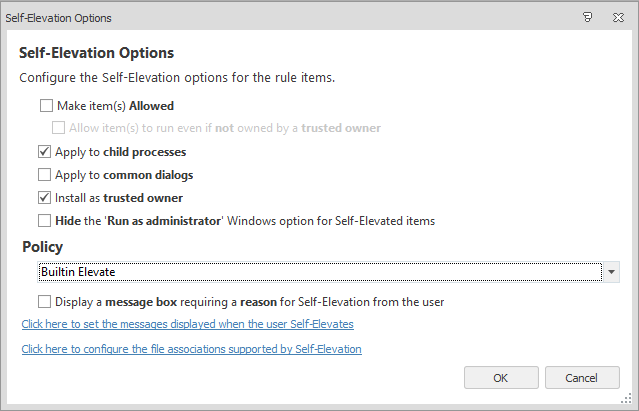
Configure the Self-Elevation options for the rule items by specifying how an application runs once it has been elevated. You can also define how the elevation is to affect any child processes or common dialogs.
In the Privilege Management ribbon, select Self-Elevation Options and configure the required settings:
- Make item(s) Allowed - Make the rule items allowed and overwrite any associated allowed items.
- Allow items to run even if it is not owned by a trusted owner - This option is available when Make item(s) Allowed is selected. When selected, all the rule items listed are executed regardless of the owner.
- Apply to child processes - By default, the Self-Elevation Policy applied to rule items is not inherited by child processes. Select this option to apply the policy to the direct children of the parent process.
- Apply to common dialogs - Elevate access to the Open File and Save File Windows menu options when a file or folder has been elevated.
- Install as trusted owner - Make the local administrator the owner of all files created by the defined application. This option is not applied to regular applications, only installer packages.
- Hide the Run as Administrator Window options for Self-Elevated items - Hide the Run as Administrator option from the Windows shortcut menu.
- Policy - Click the arrow icon and select the policy required.
Defining custom user privileges policies allows you to assign a custom token to your Self-elevation rule item.
Refer to User Privileges for further information. - Display a message box requiring a reason for Self-Elevation from the user - Prompt users to provide a reason when they self-elevate. Set the content and dimensions of the message in the Self-Elevation Message Settings.
When exploring OneDrive files, the Run as Administrator option is not available from the shortcut menu until the files have been synchronized and are available locally.
Self-Elevation File Associations
Configure a list of file types and associated applications that users can open with elevated or administrative privileges. When a user right-clicks a file, Application Control performs the following checks to determine whether the user can elevate the application associated with the file:
- Is the file type on the file associations list?
- No - the file cannot be self-elevated.
- Yes - check the associated application.
- Is there an associated application?
- No - the file is self-elevated using the associated application on the user's endpoint.
- Yes - the file can be self-elevated only if opened with the application specified in the file associations list.
If the application can be self-elevated, a corresponding option is available from the shortcut menu and the user accesses the application with elevated privileges. If a user changes a default program to one that differs to the associated application set in the configuration, the self-elevation option is no longer available from the shortcut menu.
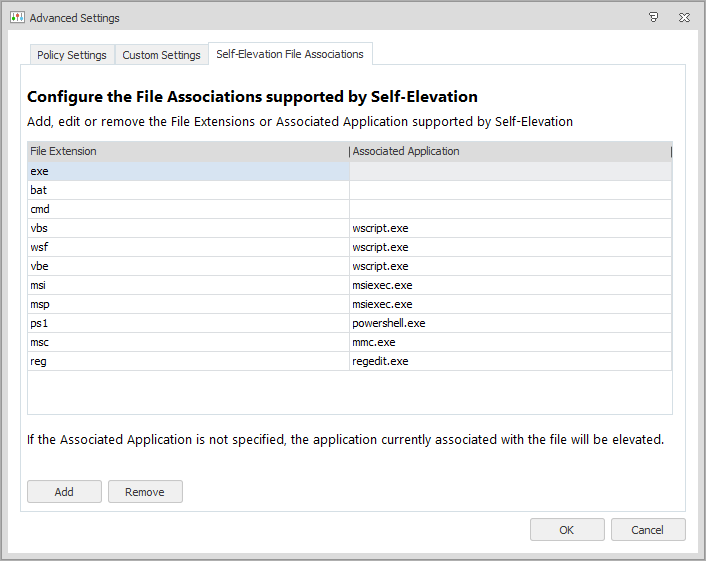
Update Files Associations
- In the Manage ribbon, click Advanced Settings and select the Self-Elevations File Associations tab.
- Update the list of extensions and associated applications using the Add and Remove buttons. Any file extension can be added.
The following extensions are included by default:
| File Extension | Associated Application |
|---|---|
| EXE | |
| BAT | |
| CMD | |
| VBS | wscript.exe |
| WSF | wscript.exe |
| VBE | wscript.exe |
| MSI | msiexec.exe |
| MSP | msiexec.exe |
| PS1 | powershell.exe |
| MSC | mmc.exe |
| REG | regedit.exe |
Self-Elevation Message Settings
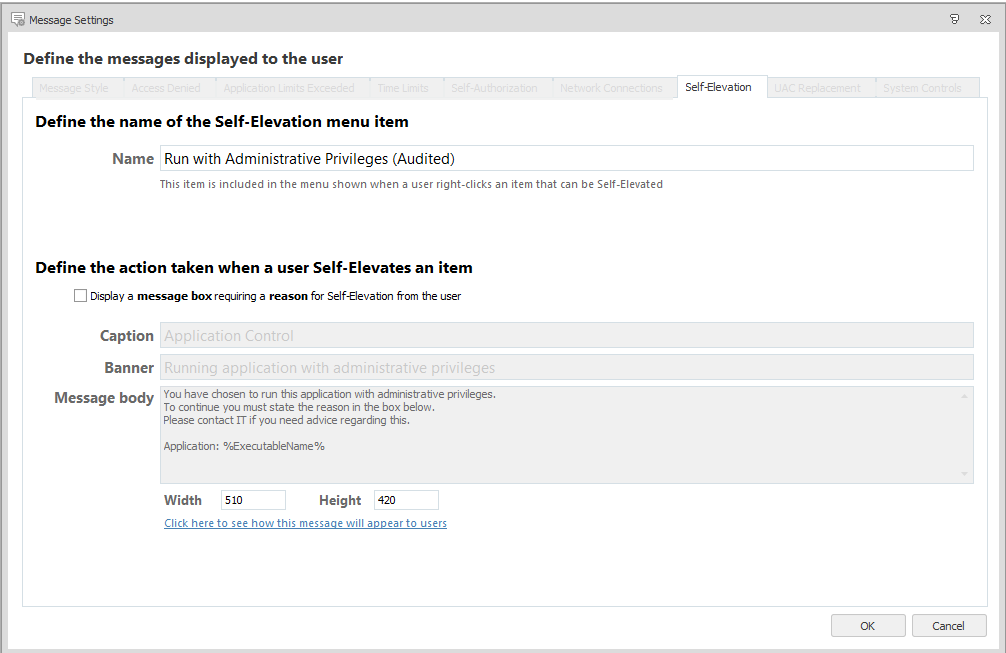
Configure the content and dimensions of the message that displays when a user requests self-elevation.
The messages are displayed if the Display a message box requiring a reason for Self-Elevation from the user option is selected in the Self-Elevation options.
- In the Global Settings ribbon, select Message Settings.
- Select the Self-Elevation tab.
-
In the Name field, enter the text to display for the self-elevation shortcut menu option.
The menu option is displayed when a user right-clicks a file with an extension on the Self-Elevation file associations list.
- Configure the caption, content, and dimensions for the message that displays when a user requests self-elevation.
- Click OK.