Environment Manager
This page refers to an older version of the product.View the current version of the User Help.
File Type Associations Action
This action sets default file extensions for selected applications. File associations created from this action overwrite default associations but users maintain the ability to override using the Open with... command or the Default Programs Control Panel settings. When an association is made, files use the icon associated with the executable when displayed in Windows.
- In the Policy Configuration navigation tree, select or create a node or condition on the Pre-Desktop, Session Unlock or Session Reconnect trigger.
- From the Actions ribbon, select File & Folder > File Type Associations.
-
Enter a valid application path or use the ellipsis to navigate to the required application.
When the action runs, clients do not check that applications exists. File type associations are created regardless of whether an application exists on endpoints.
- Click Add.
- Enter an extension or use the ellipsis to navigate to one.
- Multiple file extensions can be associated with an application. Use CTRL to select multiple file extensions from the list or repeat steps 3 and 4.
- Click OK to save the action.
FTA Roaming
Environment Manager now includes an in-built Windows Settings Group (WSG) template to enable roaming of Windows 10 File Type Associations (FTAs). The template allows the user to select default programs for opening each file type, and for the selection to persist across sessions and devices. The template can be added to Personalization groups as required. See Windows Settings Groups.
The template is enabled for users of Environment Manager Policy and Personalization together (combined console).
For FTA roaming to work an action is required at computer startup to delete the Windows default associations xml file from the endpoint.
Enable FTA Roaming for Environment Manager Policy and Personalization
1.From the Policy Configuration navigation pane ensure your Personalization Servers list is maintained. See Personalization Servers in the Combined Console
2.In the User Personalization navigation pane click Connect.
Note that the personalization server must be added to your configuration before FTA roaming is deployed to endpoints.
3.In the User Personalization navigation tree select the personalization group required.
4.Select the Windows Personalization tab.
5.Click Add.
The available Windows Settings Groups are listed in the navigation tree.
6.Select the File Type Association template and click OK.
The template is added to your personalization group.
7. To view the details of the template click Personalization Settings > Windows Personalization > File Type Associations: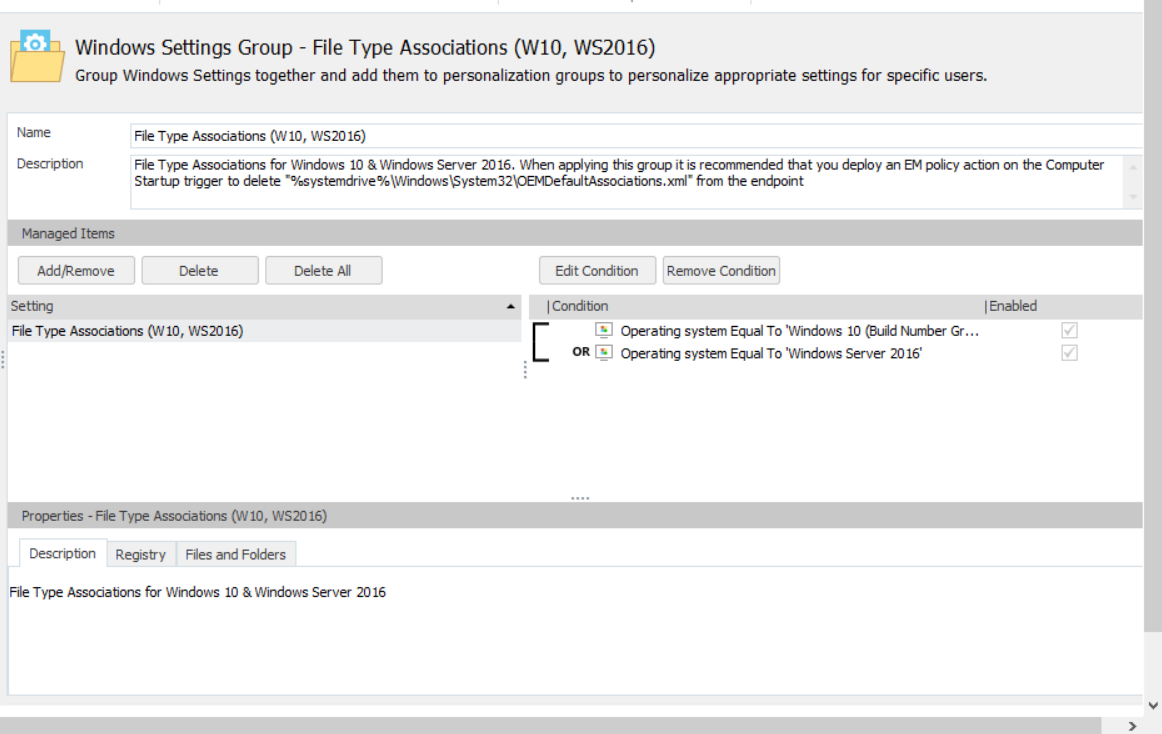
Note that in the Description field you are prompted to deploy a policy action to delete the following file from the endpoint: %systemdrive%\Windows\System32\OEMDefaultAssociations.xml.
8.Select and copy the file name from the Description field to your clipboard.
9.In the Policy Configuration navigation pane, create a new node or select an existing node in the Computer > Startup trigger.
10.In the Actions ribbon, select File & Folder > Delete File then paste the copied name file name from your clipboard.
11. Save your configuration.
The configuration can now be deployed to endpoints.
Related topics
Copyright © 2019, Ivanti. All rights reserved.