Environment Manager
This page refers to an older version of the product.
View the current version of the User Help.
Group Policy Actions
Group policy is a set of configuration rules relating to the working environment of users and computers. You can add Group Policy rules to actions in a configuration. Settings for operating systems, applications, and users can restrict or allow user functionality. For example, you can use Group Policy to prohibit access to the Control Panel or to limit user profiles to a specific size.
Group polices are stored in administrative template files that describe where the registry-based settings are stored. There are two types of files:
- ADM - Administrative template files that store settings for Windows XP and Windows Server 2003.
- ADMX - Administrative template XML files that store the settings for Windows Vista and Windows Server 2008 and higher.
By default, Group Policy files are stored in the following locations:
- ADM - C:\WINDOWS\Inf
- ADMX - C:\WINDOWS\PolicyDefinitions
You can change the default location for storing Group Policy files in the Group Policy Location dialog, which you access in the Manage ribbon.
For more information, see Group Policy Location.
You create Group Policy Actions in the Set Policy dialog.
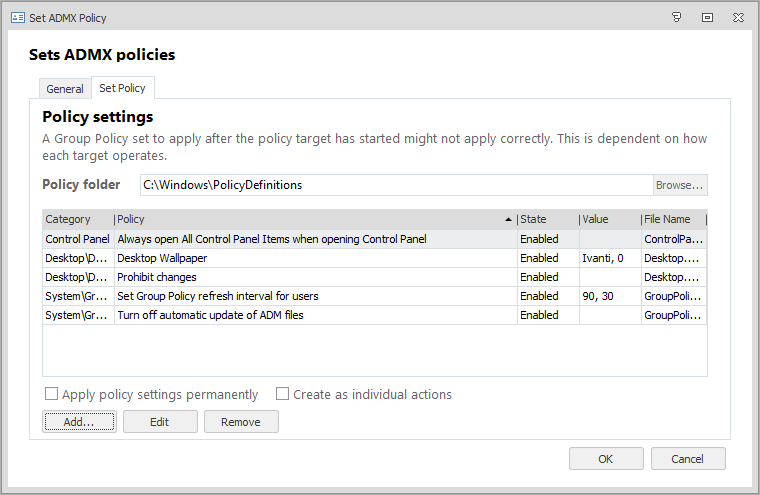
The dialog lists information about Group Policy settings in the following columns:
- Category - The parent path of the Group Policy setting according to the hierarchy in which settings are organized in the dialog, for example Windows Components\FileExplorer\Explorer Frame Pane.
- Policy - The name of the policy, for example Hide specified Control Panel items.
- State - A policy can be Enabled, Disabled, or Not Configured.
- Value - Some policy settings need a value setting, such as a date or file size.
- File Name - The name of the ADM or ADMX file within the policy itself.
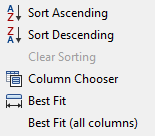
You can use the columns' shortcut menu to choose which columns to display and how:
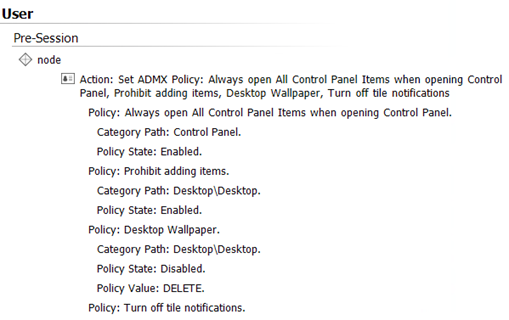
The policy details listed in the dialog are also included in the report produced by the Configuration Profiler:
When you create a Group Policy action, you can add multiple Group Policy settings to a single action. You can use the Create as individual actions option to convert each policy setting into an action of its own. Splitting multiple Group Settings into separate actions is irreversible. You cannot regroup the new actions. However, once the actions are created, you can edit an individual action and add additional Group Policy settings to it.
Policy settings applied though Environment Manager are automatically removed from managed endpoints at logoff or when a configuration changes. If the Apply policy settings permanently checkbox is selected, the remove is not applied and the policy setting remains active on the endpoint.
Group policy administrative templates such as Site to Zone Assignment List for Internet Explorer, require Client Side Extensions (CSE) to run. In previous versions of Environment Manager, these policies could be configured but the agent was unable to run the CSEs.
The Environment Manager agent now supports these CSEs.
Folder Redirection using CSEs is not supported, as the CSE cannot be configured through ADMX.
Create a Group Policy Action
- In the Policy Configuration navigation tree, create a new node or select an existing node.
-
In the Actions tab, select Group Policy > Set ADMX Policy or Set ADM Policy.
The Set ADMX Policy dialog displays.
- In the Policy folder text box, accept the default policy folder. Or click Browse to navigate to a folder from which to select ADMX policy templates.
-
To add a policy setting, click Add.
The Policies dialog displays.
-
In the navigation tree in the left-hand pane, select a category. You can use the Filter locate the required category more quickly.
The individual policies for that category display in the right-hand pane.
-
Double-click the required policy in the right-hand pane to configure its settings.
The Set Policy Values dialog box displays. It has two tabs: Options and Help.
Click Help to view a description of the policy setting. Click Previous Setting and Next Setting to scroll through the settings in the selected policy folder.
-
In the Options tab, configure the setting as required: Enabled, Disabled, or Not Configured.
When Enabled is selected, some policies have additional settings to enter, such as a date or file size.
- Click OK to add the policy to the Set ADMX Policy dialog.
-
Repeat steps 4 - 9 to add more policies.
You can use the Edit and Remove buttons to adjust the settings.
-
If required, select the Apply policy settings permanently checkbox.
Policy settings applied though Environment Manager are automatically removed from managed endpoints at logoff or when a configuration changes. If you select the checkbox, the remove is not applied and the policy setting remains active on the endpoint.
-
To split multiple settings into single actions, select the Create as individual actions checkbox.
Polices cannot be regrouped once you split them.
-
Click OK.
An action is created containing all the configured group policy settings.