Environment Manager
This page refers to an older version of the product.
View the current version of the User Help.
Windows 10 Start Menu Builder
Environment Manager 2020.2 introduced the Windows 10 Start Menu Builder; an easy-to-use wizard that allows you to create a personalized Start menu as a log on action.
A customized Start menu can be deployed to endpoints used by different user groups. This enables you to provide a standard menu, optimized for each department or user group, across your organization. The customized menu is created as an action on a logon trigger.
Multiple Start menu actions can be created and applied under different conditions. However, if more than one Start menu action is applied to the same endpoint only the first one is used.
The Start menu action is applied only to Windows 10 endpoints, it will not impact any endpoints running a different OS, and it does not need to appear under an OS condition.
Click the link below to view a short introductory video for the Windows 10 Start Menu Builder.
In this section:
- Windows 10 Start menu
- Create a Start menu action
- Manage Available Applications list
- Save configuration changes
- Edit a Start menu action
Windows 10 Start menu
The Windows 10 Start menu consists of the application list (1) and the tile area (2):
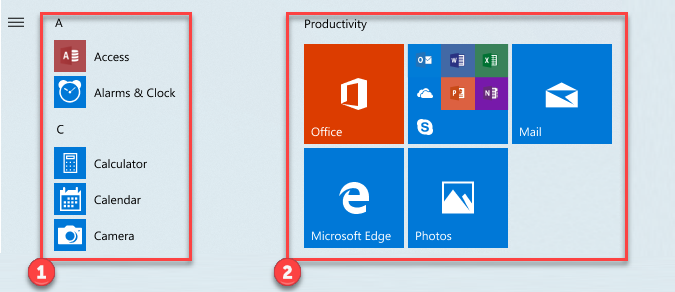
Applications displayed comprise:
•UWP (Universal Windows Platform) apps (or ‘modern’ apps)
•Win32 apps (or ‘traditional’ / ‘desktop’ apps)
The Start Menu Builder allows you to manage both Win32 and UWP apps, and the tile layout itself - all from a simple, intuitive interface.
Limitations
•Mandatory profiles are not supported
•Versions of Windows 10 earlier than 1607 are not supported
•Windows 10 1607 is the only LTSB version supported
•UWP system apps are integral to the OS and cannot be removed from Windows Start.
System apps are not affected by the Start menu action and do not appear in the Start Menu Builder wizard.
•The deployed Start menu is applied during the first few moments after the shell has started - and may result in some users observing changes to Windows Start immediately after logon.
Actions created using the Windows 10 Start Menu Builder are applied to endpoints after personalization data is synchronized at logon. This means that any existing Start menu personalization will be overwritten.
Create a Start menu action
A Start menu action is created using the Windows 10 Start Menu Builder wizard. The wizard icon is available from the Environment Manager Tools and Wizards ribbon and the context menu. It is active when a node is selected in the console navigation pane.
The default list of Windows applications available in the Start Menu Builder wizard is supplied by an XML file which can easily be replaced or modified from within the wizard itself.
Open the Start Menu Builder wizard
1.From the Environment Manager console Policy Configuration navigation pane, select the logon trigger required. Note, the following triggers can be used for the Start menu action: Pre-Session, Pre-Desktop or Desktop Created.
Select the node required, or from the menu ribbon select Add Node to create a new one.
2.In the menu ribbon select Tools & Wizards > Start Menu Builder. Alternatively, right-click and select Actions > Start Menu Builder.
The Ivanti Start Menu Builder opens.
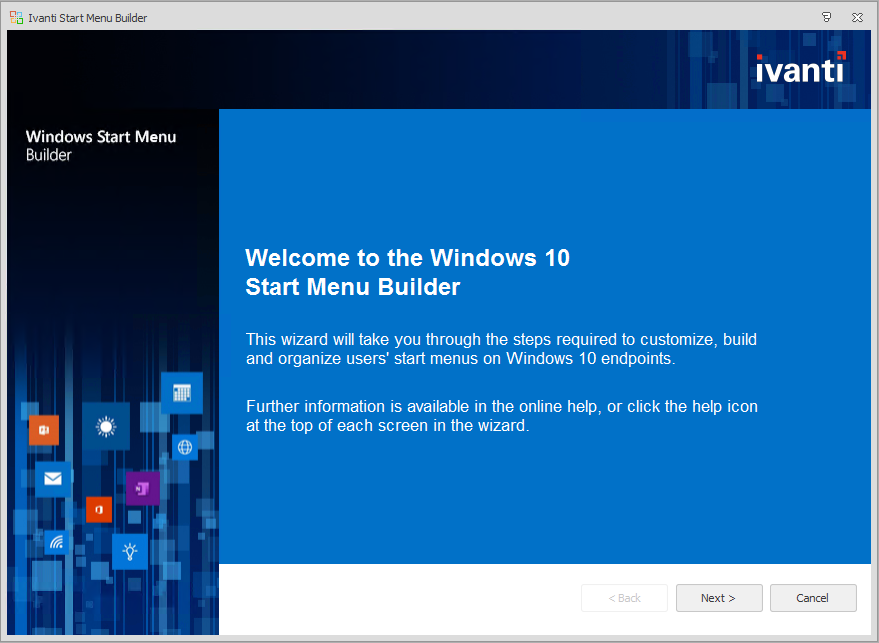
3.Click Next.
Start Menu General Settings
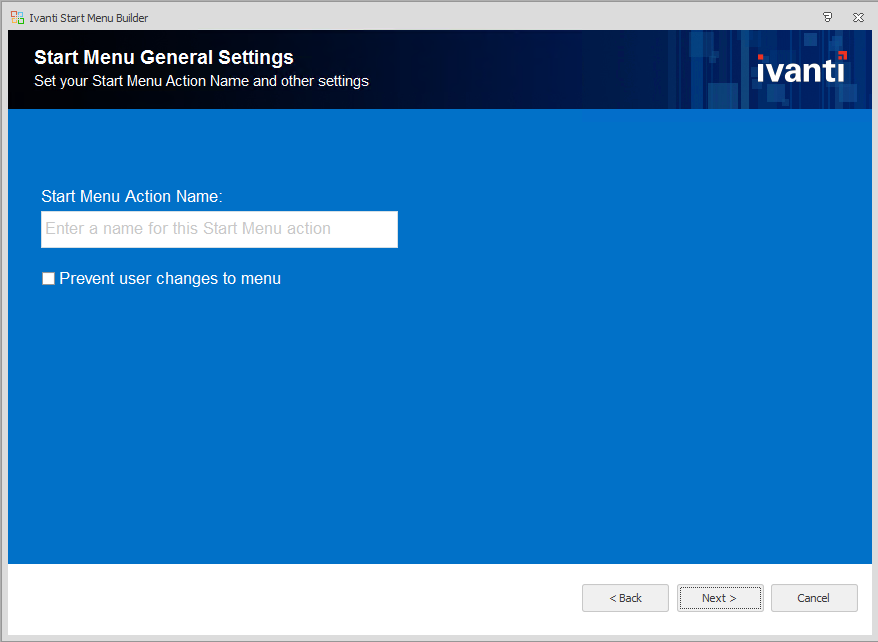
1.In the Start Menu Action name field, enter a name for your action.
If no name is entered a default name is assigned comprising the current date and time.
2.If required, select the Prevent user changes to menu checkbox.
•With this option checked, the user cannot modify the menu at the endpoint.
•With this option cleared, the user can modify the menu. However user changes will be lost should the logon action run again.
3.Click Next.
Create Application List
This page allows you to select the applications that you want to include in the Application List of your Start Menu action.
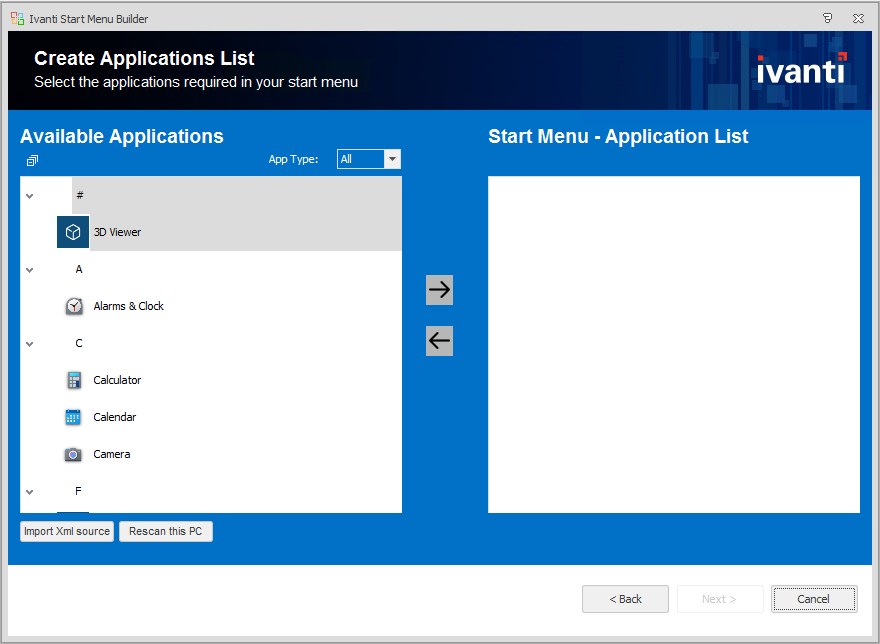
1.From the Available Applications panel, select the application required.
Click the right arrow (![]() )to add the application to the Start Menu Applications List panel.
)to add the application to the Start Menu Applications List panel.
2.To remove an application from the Start Menu Applications List, select the application required, then click the left arrow (![]() ).
).
3.Repeat these steps to add or remove the applications required. When your application list is complete, click Next.
Note, the list of Available Applications displayed is determined by an XML file that can be replaced using the Import Xml source or Rescan this PC buttons. This is described below in Manage Available Applications list.
The Available Applications list can be filtered by application type: UWP, Win32 or all. Click the drop-down arrow in the App Type combo box and select the option required.
Applications listed are grouped alphabetically. Click the Collapse/Expand icon ( ) as required to collapse or expand the groupings.
The Start Menu action cannot create folders. Items added from within folders in the Available Applications list will be displayed at the root of the target application list.
System UWP apps will be present in your customized Start menu– they cannot be deprovisioned.
Create Tile Groups
This page allows you to create a tile layout for the Start menu
Applications selected previously are displayed in the Start Menu Application List on the left. Add the required applications to the tile layout in the Start Menu Tile Groups panel on the right.
Note that tiles can only be created from application listed. To add further applications to your list, click Back. To modify your applications list (refer to Create Application List section above).
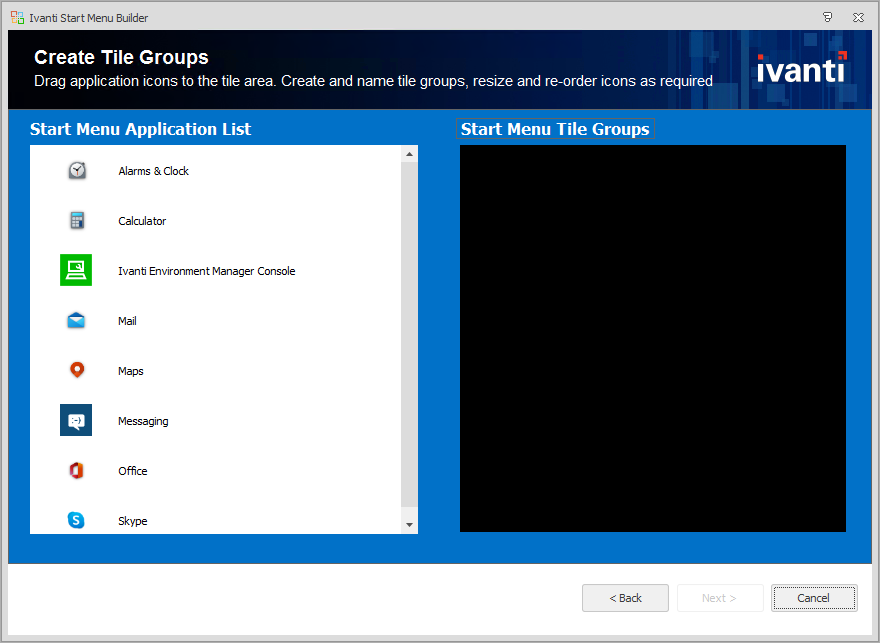
1.To add a tile or tile group, drag items from the application list panel and drop them in the Start Menu Tile Groups panel.
2.To format the tile size or remove a tile, right-click the tile and select the option required:
•Unpin Tile - remove the tile from the tile group panel
•Resize - select the tile format required
Note that Win32 tiles can only appear in small or medium sizes. The formats available for UWP tiles may be constrained by the particular UWP application.
3.Tiles can be arranged in groups, and the tile groups can be named.
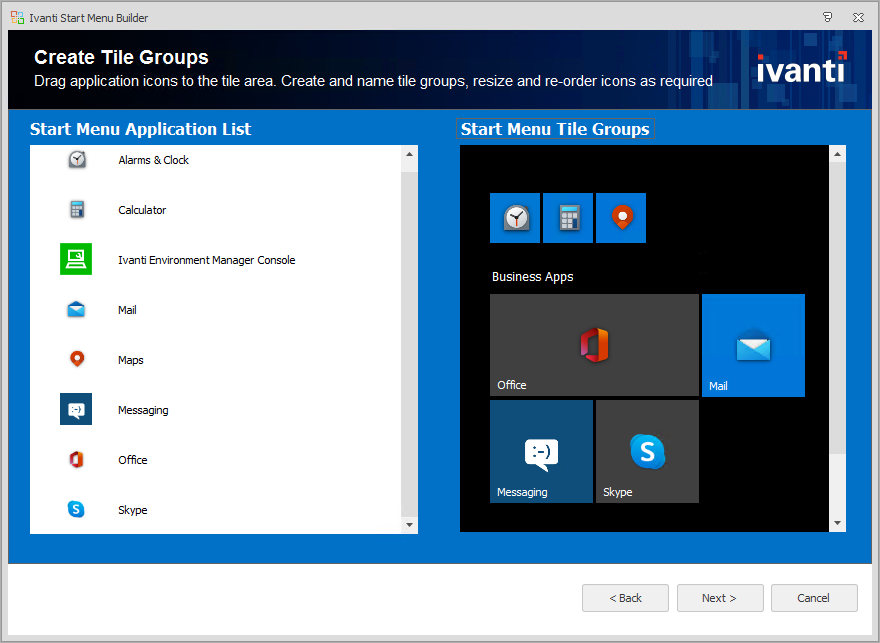
•In the Start Menu Tile Groups panel, use drag and drop gestures to arrange tiles into groups as required.
•To enable tile groups to be named, leave vertical space between the tile groups. Mouse-over that space to reveal the Name Group field and click the field to enter or edit the tile group name.
4.When your tile group layout is complete, click Next.
Tile layout limitations:
•The tile layout supports up to three columns of medium-sized tiles.
•Titles for folders are not currently supported.
Note in Windows Start, folders are created by dropping one tile directly on another.
•Group headers cannot be dragged from one position to another.
Start Menu Build Complete
This page confirms the Start menu action build is complete.
•Click Finish to close wizard.
The Start Menu Builder wizard closes and the Windows 10 Start Menu action is listed in the Actions tab for the logon trigger selected.
Save configuration changes
1.Click File > Save As > Live configuration on this computer.
You can now logon to the machine as an end user to review the Start menu action.
2.At logon, Environment Manager deploys the action as follows:
•UWP apps for the current user are deprovisioned (or reprovisioned).
•Shortcuts for Win32 apps are created
•The tile layout is applied.
Manage Available Applications list
The list of Available Applications displayed within the wizard is compiled the first time the Start Menu Builder wizard is run. It is based on the Start menu of the current Windows machine and is saved as AvailableApps.1.0.xml in C:\ProgramData\AppSense\Environment Manager\Console.
Additionally, a default list of Windows 10 applications is supplied as an XML file with the Environment Manager software. This list is used if the current console is a non-Windows 10 machine.
The available applications list can be easily updated or replaced from the Create Application List (page 3) of the wizard.
Import Xml source
An XML application list can be imported to replace the current list, or to be merged with it.
1.Click Import Xml source and in the dialog displayed browse to the location of the file required.
2.Select the XML file required and click Open.
The Import Available Applications dialog opens.
3.Select the import action required:
•Merge with existing list
•Replace existing list
4.Click OK.
Rescan this PC
If you have made changes to the application list of the current machine a rescan will update the application list accordingly.
1.Click Rescan this PC. You will be prompted to confirm you wish to continue
2.Click Yes.
The rescan is performed and the application list updated.
Remove applications manually
Listed applications can be removed from the list manually if required.
1.In the Available Applications panel select unwanted items.
2.Right-click and select Remove item(s) from list.
All selected items will be removed.
Command-line utility EmStartmenuScanner.exe
The standalone command-line utility EmStartmenuScanner.exe can be used to scan a PC and produce an available applications list without installing the full Environment Manager console.
1. Locate the EmStartmenuScanner.exe file in C:\Program Files\AppSense\Environment Manager\Console\Utility.
2.Copy the file to the machine you wish to scan.
3.Open an elevated command prompt and run the file.
Note the single parameter is the target xml file name.
For example: EmStartmenuScanner MyList.xml
The applications list generated can be imported using the Import Xml source button as required.
Edit a Start menu action
Existing Start menu actions can be edited using the Windows 10 Start Menu Builder wizard.
1.From Policy Configuration navigation pane, select the logon node required. In the Actions tab, double-click the Start Menu action required.
Alternatively, right-click the action and select Edit from the shortcut menu.
The Windows Start Menu Builder opens.
2.Click Next to reach the page of the wizard you wish to edit. Complete your changes as required and save your changes (refer to the guidance described previously in this topic).