Windows Personalization
Windows settings, such as wallpaper selection, mouse options and accessibility features, can be personalized for managed users through Environment Manager Windows Personalization. This is achieved by personalizing the appropriate registry keys and values, files and folders. The settings a user applies to their desktop are saved to the personalization database when a user logs off, and restored when the user logs on to any managed endpoint.
In this section:
- Windows settings groups
- Apply Windows settings group to a Personalization Group
- Custom Windows settings
- Default Windows settings groups
- Managing shortcuts for roaming users
Windows settings groups (WSG)
Windows settings can be grouped together in a Windows settings group and the settings group then added to a Personalization Group. This enables you to customize settings for groups of users at a granular level and apply or roll back settings for individual groups as required. Further control can be achieved by adding conditions that specify how these Windows settings groups are applied.
Environment Manager contains default (or pre-configured) Windows settings groups that personalize the most common Windows settings. In addition to the pre-configured settings groups, you can clone, add and modify your own groups.
Within the navigation pane, when you expand Windows Personalization, all settings groups are listed - including both pre-configured settings groups plus any that you have added yourself.
When you upgrade to a newer release of Environment Manager relevant settings updates are applied only to the default pre-configured Windows settings groups. However, if you have made any modification to a default settings group, the release update for that group will not be applied.
Pre-configured groups cannot be edited directly. However, any pre-configured group can be cloned and saved, and the cloned file can be edited as required.
If deleted, the pre-configured Windows settings groups cannot be recovered.
Windows settings groups and inclusion logic
Windows settings groups containing file or registry inclusions are applied to Personalization Groups. Any Application Group settings that reference the same folders or registry locations for that Personalization Group will be excluded at synchronization so only the Windows settings group is applied.
When a condition has been configured for a Windows settings group, the following logic applies on the endpoint:
- If the condition evaluates as True, the Windows settings group data is applied to the user's session and the inclusion paths are excluded globally from application virtualization.
- If the condition evaluates as False, the Windows settings group data is preserved in the database but is not applied to the user's session. The specified file and registry locations in the Windows settings group are not synchronized to the user’s endpoint. The data is applied when the user roams back to the machine with a condition that evaluates as True.
Create a Windows settings group
- In the User Personalization navigation pane, select Windows Personalization.
- From the Personalization ribbon, click Add Windows Settings Group.
-
Enter a name and an optional description and click OK. The Windows settings group name must not be a duplicate of an existing group or a reserved name, for example, W7 and W8.
The Windows settings group displays in the work area.
-
Click Add/Remove.
The Add/Remove Items dialog displays.
- Select the required settings from the left pane and click the right arrow to add them to the Windows settings group.
-
Multiple settings can be selected using the Ctrl or Shift keys.

An emboldened setting means that the setting is used in another Windows settings group. To see which groups it is used in, select the emboldened setting and click the In Groups tab at the bottom of the dialog.

To view personalization applied to any registry keys or folders, select the Setting Name from either panel within the dialog and click the required tab: Description, Registry or Folders.
If the setting you want to personalize is not available, click the Create Windows Setting link to configure a Custom Windows Setting.
- Once you have added all settings required for your group, click OK to save the Windows settings group.


The settings you have added for the group are displayed in the work area.
Settings can be deleted from the group or you can click the Add/Remove button to edit the group.
Add Conditions to a Windows settings group
Create conditions to determine when settings are applied, for example, when a particular registry key or folder exists:
1.Select the Windows settings group required.
2.Click Add Condition.
3.If required, enter a name for the condition. If you want to use the condition in more than one Windows settings group, a name is required. If the conditions apply to this group only, a name optional.
4.Select the Make available for reuse checkbox if you want the condition to be available for other Windows settings groups.
To apply an existing Windows settings group condition, select the Use existing condition radio button and choose the required condition from the drop-down. The list includes conditions you have already configured, and built-in conditions for Windows 7 and Windows 8. Conditions for Windows 10 operating systems are only available as custom conditions.
5.Click the Conditions drop-down and select the condition required.
You can add multiple conditions and utilize AND/OR statements to create a configuration of conditions to apply to the Windows settings group as required.
Move, remove and edit conditions using the toolbar.
6.Click OK to save the Windows settings group condition. The condition is applied to the Windows settings group and displayed in the work area.
Edit a Windows settings group
When you upgrade to a new release of Environment Manager only unmodified, pre-configured Windows settings groups will be updated.
Select a Windows settings group to edit the settings managed by that group and to manage its conditions.
The following options are available:
•Add/Remove - Open the Add/Remove Items dialog to configure the Windows settings for the group.
•Delete - Delete the selected Windows setting.
•Delete All - Delete all Windows settings for the group.
•Edit Condition - Open the Windows Settings Group Condition dialog to configure conditions for the group. If there are no current conditions for the group, the click the Add Condition button.
•Remove Condition - Remove the condition that applies to the Windows settings.
Clone a Windows settings group
Select a Windows settings group and click Personalization > Clone Windows Settings Group.
A copy is made of the selected group and can be edited as required.
For each personalization group, a list of Windows settings groups can be configured to tailor personalization to the requirements of the users managed by that group.
Apply a Windows settings group to a Personalization Group
- In the User Personalization navigation pane select Personalization Groups.
- Select the personalization group required.
- Select the Windows Personalization tab.
-
Click Add.
The available Windows settings groups are listed.
- Select a Windows settings group and click OK.
- Select multiple groups using the Ctrl or Shift keys.
The Windows settings group is added to the Personalization Group.
For information on inclusion logic when adding a Windows settings group to a Personalization Group, see Windows settings groups and inclusion logic above.
Custom Windows settings
You can create custom settings to personalize registry keys, particular folders, and files. For example, you might want to specify that particular folders are included, or that specific settings for registry keys are applied. Equally, you can create custom settings to exclude such items from personalization.
From Environment Manager 2020.2, custom settings can exclude specific file types without having to specify their folder path. For example, you may wish to exclude all multimedia files from personalization.
Note that to include a file type within a custom setting (such as *.pdf, or *.docx for example), you must specify a folder path location.
Once created, the setting can be added to Windows settings groups.
Create or edit a custom Windows setting
From the Personalization ribbon, select Custom Windows Settings Editor. The Custom Windows Settings dialog is displayed. Any existing custom settings are listed.
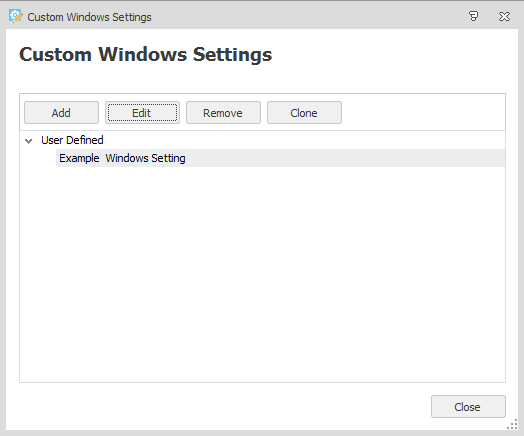
The following options are available:
- Add - Configure a setting which can then be added to Windows settings groups and personalized.
- Edit - Update the selected custom setting.
- Remove - Delete the selected setting from the list. If you attempt to remove a setting which is referenced in a Windows setting group, you will be asked to confirm the delete. Each group in which the setting is referenced is listed. This helps to ensure that a setting is not removed in error.
-
Clone - The clone function makes a copy of an existing Windows setting and allows the configured registry keys and folders to be updated as required.
Certificate, credentials and Start menu settings cannot be cloned.
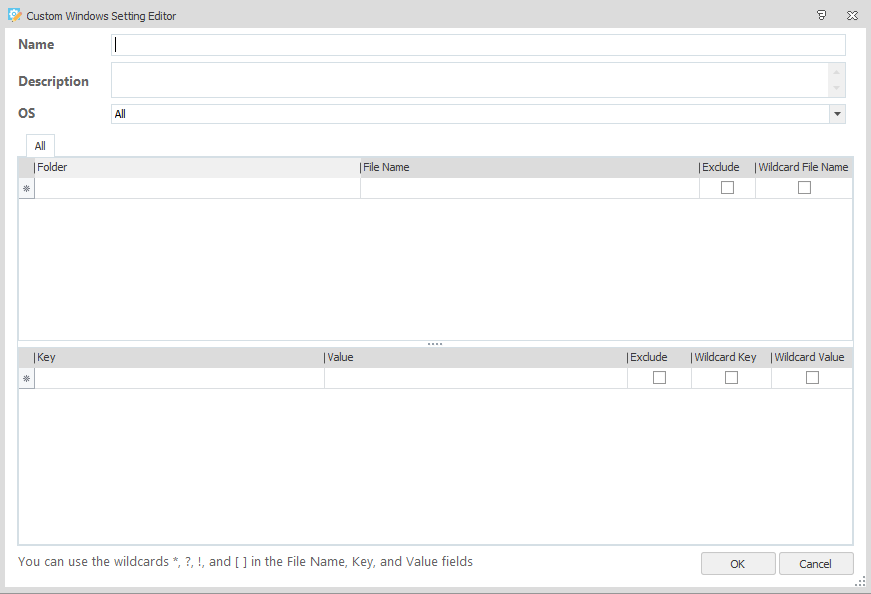
The Add and Edit options open the Custom Windows Settings Editor.
Custom Windows Settings Editor
In addition to the setting name, description and OS fields, the dialog comprises two panels:
•The first panel allows you to specify any specific folders or files to be included (or excluded) in personalization.
•The second panel allows you to specify any registry settings to include or exclude.
Note, examples of custom settings are illustrated below.
The Custom Windows Settings Editor offers the following properties and functions:
| Property / function | Description |
|---|---|
| Name | The name that appears in the Windows Personalization list. |
| Description | An optional description used to tell users more about the setting and what it does. |
| OS |
The operating system to which the setting applies. Separate tabs are created for each selected operating system so specific folders and keys can be configured for each. This allows differences between operating systems to be taken into account when the setting is applied. If you want to configure one setting, managing the same folders and keys across all operating systems, select All. If you change a setting from individual operating systems to All, select whether to inherit the settings applied to one of the operating systems or configure new settings. The All tab and individual operating system tabs cannot be displayed simultaneously. However, when you clone some Windows settings, multiple OS tabs, including the All tab, may initially be shown. Before you save the setting either keep the All tab and remove the individual operating systems tabs, or remove the All tab. If you do not remove any of the tabs, the OS tabs are automatically removed leaving only the All tab. |
| Folder |
The folder to personalize or to exclude from personalization. Enter a folder path or select the ellipsis (...) and browse to the folder. Folder paths must start with a CSIDL, a system variable, or a letter. Wildcards are not supported. |
| File Name |
The file to personalize or to exclude from personalization. Click the ellipsis in the File Name field to browse to a file, or enter the folder path and file name manually. You can use the following wildcards in the file name: *, ?, ! and [ ] (see Wildcard File Name below) If using a wildcard to specify a file type for inclusion, the required path must be specified within the Folder field. |
|
Exclude |
You can exclude a sub-item from personalization if required. For example, if a child item is included in personalization because a parent folder or registry path is included, select the Exclude checkbox for that item. |
|
Copy to |
Allows you to copy content from one operating system tab to another. |
|
Wildcard File Name |
When using wildcards to include or exclude items, be aware that the more specific folder or registry path takes priority. Refer to Custom settings - example below. |
| Key |
The registry key to personalize or to exclude from personalization. Click the ellipsis in the Key field to open a registry browser and select the key. Or enter the registry key path manually. You can use the following wildcards: *, ?, ! and [ ]. |
| Value | Enter the registry key value to personalize or to exclude from personalization. You can use the following wildcards: *, ?, ! and [ ]. It is not possible to enter the backslash character (\) within the registry key Value. |
|
Wildcard Key |
To use permitted symbols in the Key field, select the Wildcard Key checkbox. |
|
Wildcard Value |
To use permitted symbols in the Key field, select the Wildcard Value checkbox. |
The example below illustrates the principles of creating a custom setting within the editor, and how settings logic is interpreted.
A typical goal of an organization is to enable a fast user log on and log off. To prevent potentially large volumes of log files from impacting this process you may wish to exclude them from synchronization. A global exclude settings can be created to achieve this.
In our example, we want to exclude all .log files except those saved between sessions by an internal application. To achieve this, we add a specific include rule to the group settings:
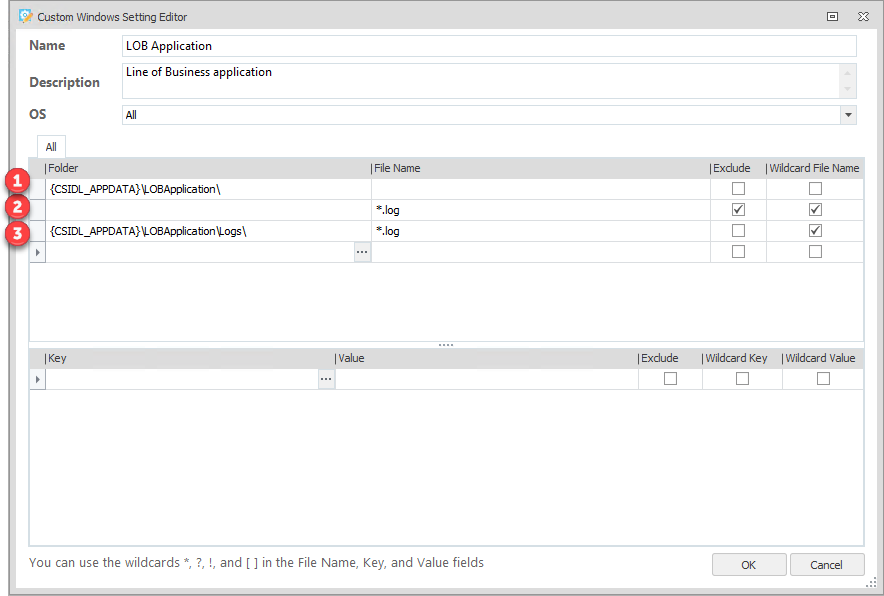
1.{CSIDL_APPDATA}\LOBApplication path specifies that the folder to be included within personalization.
In isolation, this setting states that any changes made within the specified folder (or below it) will be saved to the server at user log off, and restored at user log on.
2.Row 2 has values within the File Name, Exclude, and Wildcard File Name columns.
The File Name value of *.log indicates the setting applies to any .log file. The selected Wildcard File Name checkbox confirms this interpretation.
The Exclude checkbox is selected.
Collectively, rows 1 and 2 provide a setting where all files in the CSIDL_APPDATA\LOBApplication folder (and below it) are included except for .log files - which are excluded.
3.Row 3 has values in the Folder, File Name and Wildcard File Name columns.
The folder path specifies the \LOBApplication\Logs folder.
The file name again specifies *.log, referring to all .log files within this folder.
Within this row the Exclude checkbox is clear, so the files at the location specified are to be included.
Collectively, the setting is interpreted as follows:
•Include all files in CSIDL_APPDATA\LOBApplication folder and below.
•Exclude all .log files in CSIDL_APPDATA\LOBApplication folder and below.
•Include all .log files in the CSIDL_APPDATA\LOBApplication\Logs folder
Conflicts or ambiguity within settings return unpredictable results and should be avoided.
Where ambiguity exists, the logic applied inherits from the top (the first rule stated).
Wildcards in earlier versions of Environment Manager
Prior to the 2019.1 SP2 release of Environment Manager the use of wildcards was detected automatically. When you upgrade from an earlier version of the software (2019.1 or earlier), Environment Manager will again automatically detect whether wildcards are used, and will select or clear the required Wildcard Key or Value checkboxes accordingly.
Default Windows settings groups
The Windows settings groups available by default are listed below. Click
on a group name to view which Windows settings are managed by that group.
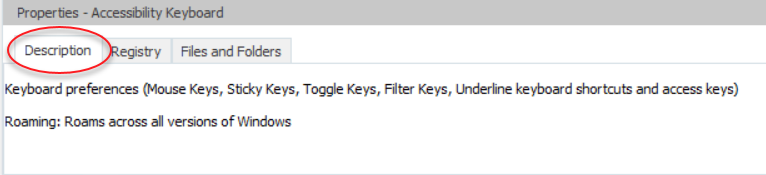
For further information about each group, and advice on usage, refer to the Description tab of the template Properties in the Environment Manager console.
When you upgrade to a new release of Environment Manager only unmodified default Windows settings groups are updated.
- Accessibility Keyboard
- Audio and Sounds
- Tablets
- Visual Settings
- Action Center Settings
- Active Setup
- General Folder Options
- Libraries
- Links
- Mapped Network Drives
- Mapped Network Printers
- Network Location Shortcuts
- Search Folder Options
- View Folder Options
- File Type Associations
- IE Passwords
- IE Zones
- IE10+ Settings
- IE Passwords
- IE Zones
- IE10+ Settings
- IE Passwords
- IE Zones
- IE10+ Settings
- IE Passwords
- IE Zones
- IE8-9 Settings
- Input Keyboard
- Mouse
- Mail Signatures
- MAPI Profile
- Input Language
- Language Bar
- Locale
- MUI
- Certificates
- Credentials
- Sticky Notes Windows 10
- Notification Area
- Taskbar
- Toolbars
- Notification Area
- Start Menu
- Start Menu - Recently Launched Applications
- Taskbar
- Toolbars
- Icons
- Themes
- Window Color and Appearance
- Icons
- Themes
- Window Color and Appearance
- Icons
- Themes
- Window Color and Appearance
- Account Picture
- ClearType
- Icon Positions and Views
- Screen Saver
- Visual Effects
- Wallpaper
Shortcut management for roaming users
As a user moves between managed endpoints with different operation systems and applications, some configured shortcuts are not valid for all environments. If users are managing folders using Windows settings groups, Environment Manager manages the following temporarily invalid shortcuts:
| Shortcut or Link | Supported Operating System |
|---|---|
| Standard shortcuts in the Windows file system that point to a target does not exist | All supported operating systems |
| Items pinned to the Taskbar that point to nonexistent paths | All supported operating systems |
| Items pinned to the Start menu that point to nonexistent paths | Windows 7, Windows Server 2008 R2 |