Request and install certificate from a public CA
This topic describes how to request and install a security certificate for your appliance supplied by a public certificate authority (CA).
To obtain a security certificate the first step is to create a certificate signing request (CSR) from the File Director appliance. You then submit the request data to your CA. A certificate chain is required comprising the server certificate, the root, and intermediate certificate(s). Once you obtain the signed certificates you will need to ensure they are each in the format required and then apply them to your File Director appliance.
The process is split into three key steps:
- Create a CSR from the File Director appliance
- Request certificates from your public CA
- Apply certificate chain to the appliance
Prerequisites
- You are using a public CA.
- Your CA will provide a web server certificate chain in 2048-bit RSA certificates in Base64 PEM format.
Various public CAs are available and the precise instructions for requesting and configuring certificates will vary between authorities.
Example documented
To view specific instructions as an example, click the expandable headings in this topic. The example describes creating an SSL certificate for a single web server using a free trial certificate from comodo.com. Your configuration may include multiple servers - and will use your preferred CA.
Create a CSR from the File Director appliance
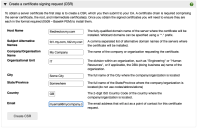
- From File Director Admin console, click Configuration > SSL Certificate.
- Expand the section To
obtain a certificate from a Certificate Authority, and complete the following fields:
- Host Name - The fully-qualified
domain name of the server where the certificate will be installed.
Note that wildcard domains can be specified with a * prefix.The host name does not have to match the appliance host name set in the appliance console. However, the host name you provide must match the FQDN on your DNS ’A’ records.
For further information refer to SAN Certificates.
- Subject Alternative Names - A comma separated list of alternative domain names of servers where this certificate will be installed (2021.3 and later).
Note, specifying alternative domain names enables you to apply one certificate to different nodes within a cluster without using a wildcard for your entire domain. - Company/Organization Name - The name of the organization requesting the certificate.
- Organizational Unit - The division within the organization. For example, Engineering or Human Resources, or if applicable, the database administrator name for the organization.
- City - The full name of the city where the organization is located. Do not use codes or abbreviations.
- State/Province - The full name of the state or province where the organization is located. Do not use abbreviations or codes.
- Country - The two digit ISO country code where the organization is located. For example, US, FR.
- Email - The email address that will
be a point of contact for the certificate request.
Note, this email contact may be required at certificate renewal, or in case of technical issues.
- Host Name - The fully-qualified
domain name of the server where the certificate will be installed.
-
Click Create CSR.
A text box displays the certificate request data.

Every time you use the Generate New CSR option, the unique server key is changed, making any previous certificates generated for this appliance invalid.
- Copy the CSR text
including the
BEGIN CERTIFICATE REQUESTandEND CERTIFICATE REQUESTtags, and save it as a TXT file. You will require the copied text in the next step.


Request certificates from your public CA
Having generated the certificate request from File Director, the next step is to go to your CA and submit the certificate request. Typically, your public CA will require you to have (or to set up) an account with them, and they will validate your ownership of the domain name within your CSR before issuing the security certificates.
Request server certificate
Note, the precise sequence of steps will vary between CAs.
- In a web browser, navigate to your CA.
- Request a new certificate (or certificate renewal).
- Ensure that the certificate request uses base 64 encoded CMC or PKCS #10 (.csr, .pem, .p10 format).
- Alternatively, request a certificate renewal that uses base-64-encoded PKCS #7 file (.p7b or .p7c format)
- Ensure that a web server certificate template and/or web server attributes are applied to your requested certificate
- When prompted, paste the copied CSR text into the request text field and submit your request.
- Follow the steps advised by your CA to enable the validation of your domain name.
- Download certificates issued and save them to your required certificate folder.
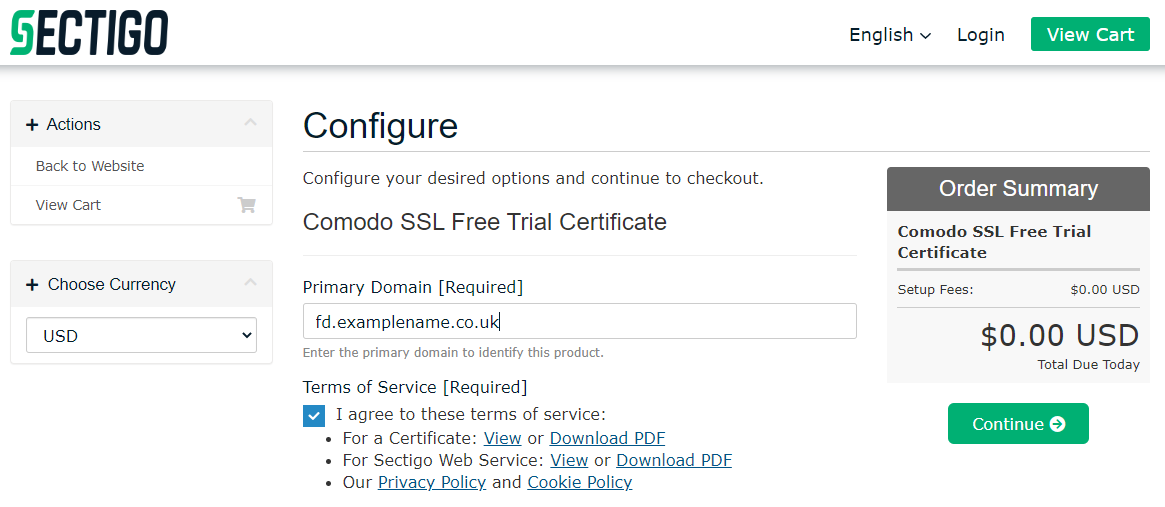
- In a web browser, navigate
to your CA server (example used: https://ssl.comodo.com/free-ssl-certificate) and initiate the certificate request.
-
In the Configure page, enter the Primary Domain for the server certificate, review and accept the Terms of Service, then click Continue.

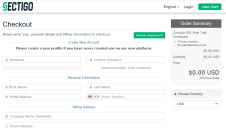
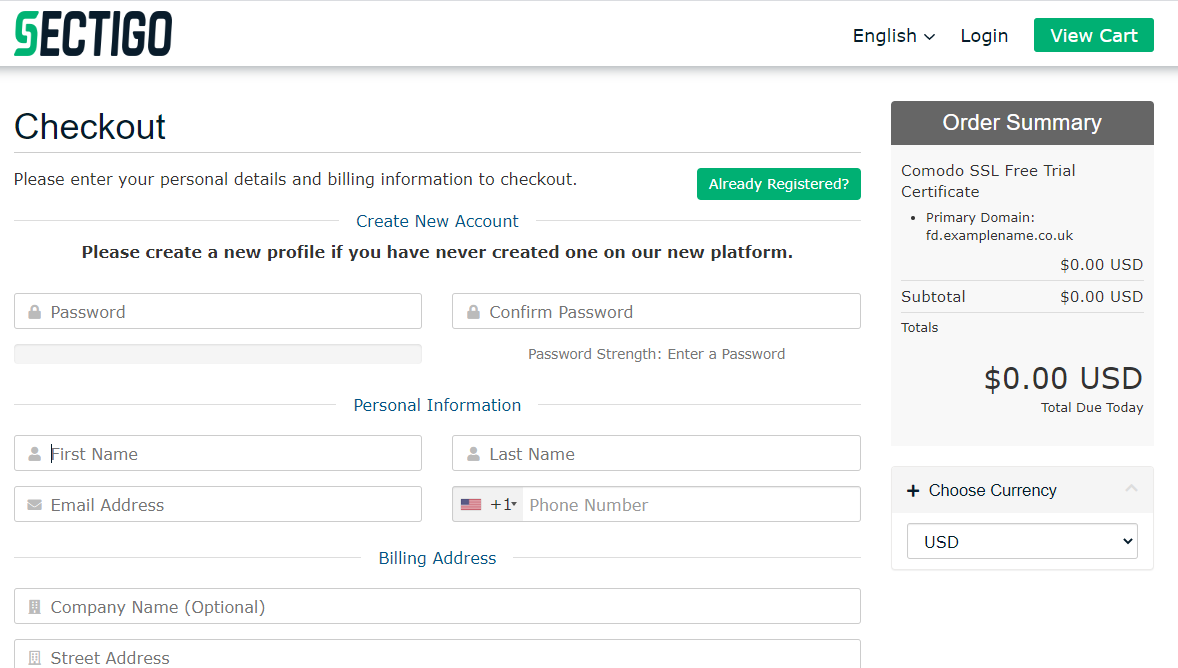
-
Proceed to the Checkout page where you are prompted to create a user account (or log in to an existing one). Enter your personal details and billing information as required.
-
Click Complete Order.
-
The Order Confirmation page is displayed.

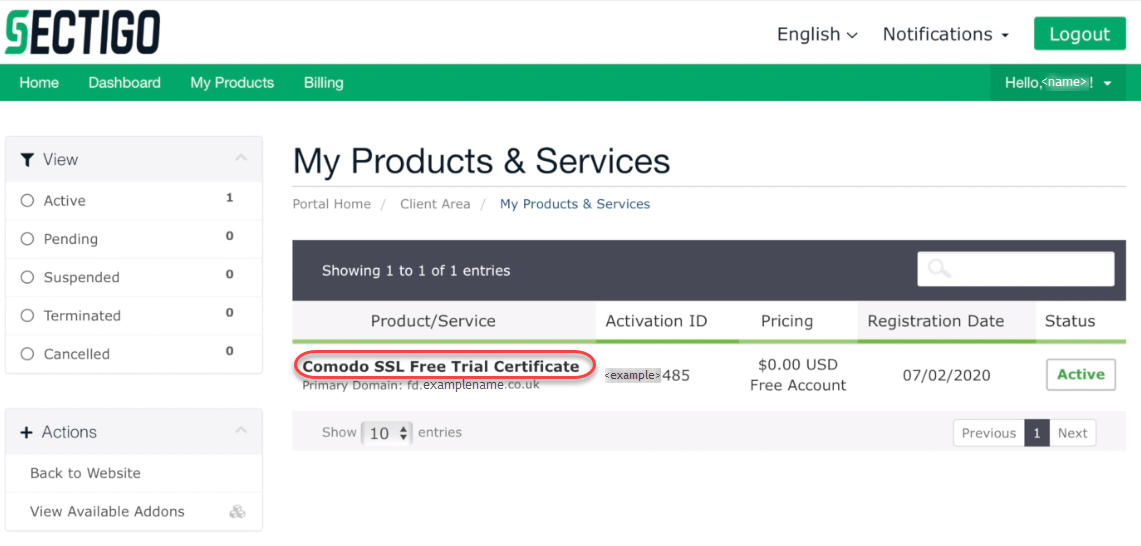
Click View / Set Up Products.
-
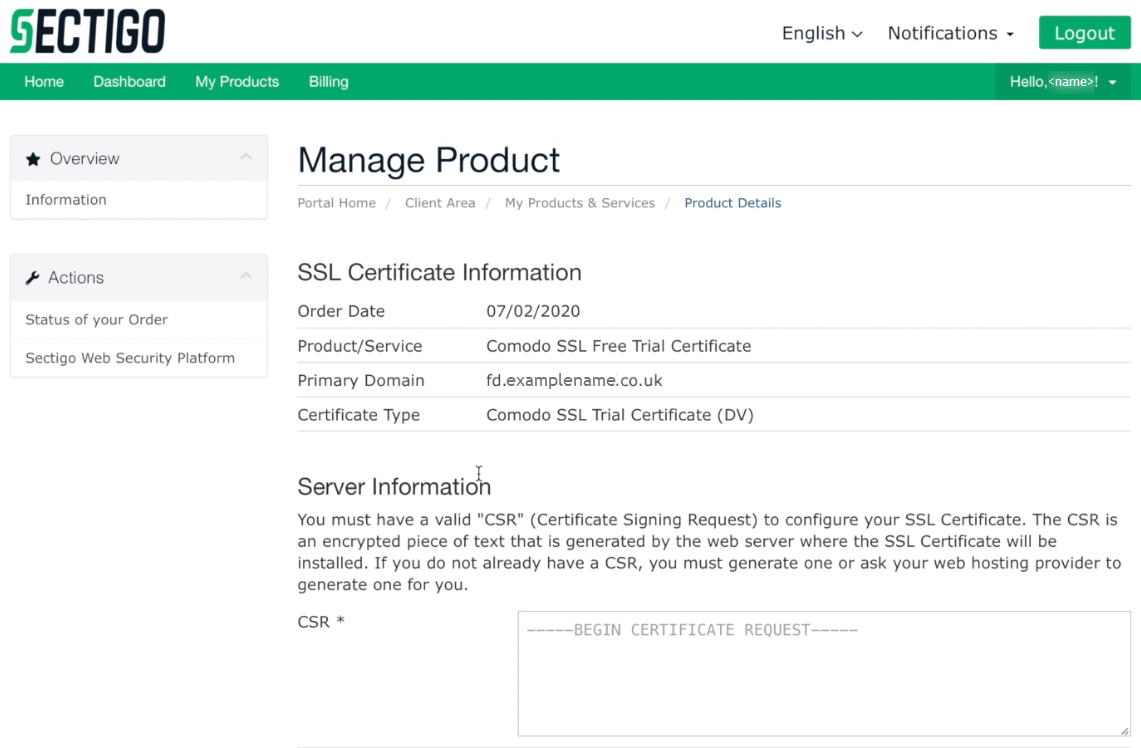
The My Products & Services page opens.
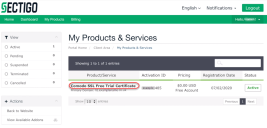
Click the product name link and proceed to the Manage Product page.
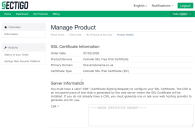
-
Paste the copied certificate request text into the Server Information CSR request field, then click Continue.
-
Domain Control Validation information is displayed describing methods available to verify the domain name in your certificate.
From the drop-down list at the bottom of the page, select the verification mechanism preferred. For example, the contact email address specified in the CA account. Click Continue.
-
The certificate order is now complete.
Order Completed information is displayed confirming the domain verification method and next step in the process. For example, an email will be sent to validate domain ownership.
-
On receipt of the Domain Control Validation email from the Sectigo Certification Authority, follow the instructions it contains to verify your ownership.
For example, copy the supplied validation code, and paste it into the linked URL as prompted.
-
Return to the Sectigo website. Click the My Products and Services link to open the Manage Product page for your certificate.
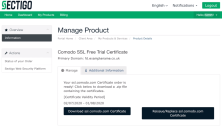
From the Manage tab, click Download ssl.comodo.com certificate.
-
An email is sent with a .zip file attached. It contains the certificates and linked instructions for the downloading and application of your certificate files.
The number of certificates included may vary according to your request. In our example four certificates are supplied:
-
Root CA Certificate:
Root certificates provided by public CAs are not required to protect the File Director appliance.
-
Intermediate (chain) CA Certificates (x2):
These certificates are applied to File Director as chain certificates.
- Server Certificate for the required domain name
-
- Extract the files from the zipped file and save them to the certificates folder required.


File Director requires any intermediate certificates to be installed before the server certificate.
Apply certificate chain to the appliance
Install certificates
When using a public CA it is not necessary to install the root certificate on your File Director appliance. Your OS is published with its own in-built set of trusted root certificates, and this set will include the majority of public CAs.
Chain Certificates
-
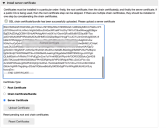
Open each intermediate certificate file in a text editor such as Notepad.
Also open the File Director Admin console (Configuration > SSL Certificate > Set a new Certificate section).
-
Select the text from your first intermediate certificate. Include the
BEGIN CERTIFICATEandEND CERTIFICATEtags but ignore any other metadata included in the file.Copy this text and paste it into the text box within the File Director Set a new certificate dialog.
Repeat this process for the second intermediate file (plus any other intermediate files your specific chain requires. The text for all intermediate certificates, including the tags, is concatenated as a single file.

Ensure Chain Certificate/Bundle is selected as the Certificate Type and click Upload Certificate.
A message will confirm that the chain certificate has been installed and prompts you to upload a server certificate.

Server Certificate
- Locate the server certificate file downloaded previously (refer to Request server certificate above) and open the file in a text editor.
- Copy the text for the server certificate to your clipboard. Include the
BEGIN CERTIFICATEandEND CERTIFICATEtags but ignore any other metadata included in the file. - In the File Director Admin console (SSL Certificate dialog), paste the server certificate details into the text box within the Set a new Certificate section .
-
Ensure Server Certificate is selected as the Certificate Type, then click Upload Certificate.
Notification messages within this dialog are displayed only temporarily.

When all certificates have successfully installed, a notification message is displayed at the top of the SSL Certificate dialog confirming that the certificate has been enrolled.
To test the certificate, close and reopen the browser and connect to the Admin console using the fully qualified server name specified in the certificate. If the certificates are installed correctly, the browser connects securely without any security warnings.
We recommend that you back up the File Director appliance configuration snapshot.