Application of SLAs
Applying an SLA includes the initial creation of an Incident with a default SLA, the process by which CSM initially sets the timelines for the SLA, and then the process by which CSM determines whether or not the default SLA should update as more information is added to the ticket.
How SLAs are applied
- Incidents are created with a default SLA (OOTB = Corporate).
The SLA Timelines Created flowchart describes the process by which timelines are initially set for SLA.
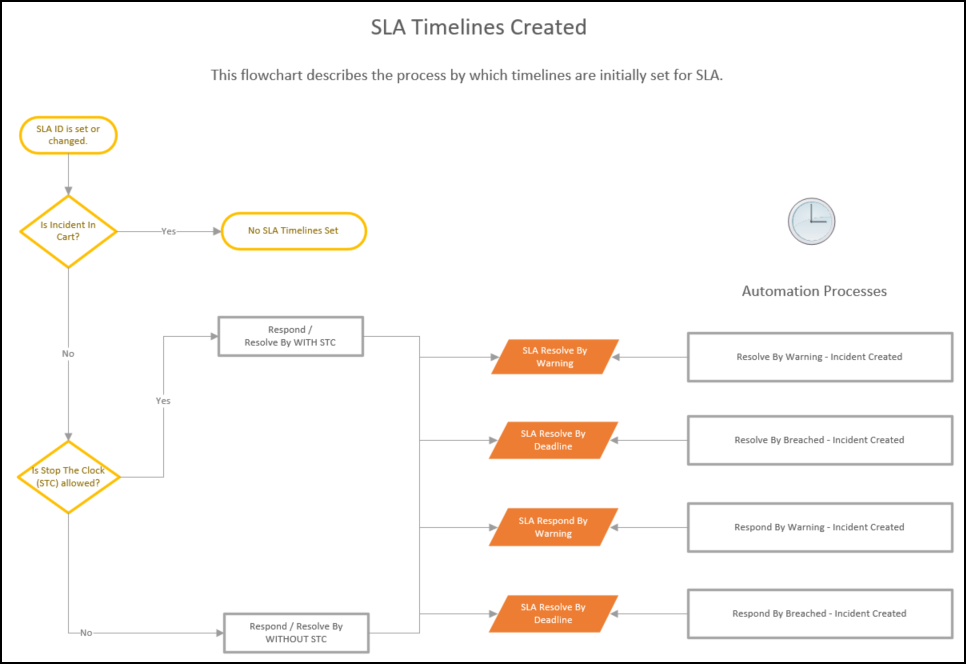
- Based on the SLA that wins the selection process.
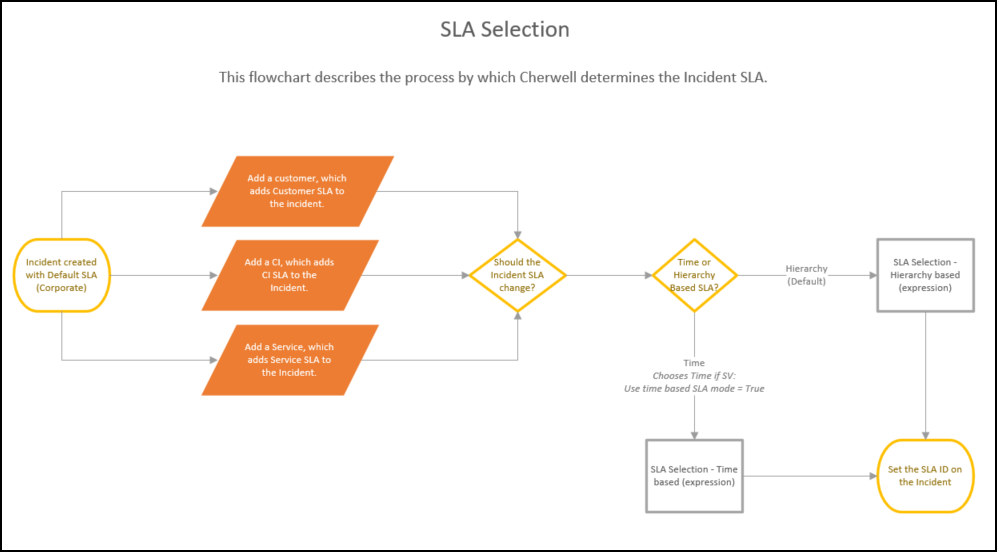
- If an element is added to the ticket that has a SLA tied to it, CSM will check to see whether the default SLA should update, and change if needed (SLA Selection).
The SLA Selection flowchart describes the process by which Cherwell determines the Incident SLA after the incident has been created as more information is added to the ticket (example: when a Customer is added).
The SLA Timelines/Stats Changed flowchart describes how SLA Timelines are changed during the lifecycle of the ticket, and the associated APs that are triggered.
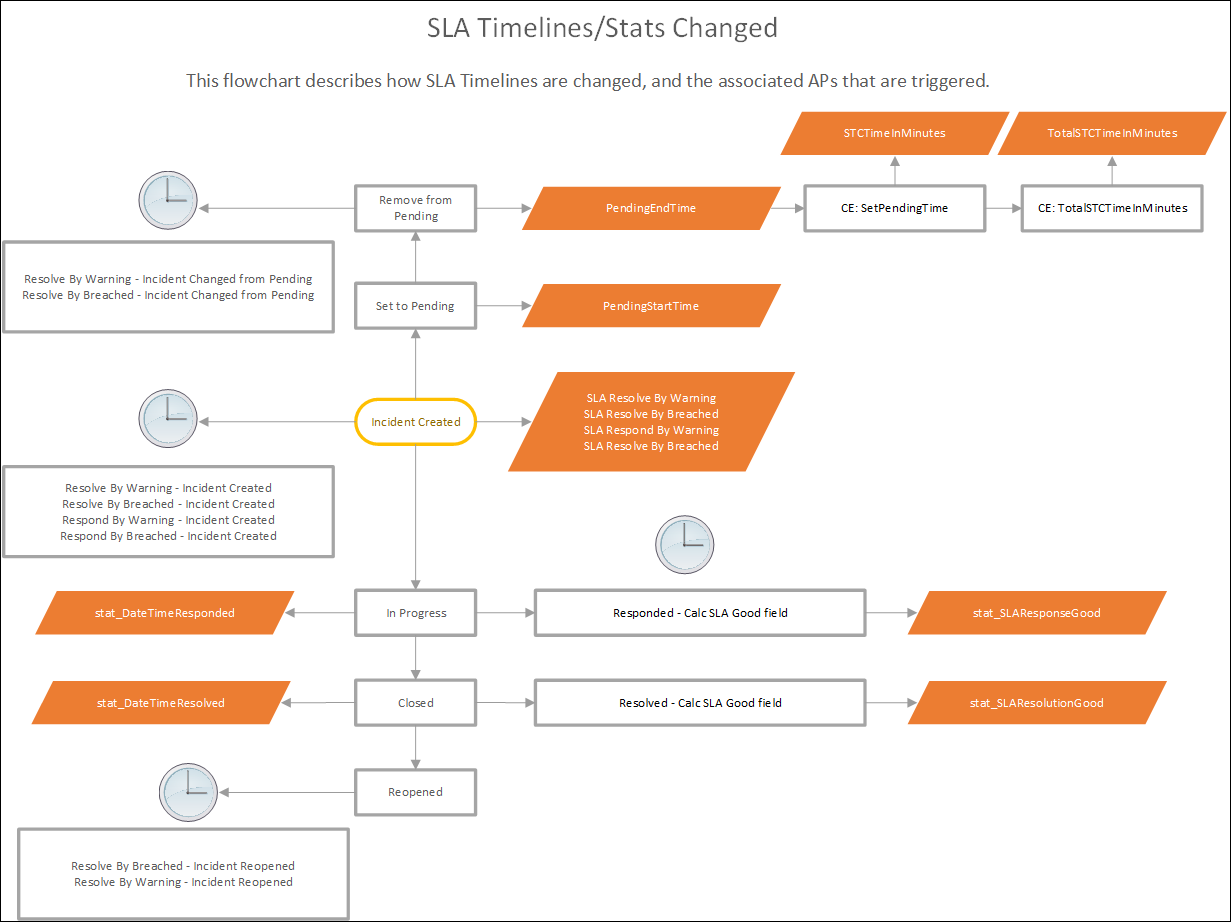
If a ticket goes to any of these statuses, SLA is affected:
- In Progress: Marks the response-by date and time
- Pending: Calculates total amount of time (in minutes) in this status. If STC is allowed, this time will be added to extend the deadline to prevent the SLA from breaching
- Closed: Marks the resolution date and time.
- Reopened: Begins monitoring for SLA breach again based on the ticket SLA deadline. Time spent in Closed status does not stop the clock.
SLA Breach
- A warning is initiated (if configured), the ticket is marked as warned, and emails are sent (if configured).
- One-Step Action runs (OOTB: marks the ticket as having breached, emails the technician/manager, etc.). Breached incidents show up in applicable dashboards/metrics.