Adding a Group Using the Report Designer
When you add a Group from the Report Wizard, certain elements are automatically added to your Group:
- Header with display labels set
- A Footer with display labels set
- A Count based on each Field you select for grouping (added to the footer)
When you add Groups through the Report Designer, you must manually add these items. You can also use the Report Designer to modified the Group elements that are automatically added by the Report Wizard.
The following steps explain how to use the Report Designer to add the elements that are automatically provided by the Report Wizard.
To add a Group using the Report Designer:
- In the Report Manager, right-click a Report, and then select Design Report.
- Select the band to which you want to add a Group, and then click Add a Group.
- From the list that opens, click the Field you want to Group results
by.
Example: select Incident>Call Source to group Incidents by source.
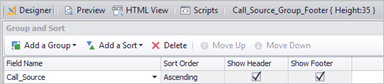
- In the
Group and Sort pane, select or clear the
Show Header and
Show Footer check boxes, depending on your
needs.
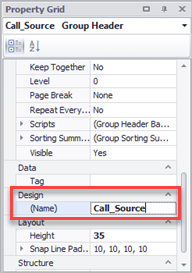
- Use the
Property Grid settings to format the Group
Header band. This property is not shown in the Report output, but changing it
helps organize the Report in the Report Designer.
Example: In the Design area, change the name of the band to Call_Source.
- From the
Field List in the right pane, select a Field for
the group and drag it to the Group Header band.
Example: Incident>Call_Source.
For more information, refer to Adding Fields to a Report .
- Add a prefix to the Field. For more information, refer to Formatting a Field.
- Use the Format toolbar to format the display Field as needed.
Example: change the font and font size.
- Add a count to the Group, following the steps in Adding a Count to a Report Group.