Add a Radio Button Control to a Form
Use the Form Editor (accessed from within a Blueprint in CSM Administrator) to add a Radio Button Control to a Form.
Good to know:
- A Radio Button Control is highly configurable. You can add one or many to a Form, then define the associated Field (Field that stores the value) and the value to store, and how the radio button looks and behaves on the Form (ex: Text, tooltip, size, color, border style, image, alignment, anchoring, layering, visibility, enabling/disabling, and tab order).
- See Form Editor Behaviors for tips on working with Controls and the Form Editor.
To add a Radio Button Control to a Form:
- Open a Form in the Form Editor.
- Drag-and-drop the Radio Button Control from the Standard Control tree onto the Form.
- Define what the Radio Button will do:
- Right-click the Link Label Control, and then select Control Properties.
- In the Radio Button Properties window, define the following:
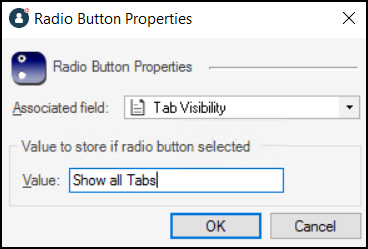
Associated Field: Select the Field that will store the radio button's selected ("checked") value. Value: Provide the value to store in the associated Field (above) when the radio button is selected. Example: Add radio button to Show all Tabs. When clicked, a Show all Tabs value is stored in a Tab Visibility field. A Form Arrangement could then use an Expression to conditionally show/hide tabs based on the value in the Tab Visibility field.
- Define the text to display beside the Radio Button:
- In the Label text box on the Dashboard Editor toolbar, provide the text to display.
- (Optional) Change the font, font size, font style, font alignment, and text wrap, if needed.
- Define how the Form Control looks and behaves on the Form (ex: Size, alignment, etc.).
- Publish the Blueprint (File>Publish Blueprint) to commit the changes, or save the Blueprint (File>Save Blueprint) to continue making other changes.