Configuring the JIRA mApp Solution
Configure the JIRA V2.0 mApp Solution using the CSM Desktop Client, CSM Administrator, and JIRA.
To configure the web service:
- In the CSM Administrator, select Browser and Mobile Settings from Categories and then select Web Service Manager.
- Right click on the JIRA Service and select Edit.
- Select the General page and enter your JIRA URL.
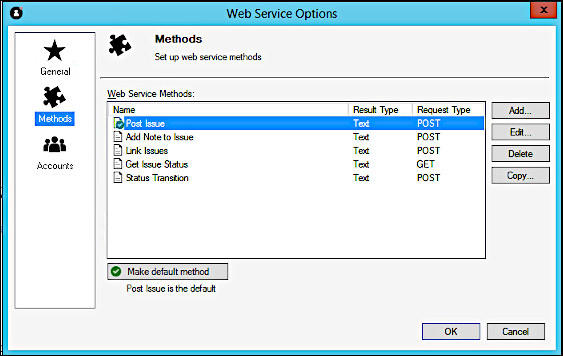
- Select the
Methods page.
Methods should show for Post Issue, Add Note to Issue, Link Issues, Status Transition, and Get Issue Status. Additional methods can be added as required. For additional information, see the JIRA online API: https://developer.atlassian.com/jiradev/jira-apis.
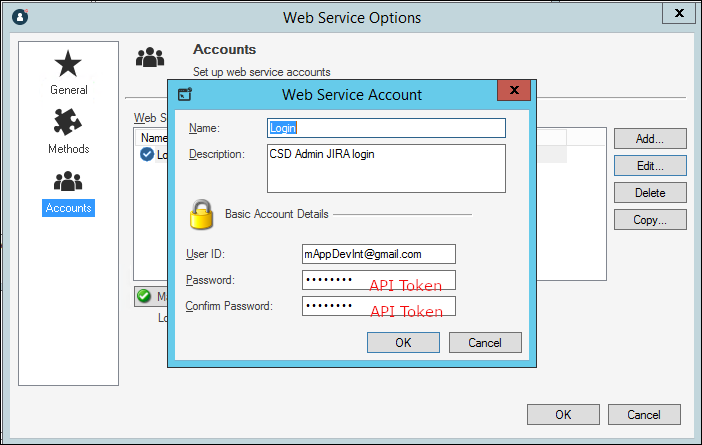
- Select the Accounts page and select Login and then Edit.
- Enter a User Name for your JIRA account. Ensure the user account has the Administrator role at the Project level.
- In the Password field, do NOT enter the password but enter the API token instead. See: https://id.atlassian.com/manage/api-tokens.
To configure Stored Values:
- In the CSM Administrator, select Settings from Categories and then select Open Stored Values Manager.
- Go to
in the left-hand pane.
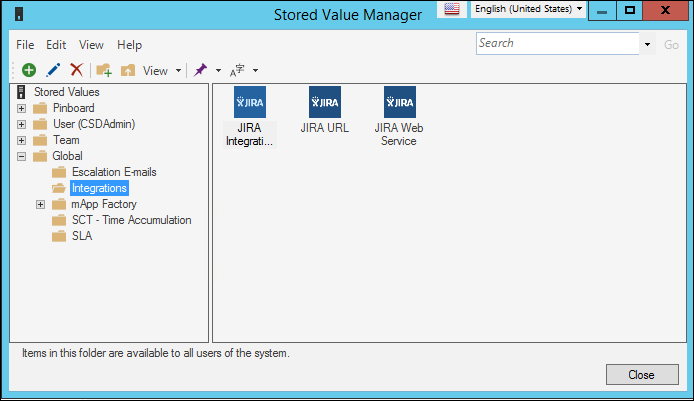
- To view the Stored Value properties, select the Stored Value and select Edit.
- Do not edit the JIRA Integration Version.
- Ensure that the JIRA URL matches the URL of the Web Service Object.
- Ensure that the JIRA Web Service matches the name of the Web Service Object.
To enable Automation Processes:
- In the CSM Administrator, select Automation Processes.
- Select Individual Automation Process Status.
- Enable all six of the JIRA Automation Processes.
- JIRA Add Linked Incident
- JIRA Link Major Incident
- JIRA Link Problem
- JIRA Update Problem Workaround
- JIRA Update Problem Status
- JIRA Update Status
To configure the Incident and Problem Forms:
- In the CSM Administrator, open a Blueprint, then select Edit Form....
- In the
Form drop-down list (top left-hand side), select
Incident Issue JIRA Key.
These forms have a range of optional Elements that you may or may not wish to use. There is a description of the function and visibility rules next to each Element.
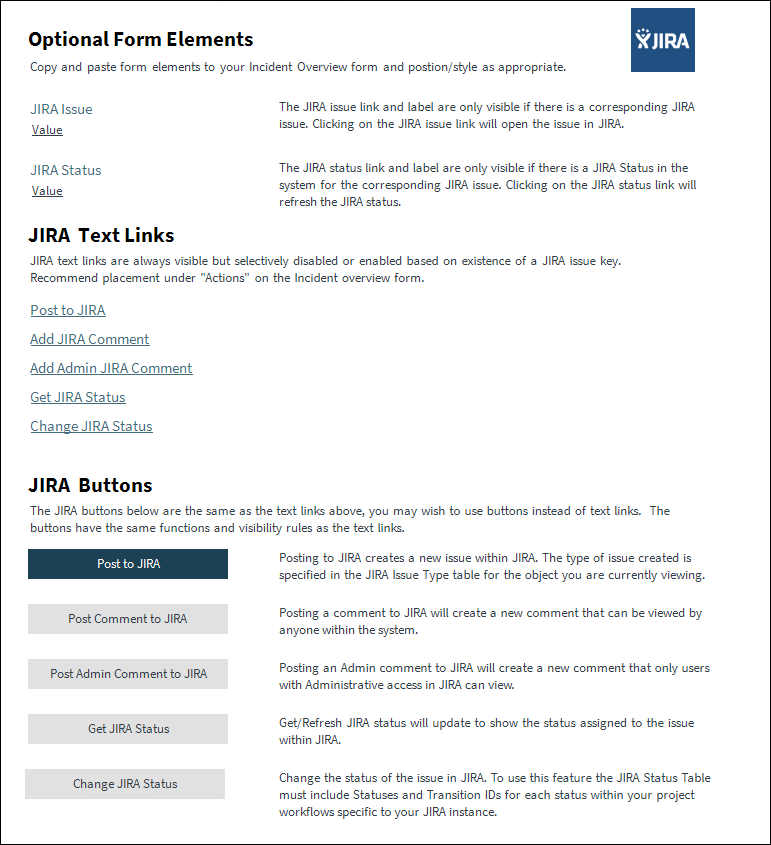
- Select the Elements that you want to add to your Overview Form.
- Copy the Elements.
- In the Form drop-down list, select Incident Overview.
- Select Yes when prompted to apply Incident Form changes back to the Blueprint.
- Paste the JIRA Elements on to the Form.
- Move your Elements to the desired location on the Overview Form.
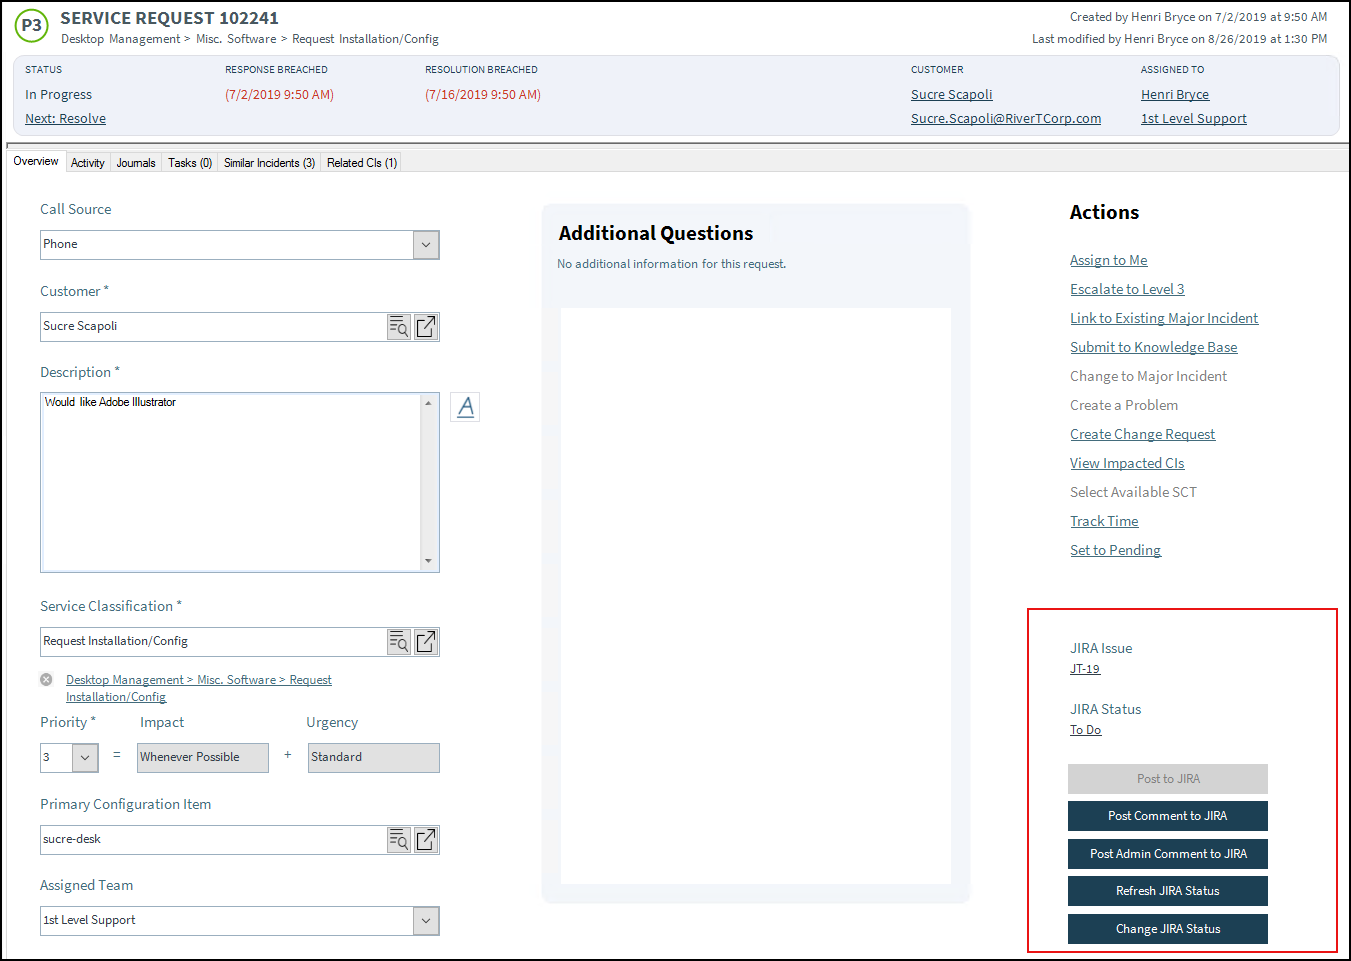
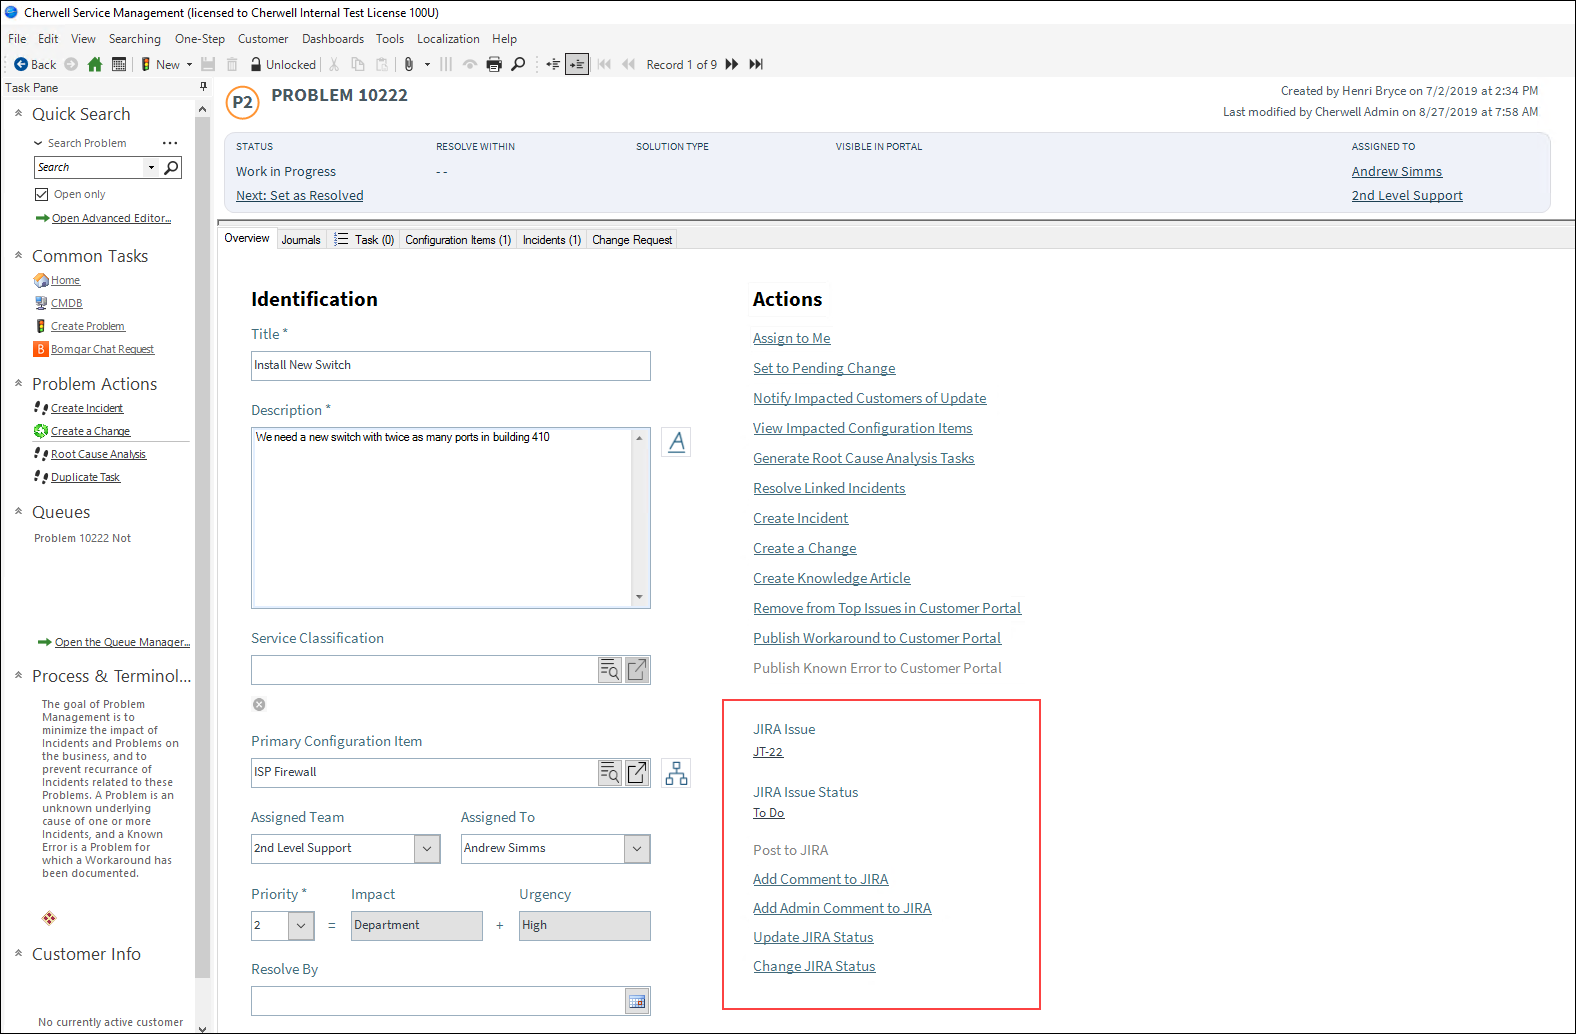
There are examples shown below of the JIRA Elements in use on both Incident and
Problem Forms to give you some ideas for placement.
To configure Actions for Incidents and Problems:
- In the same Blueprint, open Edit Actions.
- Select Menu.
- Create a new folder under Actions named
JIRA.
If you would like to add the JIRA logo to the folder, it can be found here: Global/Integrations/Jira64X64.
- Add the following One-Step Actions:
Location Display Text Expressions Blueprint\JIRA\Post to JIRA Post to JIRA Enabled: Incident Jira Issue Key Empty Blueprint\JIRA\Post Comment Add Comment Enabled: Incident Jira Issue Key not Empty Blueprint\JIRA\Get JIRA Status Refresh Status Enabled: Incident Jira Issue Key not Empty 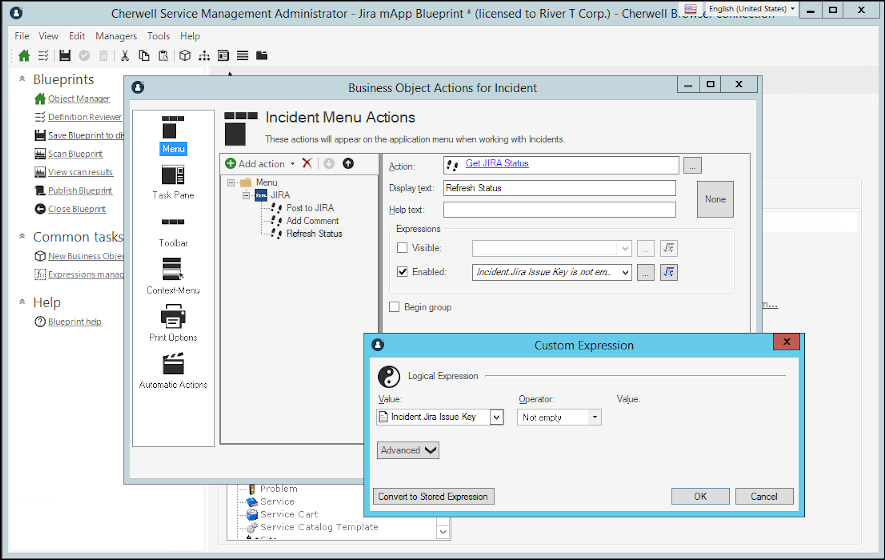
- Select Task Pane on the left and repeat steps 2-4 for Task Pane.
- Select OK to save.
- Publish the Blueprint.