Create a Release
The following procedure walks you through the typical steps to create a Release, including tips, optional steps, and behind-the-scenes information. The different contributors are noted in the procedure.
To create a Release:
- On the
CSM Desktop Client toolbar, click
New>New Release.
Note: Since a Release can be the implementation of one or more Change Requests, a Release can also be created from a Change Request by clicking File>New>New Release from the CSM menu bar or by clicking the Create New Release link in the Change Request Actions section of the Task Pane. When submitted from a Change Request, the Release inherits details from it's Parent Business Object.
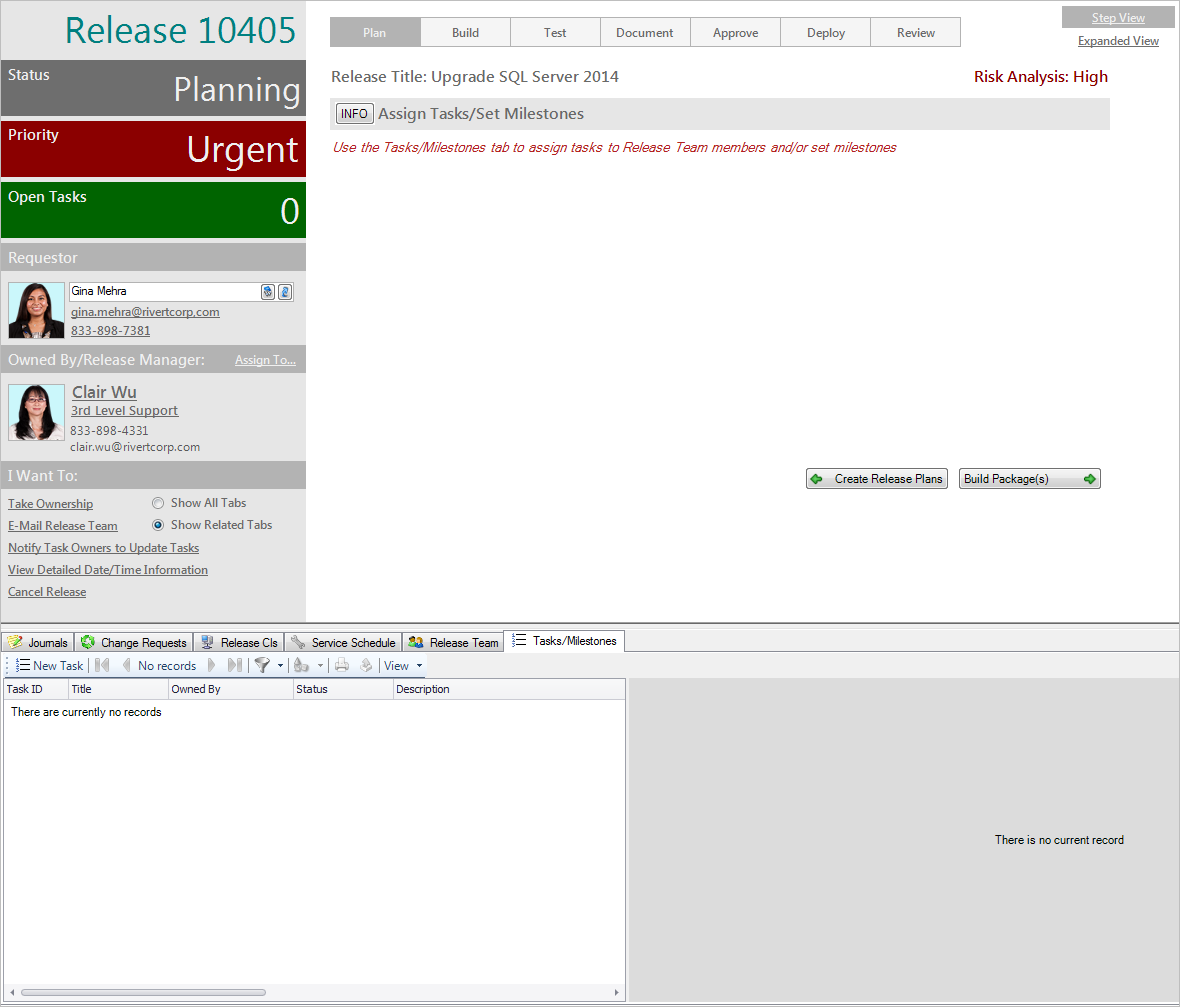
A new Release Record is created with a unique ID and a status of New. The Release enters the Plan phase.
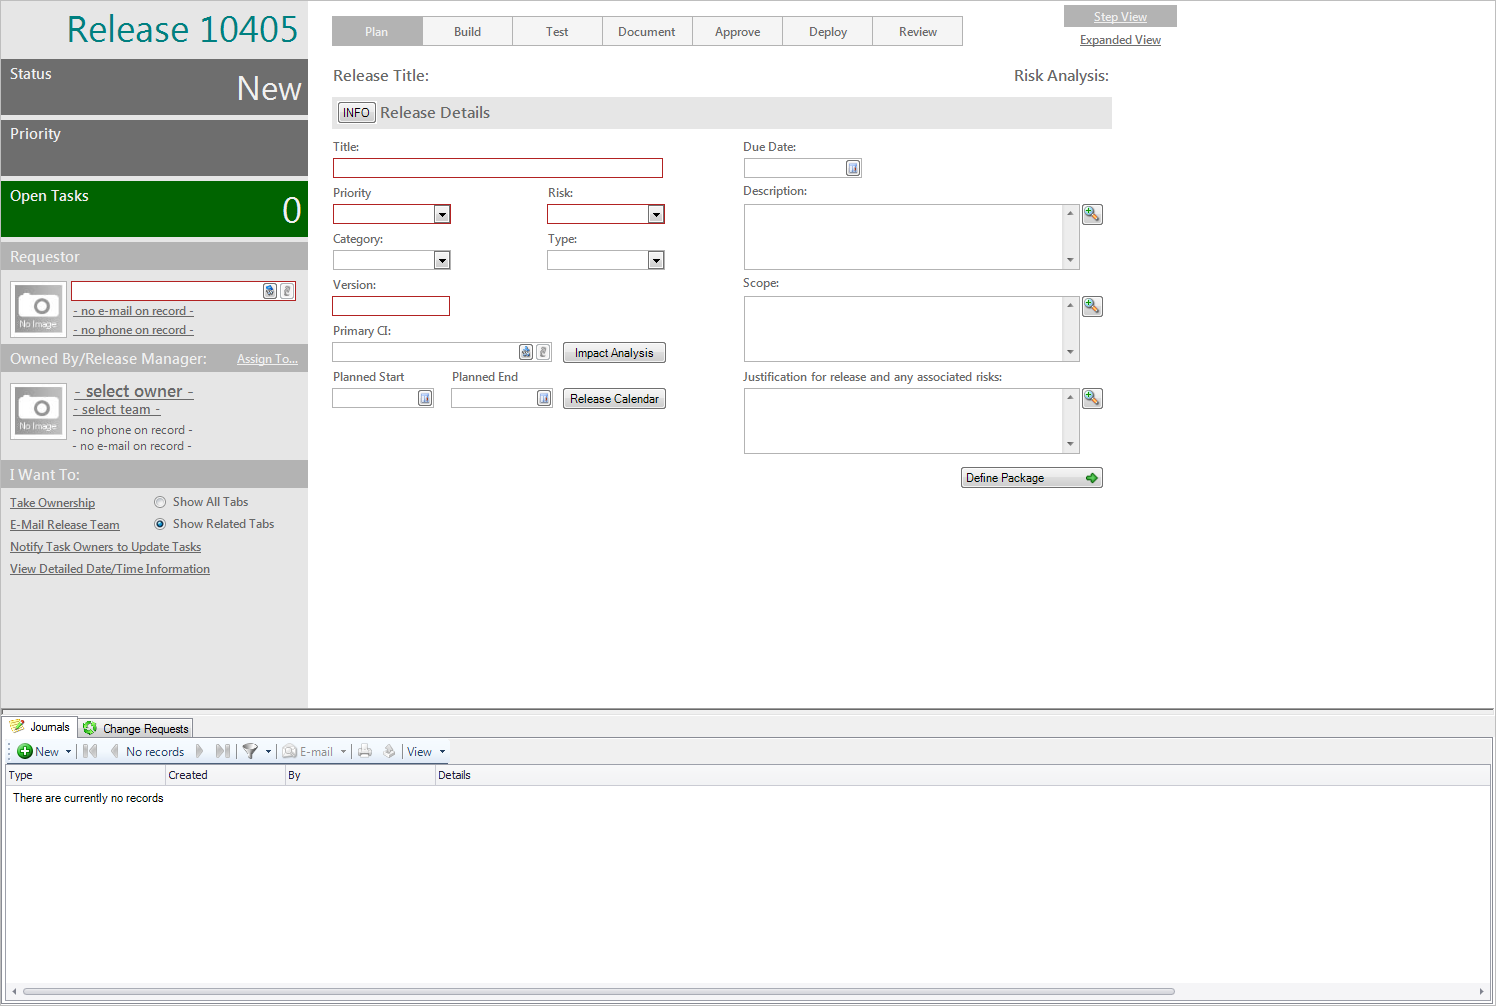
- The creator records the initial details.
- Requestor (in the Quick Info Tile): Provide the
name
of the person who initiated the Release (example: Gina), and
then press
ENTER
or
TAB
to search for the User Record.
If an exact match is found, the Requestor fields are autopopulated with the User's name, avatar, e-mail, and phone. If multiple matches are found (ex: multiple Users named Gina), the UserInfo Selector opens so that you can select the appropriate User.
Tip: Wildcards (example: "%" or "*") can be used when searching. To browse for a User or add a new Customer Record, click the User Selector button
 to launch the Contact Manager. To view the
selected Requestor's detailed User Record, click the
Quick View button
to launch the Contact Manager. To view the
selected Requestor's detailed User Record, click the
Quick View button
 .
.
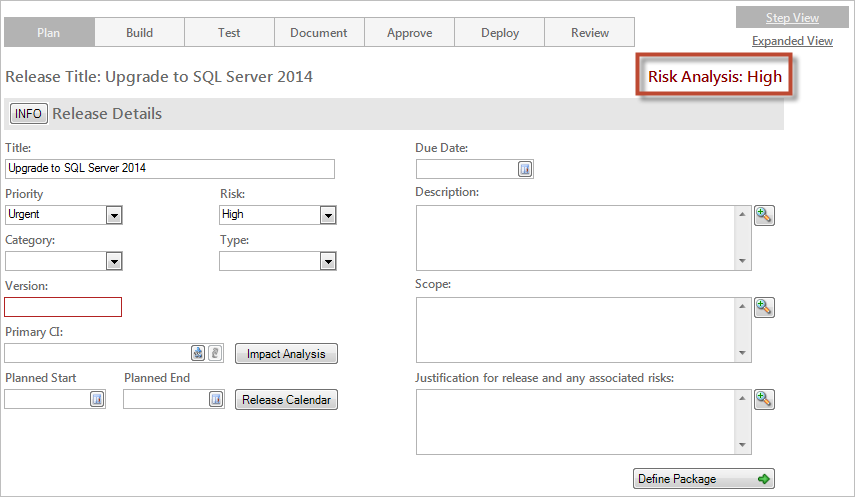
- Title: Provide a title (example: Upgrade to SQL Server 2014).
- Priority: Select a
priority for the Release (example:
Urgent).
- Click the Priority drop-down to reveal the Priority Matrix, and then click a priority number (example: Urgent for a mission-critical, department-wide Release).
The priority is displayed in the Priority alert bar of the Quick Info Tile. The color (red/orange/green) indicates the level of priority.

- Risk: In the drop-down, select a
risk (example: High).
After you select a risk level, Risk Analysis notification text appears above the Release Details banner of the Release Form.
- Category: Select a category from the drop-down (example: Major).
- Type: Select a
type of deployment:
- Delta: Deploy an update for an existing software package.
- Full: Deploy a complete software package.
- Package: Deploy a set of full and delta Releases together.
- Version: Provide the version number of the Release (example: 5.0).
- Primary CI: Select an affected CI:
- Click the CI Selector button
 to launch the CMDB window to select a CI or
create a new CI.
to launch the CMDB window to select a CI or
create a new CI.
- Impact Analysis: Click this button to view a Configuration Map of CIs that are affected by the Release.
- Click the CI Selector button
- Planned Start: Click the Date Selector button to access the Calendar, and then select the day in which you plan to begin the Release process.
- Planned End: Click the Date Selector button to access the Calendar, and then select the day in which you plan to deploy the Release.
- Release Calendar: Click this button to open the Change/Release Calendar.
- Due Date: Click the Date Selector button to access the Calendar, and then select the day in which the Release is due.
- Description: Provide a description of the Release.
- Scope: Provide a scope for the Release (example: Affects all Enterprise Apps that use the SQL Server Database).
- Justification for Release and any associated risks: Provide a justification and any risks that may occur during the Release process (example: Development requires access to new SQL features).
- Requestor (in the Quick Info Tile): Provide the
name
of the person who initiated the Release (example: Gina), and
then press
ENTER
or
TAB
to search for the User Record.
- Assign an Owner:
- Click one of the Ownership Links in the Quick Info Tile (Owned
By/Release Manager section). Ownership is required:
- Take Ownership: Click this link to make yourself the User owner.
- Assign to: Click this link to select a User owner (Release Manager). The Team owner is populated by the User owner's default Team.
- Select Owner (User): Click this link to first select a Team and then a User owner (Release Manager) (User is limited by Team).
- Select Team: Click this
link
to first select a Team owner.
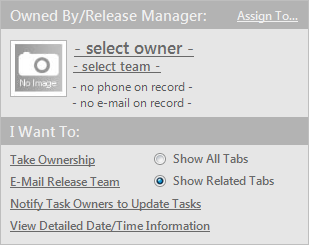
CSM automatically sends an e-mail to the owners to notify them of Ownership.
- Click one of the Ownership Links in the Quick Info Tile (Owned
By/Release Manager section). Ownership is required:
- Owner builds the Release Package.
- Click the
Define Package button on the Release Details
form.
The Release Units form opens and the Release status changes to Planning.
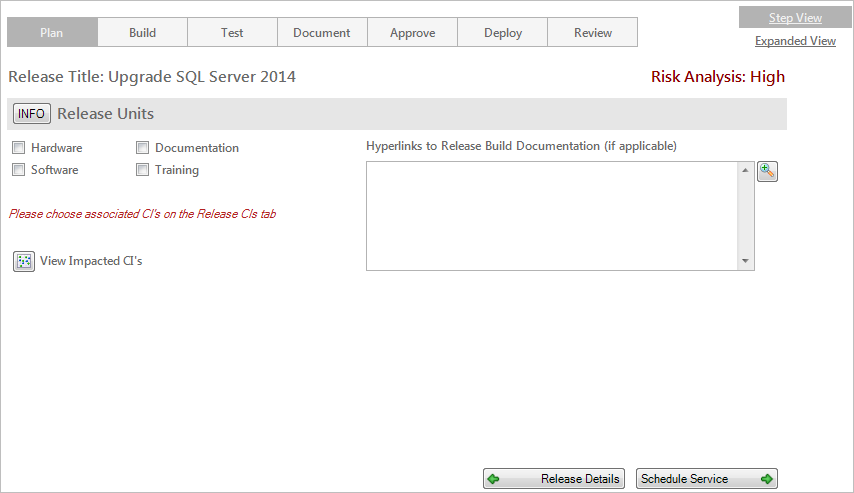
- Select Release Package Units check boxes to select desired components of the package.
- Owner adds additional affected CIs (example: SQL Server License):
- Click the Release CIs tab in the Form Arrangement to open the CI Grid.
- Click the
Add a Configuration Item button
 to launch the CMDB window, where you can
select a CI or create a new CI.
to launch the CMDB window, where you can
select a CI or create a new CI.
The selected CI record appears in the Configuration Items tab.
- View Impacted CIs: Click the
Visualization button
 to view affected CIs.
- Hyperlinks to Build Documentation: Insert a hyperlink to the documentation associated with the build, if applicable (ex: http://msdn.microsoft.com/en-us/library/dn237258(v=sql.120).aspx).
- Owner adds the Release to the Service Schedule.
- Click the
Schedule Service button on the Release
Units form.
The Service Schedule form opens in the Main Pane.
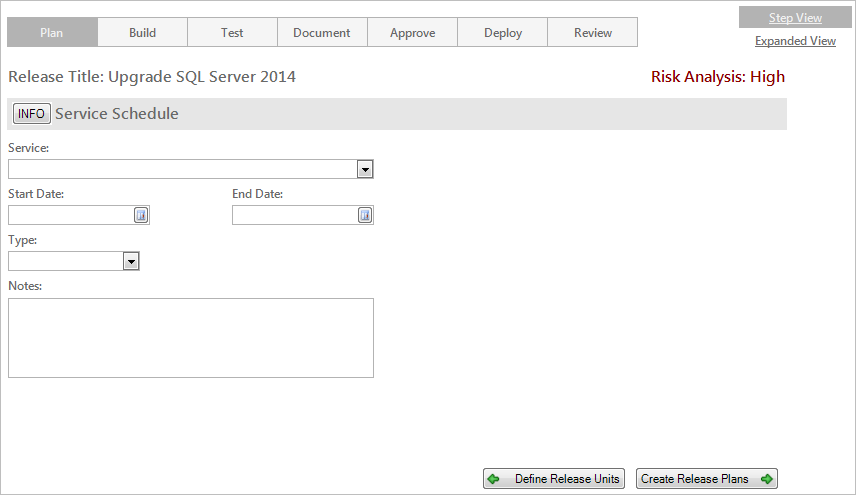
- Service: In the drop-down, select the affected Service (example: Enterprise Apps).
- Start Date: Click the Date Selector button to access the Calendar, and then select the first day in which the Service will be affected.
- End Date: Click the Date Selector button to access the Calendar, and then select the last day in which the Service will be affected.
- Type: Select the type of disruption the Release will have on the Service.
- Notes: Provide any additional information about the Service Schedule.
- Click the
Schedule Service button on the Release
Units form.
- Owner defines a Release Plan.
- Click the
Create Release Plans button on the
Service Schedule form.
The Release Plans form opens in the Main Pane.
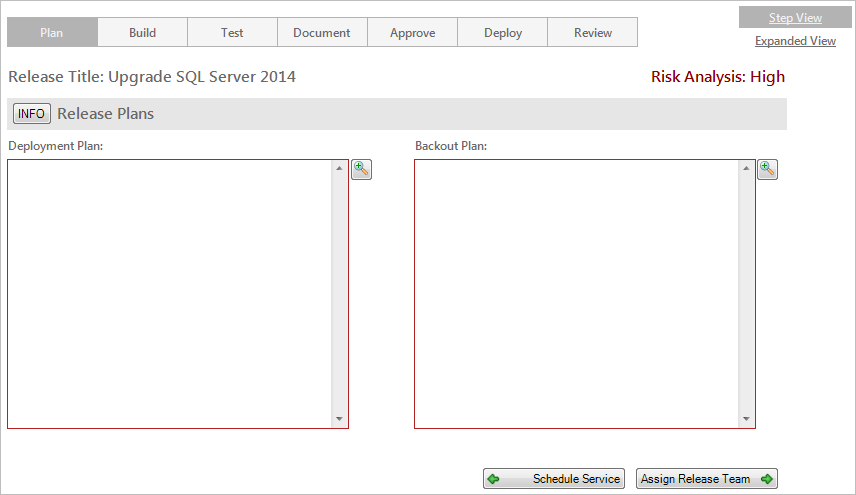
Notes: View additional form information and helpful tips by clicking the INFO button located on the title banner of the form. All fields on the Release Plans form are required.
- Deployment Plan: Provide the deployment plan such as timelines or Tasks.
- Backout Plan: Provide backout plan details in case the deployment is unsuccessful.
- Click the
Create Release Plans button on the
Service Schedule form.
- Owner defines a Release Team.
- Click the
Assign Release Team button on the
Release Plans form.
The Release Team form opens in the Main Pane and the Release Team tab appears in the Arrangement.
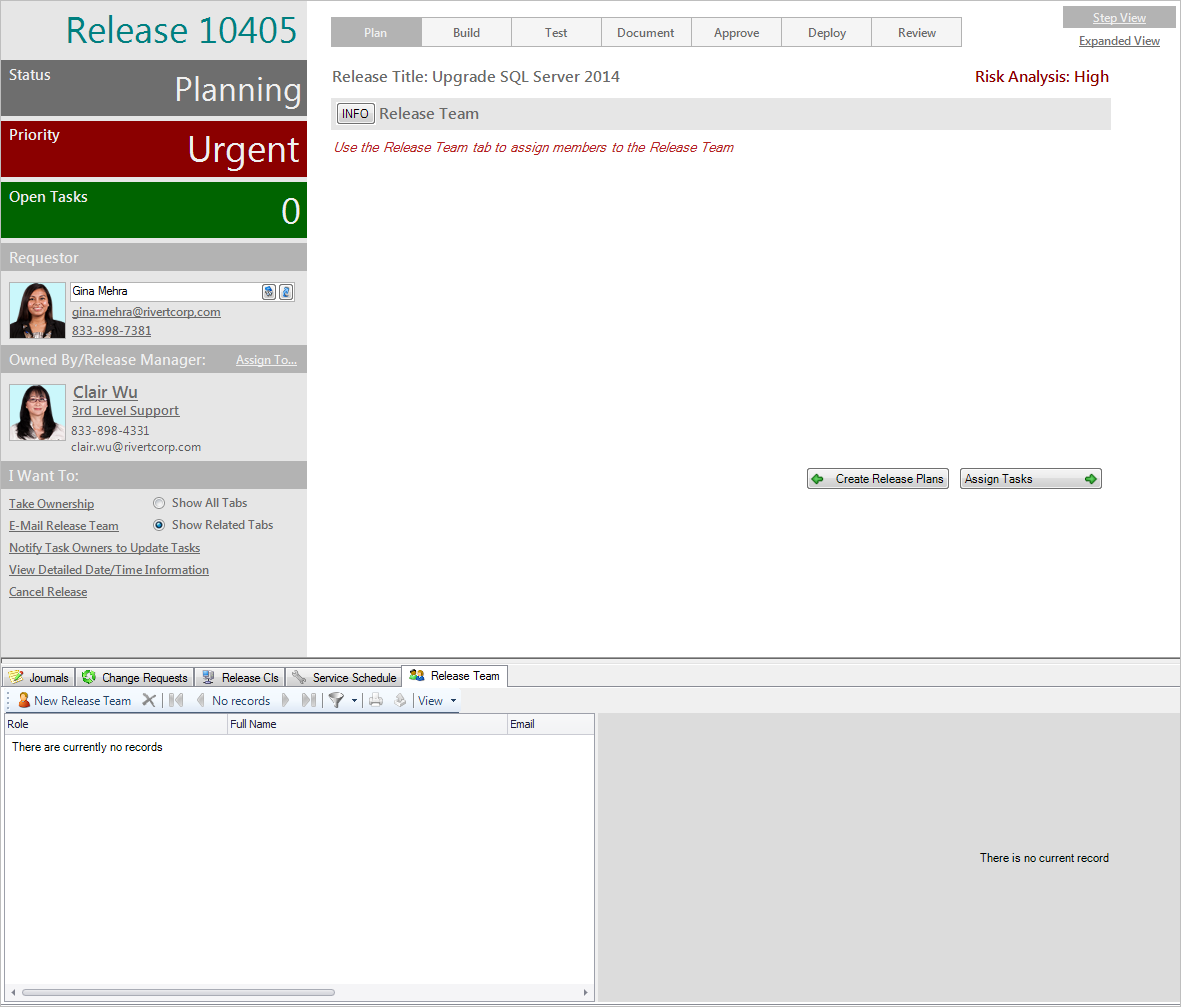
Note: View additional form information and helpful tips by clicking the INFO button located on the title banner of the form.
- Click the
New Release Team button in the Release
Team tab of the Arrangement.
The Release Team Member form opens.
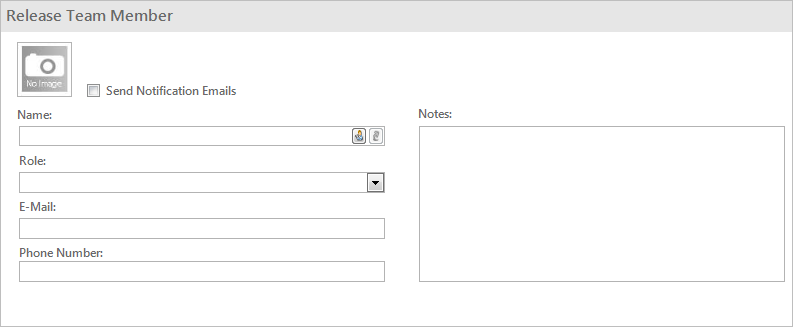
- Send Notification E-mails: Select this check box to indicate that the User should receive
Release updates via e-mail.
Note: Notification e-mails are used for Release updates. Updates are sent using links in the I Want To section of the Quick Info Tile. Click the E-mail Release Team link to define and send an e-mail to Release Team members, and click the Notify Task Owners to Update Tasks link to send a notification e-mail to Task owners.
- Name: Provide the
name
of a User (example: Henri), and then press
ENTER
or
TAB
to search for the User Record.
If multiple matches are found (example: multiple Users named Henri), the Contact Manager opens so that you can select the appropriate User.
Tips: Wildcards (example: "%" or "*") can be used when searching. To browse for a User, click the User Selector button
to launch the Contact Manager. To view the
selected User's detailed Record, click the
Quick View button
.
Note: After a User is selected, the e-mail address and phone number fields are autopopulated using information from the User's UserInfo Record.
- Role: In the drop-down, select the
role
of the User.
- Deployment Manager
- Documentation Manager
- Knowledge Manager
- Stakeholder
- Testing Manager
- Training Manager
- E-mail: Provide the
e-mail address of the User.
Note: This field is auto-populated using the e-mail address in the User's Record.
- Phone Number: Provide the
phone number of the User.
Note: This field is auto-populated using the phone number in the User's Record.
- Notes: Provide any additional information about the User.
- Click the
Assign Release Team button on the
Release Plans form.
- Owner assigns Tasks to Release Team members.
Note: Use the Task Object to monitor the status of key elements of the deployment process. You can either assign all of the Tasks in your plans, or assign key Tasks as milestones to verify that all upstream or downstream Tasks have been completed.
- Click the
Assign Tasks button on the Release Team
form.
The Assign Tasks/Set Milestones form opens in the Main Pane and the Tasks/Milestones tab opens in the Arrangement.
- Click the
New Task button in the Tasks/Milestones
tab of the Arrangement.
The Task form opens in the Arrangement.
- Complete a Task form for each Task.
The priority is displayed in the Priority alert bar of the Quick Info Tile. The color (red/orange) indicates whether or not there are open Tasks. If there are no open Tasks, the alert bar is green. If there are one to five open Tasks, the alert bar is orange. If there are more than five open Tasks, the alert bar is red.

- Click the
Assign Tasks button on the Release Team
form.
- Click the
Define Package button on the Release Details
form.
- Owner defines the Release Package build.
Note: You must define at least one Release Package build before entering the Test phase.
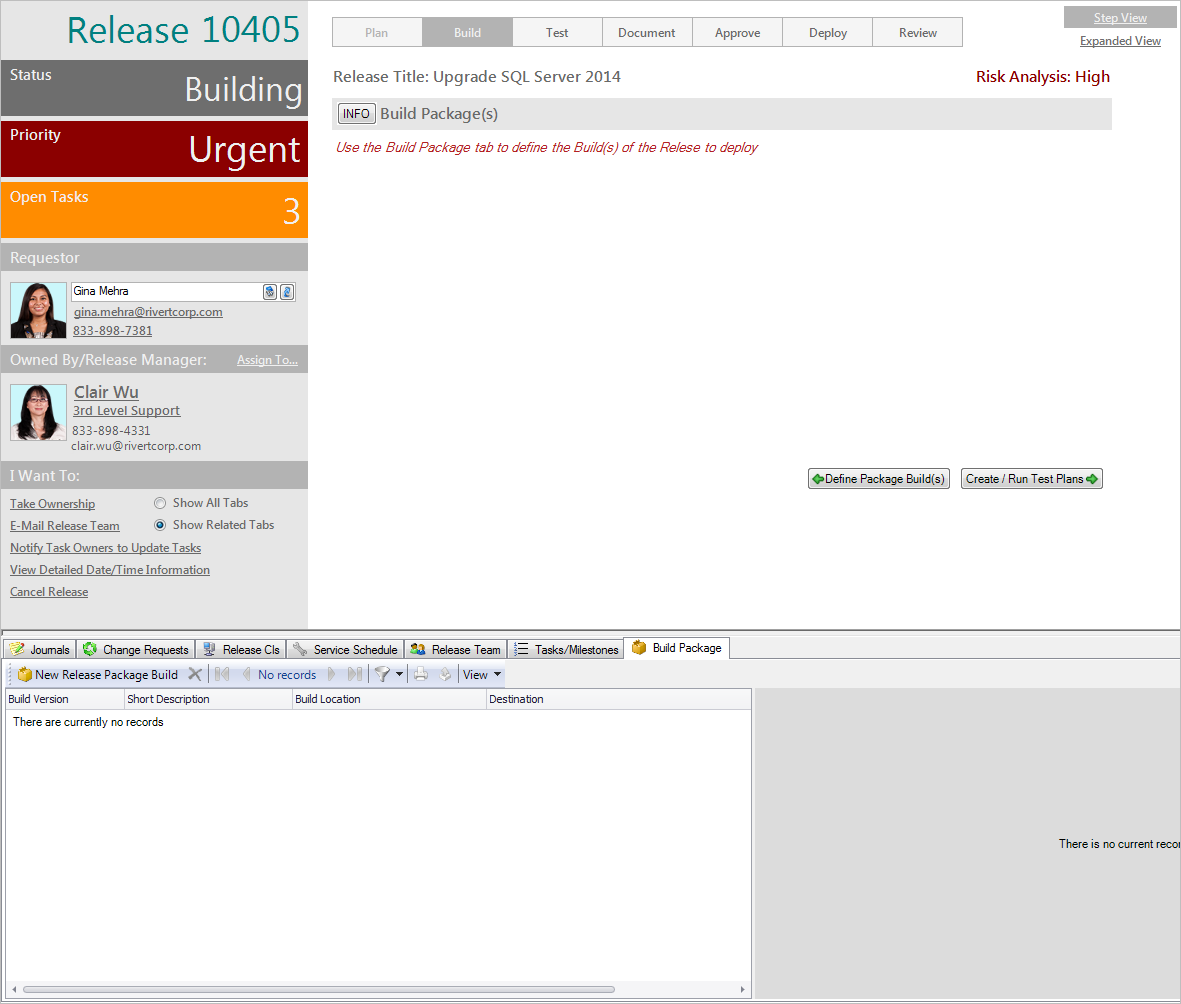
- Click the
Build Package(s) button on the Assign
Tasks/Set Milestones form.
The Build Package(s) form opens in the Main Pane, the Release status changes to Building, the Build Package tab appears in the Arrangement, and the Release enters the Build phase.
Note:View additional form information and helpful tips by clicking the INFO button located on the title banner of the form.
CSM automatically sends an e-mail to Release Team members to notify them of the new Release Package build.
- Click the
New Release Package Build button in the
Build Package tab of the Arrangement.
The Build Release Package form opens in the Arrangement.

- Short Description: Provide a brief description of the build (example: SQL Server 2014).
- Build Version (must be unique): Provide the version of the build (example: 20140512-01).
- Build Location: Provide the location of the build (example: D:\Installers\SQLServer\SQL2014-x64.exe).
- Destination: Provide the location where the build will be stored (example: \\appServer\Program Files\SQL Server).
- Click the
Build Package(s) button on the Assign
Tasks/Set Milestones form.
- Testing Manager tests the deployment of the build.
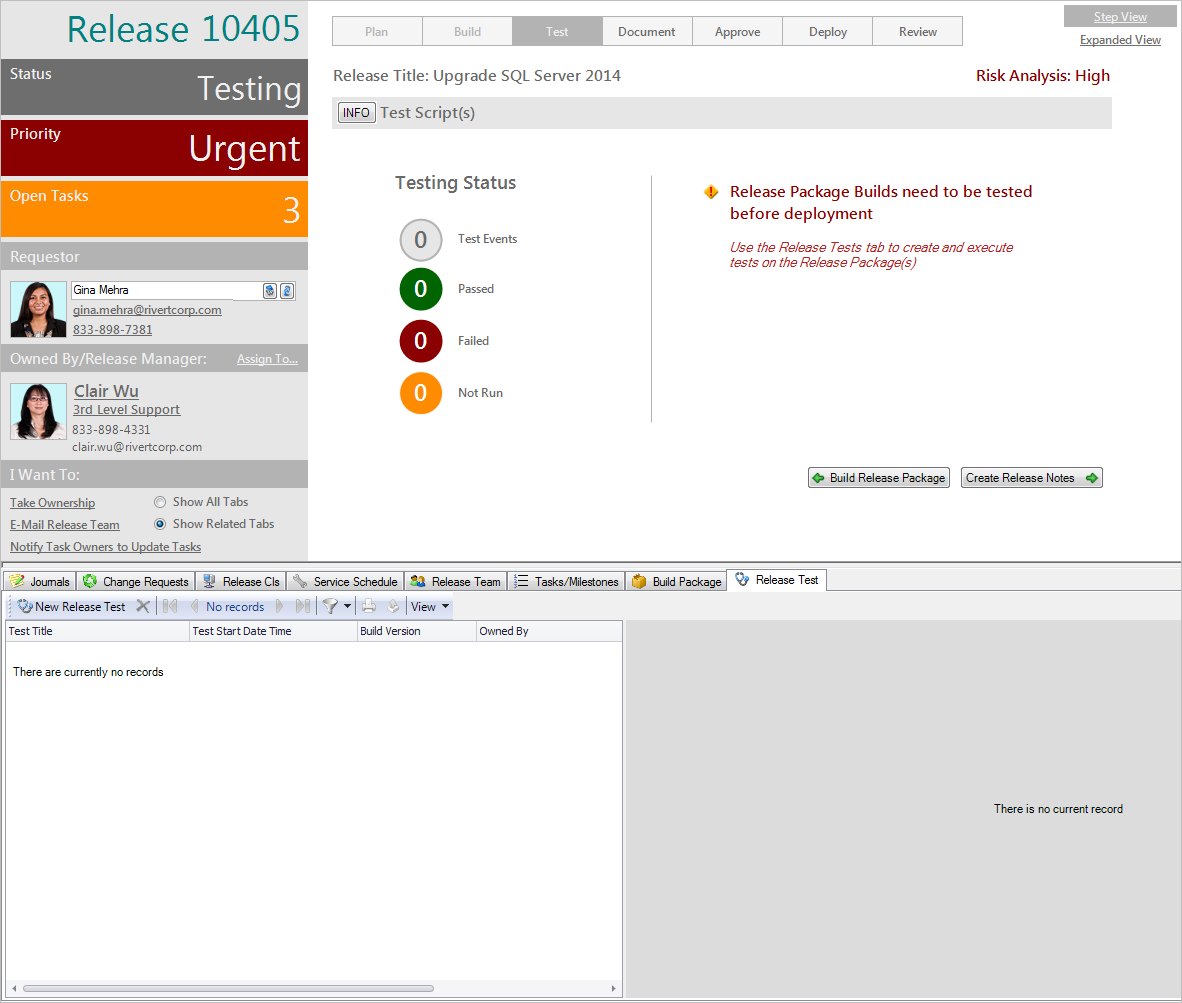
- Click the
Create/Run Test Plans button on the Build
Package(s) form.
The Test Script(s) form opens in the Main Pane, the Release Test tab appears in the Arrangement, the Release status changes to Testing, and the Release enters the Test phase.
Note: View additional form information and helpful tips by clicking the INFO button located on the title banner of the form.
- Click the New Release Test button in
the Release Test tab of the Arrangement.
The Release Test form opens in the Arrangement.
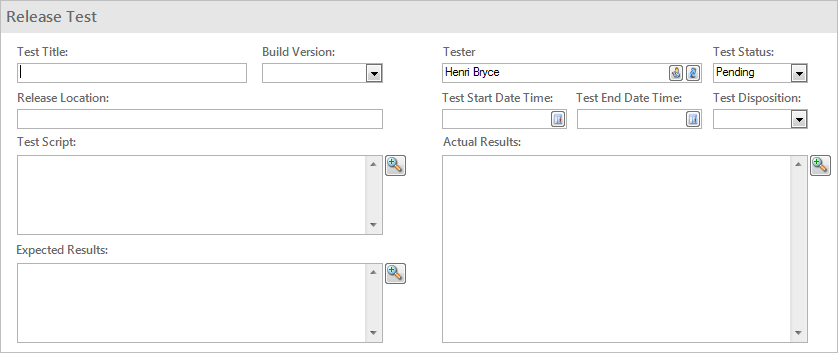
- Test Title: Provide a title for the test (example: SQL Test).
- Build Version: In the drop-down, select a
build version (ex: 20140512-01).
Notes: The Build Version field is populated using data from the Build Version field of the Build Release Package form. The record must be saved for the build version to be available.
- Release Location: Provide the location of the test Release (example: Test Server).
- Test Script: Provide the
test script
(example: Test SQL installation).
Tip: Use the Test Script field to organize your test information, which might include a high-level overview of the test or detailed step-by-step instructions.
- Expected Results: Provide the expected result of the test (example: Install the new SQL Server without issue).
- Tester: Provide the
name
of the tester (ex: Henri), and then press
ENTER
or
TAB
to search for the User Record.
Note: This field is auto-populated with name and contact information of the current User, but can be changed if necessary.
If multiple matches are found (example: multiple Users named Henri), the Contact Manager opens so that you can select the appropriate User.
Tips: Wildcards (example: "%" or "*") can be used when searching. To browse for a User, click the User Selector button
to launch the Contact Manager. To view the
selected User's detailed Record, click the
Quick View button
.
- Test Status: Select the
status of the test (example: Completed).
Note: The test status reflects the lifecycle of the test, and is set to Pending by default. When the test is initiated, the tester selects the Started test status, which auto-populates the Test Start Date Time field with the current date and time. When the test is completed, the tester selects the Completed or Cancelled test status, which auto-populates the Test End Date Time field with the current date and time.
Tip: Build testing varies by organization. Use the Test Status field to track the specific testing process of your organization.
- Test Start Date Time: Click the
Date Selector button
 to access the Calendar, and then select the
day in which you begin the test.
to access the Calendar, and then select the
day in which you begin the test.
Note: The time is automatically set to 12:00 AM. Use the Test Start Date Time field to manually define the appropriate time.
- Test End Date Time: Click the
Date Selector button to access the Calendar, and then select the
day in which you end the test.
Note: The time is automatically set to 12:00 AM. Use the Test Start Date Time field to manually define the appropriate time.
- Test Disposition: Select the
disposition (outcome) of the test (example:
Passed).
CSM automatically sends an e-mail to Release Team members to notify them of the test outcome.
- Actual Results: Provide the result of
the test (example: Installed the new SQL Server without issue).
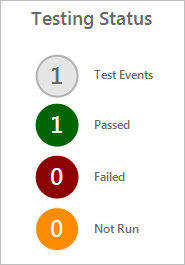
The Testing Status icons indicate the number of Test Events and their status (Passed, Failed, Not Run).
Note: If the build fails testing, click the Create New Build link in the Quick Info Tile to return to the Build phase, or click the Cancel Release link to move to the Review phase.
- Click the
Create/Run Test Plans button on the Build
Package(s) form.
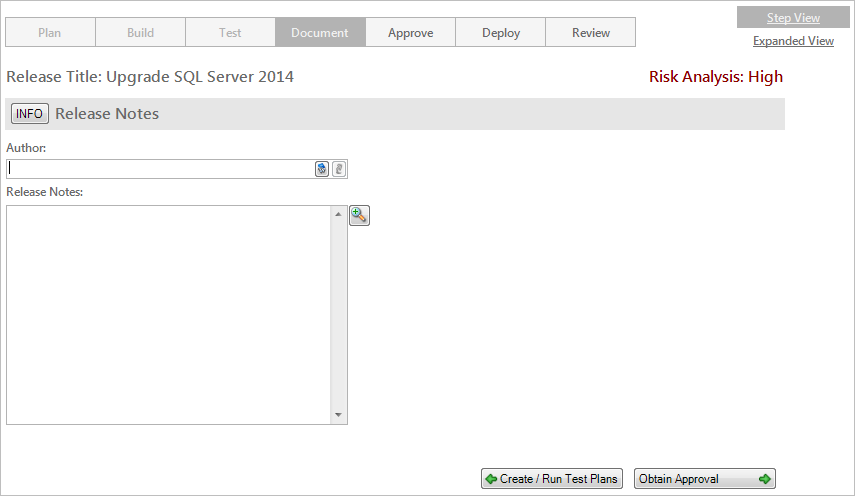
- Documentation Manager creates Release Notes.
- Click the
Create Release Notes button on the Test
Script(s) form.
The Release Notes form opens in the Main Pane, the Release status changes to Documenting, and the Release enters the Document phase.
Note: View additional form information and helpful tips by clicking the INFO button located on the title banner of the form.
- Author: Provide the
name
of the tester (example: Henri), and then press
ENTER
or
TAB
to search for the User Record.
If multiple matches are found (example: multiple Users named Henri), the Contact Manager opens so that you can select the appropriate User.
Tips: Wildcards (example: "%" or "*") can be used when searching. To browse for a User, click the User Selector button
 to launch the Contact Manager. To view the
selected User's detailed Record, click the
Quick View button
.
to launch the Contact Manager. To view the
selected User's detailed Record, click the
Quick View button
.
- Release Notes: Provide the
Release Notes.
Tip: You can also Insert a hyperlink (Rich Text) or type a system path to the associated Release Notes.
- Click the
Create Release Notes button on the Test
Script(s) form.
- Owner requests approval for the Release.
- Click the
Obtain Approval button on the Release Notes
form.
The Release Approval form opens in the Main Pane, the Approvals tab appears in the Arrangement, and the Release enters the Approve phase.
- Click the
Obtain Approval button on the Release Notes
form.
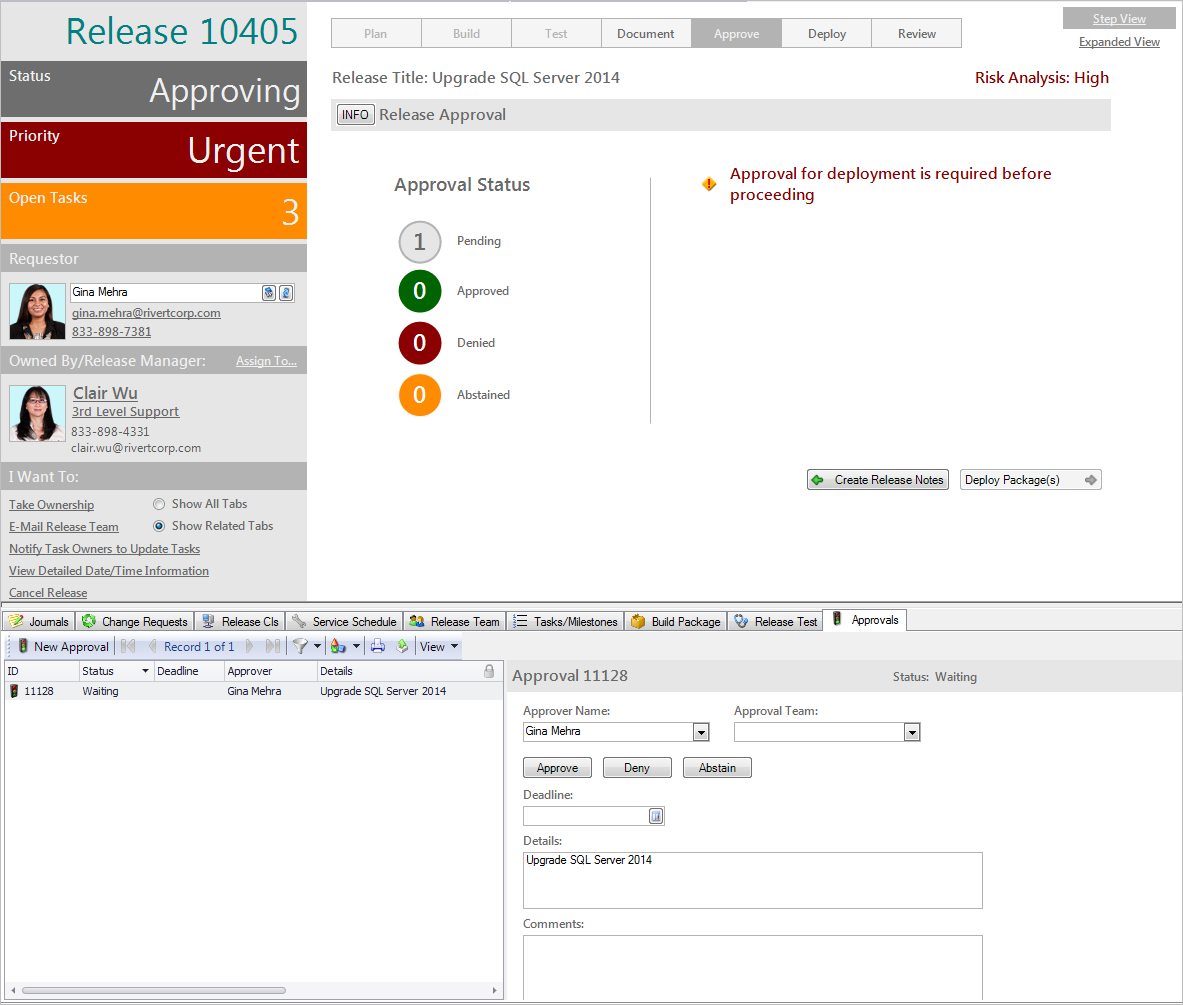
- Approver approves the Release.
- In the Approval grid, click an Approval
Record.
The Approval form opens. The Approver Name and Details fields are auto-populated per the defined Approval Process rules.
- (Optional) In the Comments field, provide your feedback.
- Click Approve.
Release Approval Process Notes: - The Release requires all approvers to provide approval.
- If an approver denies the Release (clicks the Deny button), the Release remains in the Approval phase with a status of Approving.
- If an approver abstains (clicks the Abstain button), the Release remains in the Approval phase with a status of Approving.
- The Release requires approval to enter the Deploy
phase.
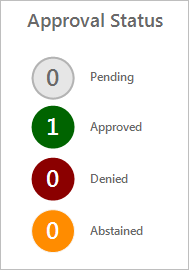
The Approval Status icons indicate the number of pending Approvals and their status (Approved, Denied, or Abstained).
- In the Approval grid, click an Approval
Record.
- Deployment Manager deploys the Release.
- Click the Deploy Package(s) button on
the Release Approval form.
The Deployment(s) form opens in the Main Pane, the Deploy Release Package tab opens in the Arrangement, and the Release enters the Deploy phase.
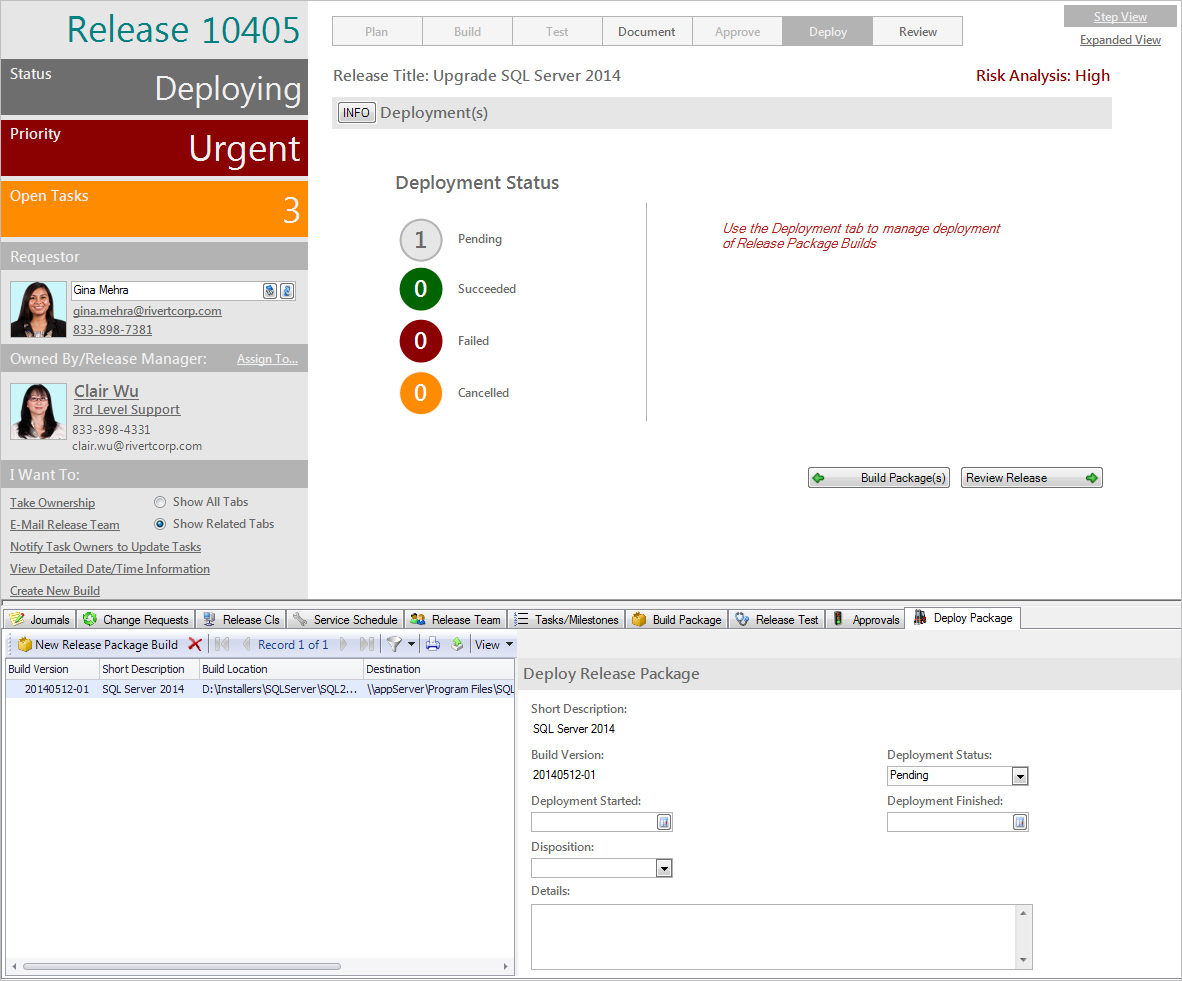
Note: View additional form information and helpful tips by clicking the INFO button located on the title banner of the form.
- In the Deploy Package grid, click a Release Package record. The Build Version and Short Description fields are autopopulated based on the selected Build version.
- Deployment Status: Select a
deployment status.
Note: When the deployment is initiated, the Deployment Manager selects the Started status, which auto-populates the Deployment Started field with the current date and time. When the deployment is completed, the Deployment Manager selects the Completed status, which auto-populates the Deployment Finished field with the current date and time.
- Deployment Started: Click the
Date Selector button to access the Calendar, and then select the
day in which you start the deployment before
updating the time.
- Deployment Finished: Click the
Date Selector button to access the Calendar, and then select the
day in which you end the deployment before
updating the time.
- Disposition: Select the
disposition (outcome) of the deployment (ex:
Succeeded).
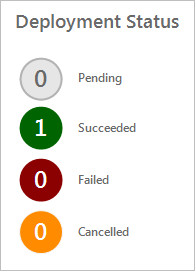
The Deployment Status icons indicate the number of pending deployments and their status (succeeded, failed, cancelled).
- Details: Provide any
additional information about the
deployment.
Note: If the deployment fails, click the Create New Build link in the Quick Info Tile to return to the Build phase, or click the Cancel Release link to move to the Review phase.
- Click the Deploy Package(s) button on
the Release Approval form.
- Owner completes the final details reviews the Release.
- Click the
Review Release button on the Deployment(s)
form.
The Release Details form opens in the Main Pane and the Release enters the Review phase.
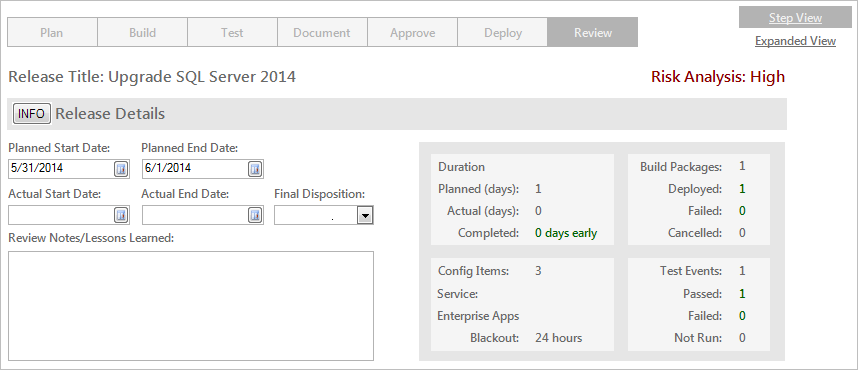
Note: View additional form information and helpful tips by clicking the INFO button located on the title banner of the form.
Note: The Planned Start Date and Planned End Date fields are auto-populated. using the dates defined on the Release Details form in the Plan phase.
- Actual Start Date: Click the
Date Selector button to access the Calendar, and then select the
date and time in which you actually started
the Release process.
- Click the
Date Selector button to access the Calendar, and then select the
date and time in which you actually ended
the Release process.
- Final Disposition: Select the disposition (outcome) of the Release (ex: Succeeded).
- Review Notes/Lessons Learned: Provide any additional information about the Release.
- Click the
Review Release button on the Deployment(s)
form.
- Owner closes the Release.
- Click the
Close Release button on the Release Details
form.
The Release status changes to Closed.
- Click the
Close Release button on the Release Details
form.