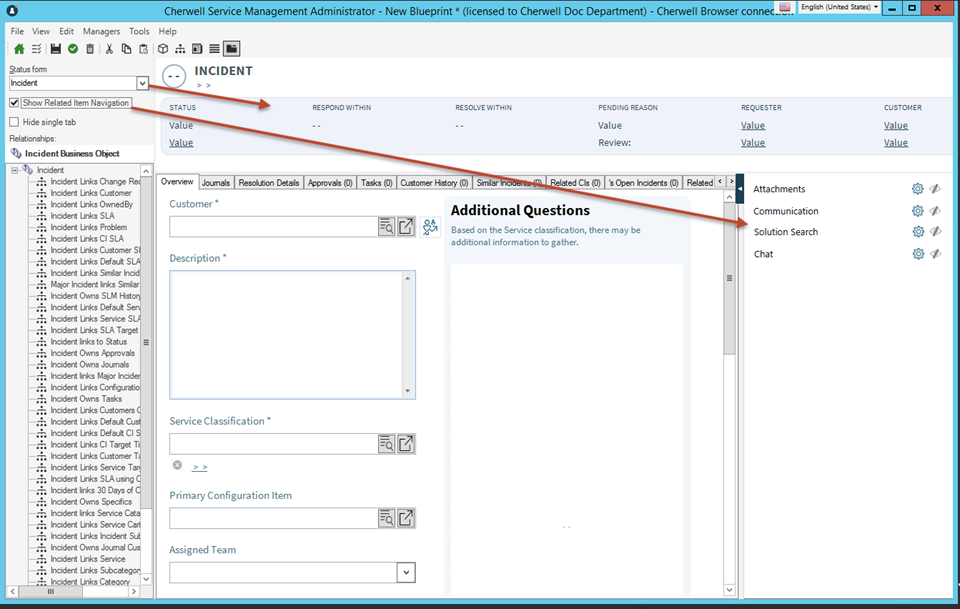
Configure Related Item Navigation
Configure Related Item Navigation with CSM Administrator.
To enable Related Item Navigation on a Business Object:
- Select the link in the yellow banner to activate
Related Item
Navigation.
Warning: Once activated, you can't revert from Related Item Navigation unless you discard or roll back the Blueprint.
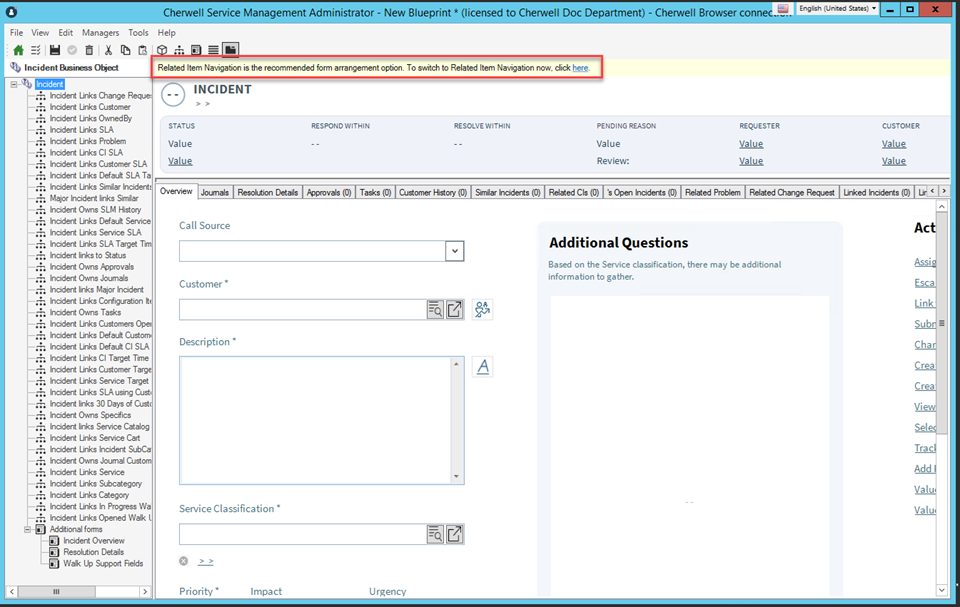
- Once
Related Item
Navigation
is enabled, a new set of controls appears at the top left corner of the
Form Arrangement Editor.
- Choose the form you want to appear in the Status Area by selecting from the drop-down list.
- Select Show Related Item Navigation to see the Related Items pane.
- Select Hide single tab if you have a single Related Items tab and don't want to display the tab styling.