CSM 10.4 Documentation

Home

Perform Transitions using a One-Step Action

Use a One-Step™ Action to perform transitions for multiple Business Objects records that are already using the Business Object Lifecycle Editor.

These steps use an Incident as an example but you can use this One-Step Action to perform transitions for any Major or Supporting Business Object already using the Business Object Lifecycle Editor.

Tip: You can also use the One-Step Action to move records forwards or backwards in a lifecycle or between branches in a lifecycle or to assign a status to an object that has never had a lifecycle.

To use a One-Step Action to perform a transition for multiple records:

  1. Log in to the CSM Desktop Client.
  2. In the CSM Desktop Client, select One-Step > One-Step Manager.
  3. Set the Business Object Association field to the Business Object that you want to perform the transition for (example: Incident).
  4. Select Create New.
  5. Provide a name and description.
  6. Select OK.
  7. Add a Transition a Business Object Action to the designer board.
  8. Select No Status Assigned from the From Status drop-down list. One Step Editor with Transition a Business Object action properties. From Status shown as No Status Assigned.
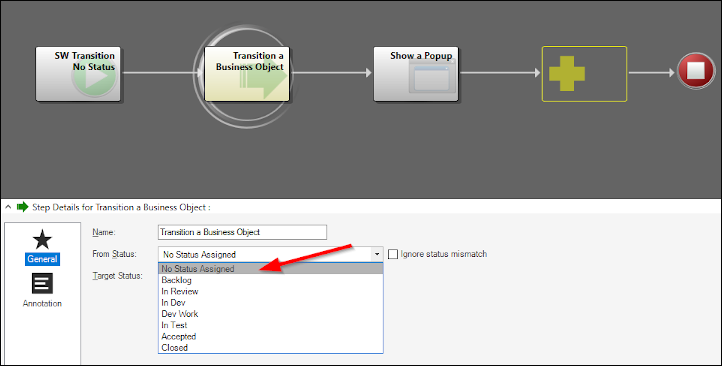
    Important: The From Status in this One-Step Action is the status in the new lifecycle not the legacy one.
  9. Select your chosen target status from the Target Status drop-down list (example: Draft).
  10. Save the One-Step Action and return to the Desktop Client home page.
  11. Open an existing Incident that has no status set.
  12. Run your One-Step Action.
    All the records that previously had no status set in the Business Object lifecycle Editor are transitioned to their new status. A journal entry is created for each Business Object transitioned as a result of the action.

Was this article useful?