Run a Report from a One-Step
You can create a One-Step Action using the Run a Report Action to run a CSM Report. For example, this One-Step Action could then be added to an Automation Process to periodically run a Report of all open Incidents assigned to a specific User.
To define a Run a Report Action for a One-Step Action:
- Open the One-Step Editor.
- Add a
Run a Report Action to the Designer Board.
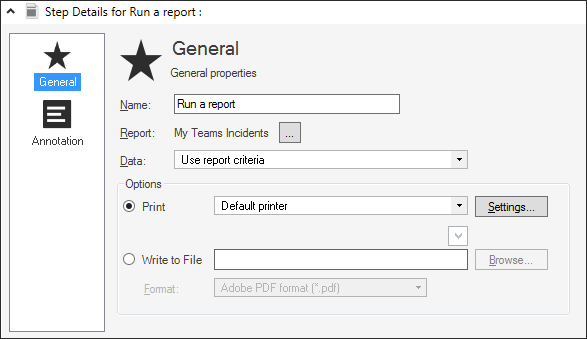
- Define properties for the Run a Report Action as follows:
- Name: Provide a display name for the Action. This is how the Action will be identified within CSM.
- Report: Click the
Ellipses button
 to open the Report Manager, and then select a
Report to run.
to open the Report Manager, and then select a
Report to run.
- Data: In the drop-down, select the data to use for the Report:
Data Source Action Use Report Criteria Run the Report exactly as designed (example: against a particular Search Group). Current Record Run the Report against the active record (the single record selected in CSM before running the One-Step Action). Current Group Run the Report against the current group of records. For example, run a Quick Search for all Incidents containing the word "print," and then execute the One-Step Action. The search results become the data for the Report.
- Select an output option:
Output Output Specific Options Print Choose a connected printer from the drop-down. Click Settings to open Print Options and define the number of copies to print and whether or not to collate them. Write to File Enter a filename; click the Selector button  to insert Tokens (example: Fields, System
Functions, Prompts, Expressions, Stored Values, Metrics, and Counters) directly
into the filename.
to insert Tokens (example: Fields, System
Functions, Prompts, Expressions, Stored Values, Metrics, and Counters) directly
into the filename.
or
Click the Browse button to open the Select File window and select an existing file.
Note: If an existing filename is entered or selected, running the One-Step will overwrite the existing file. If a new file name is entered, a new file will be created.
Select a file format from the Format drop-down. The following formats are supported:
- Adobe PDF
- Bitmap
- CSV
- EMF
- Excel
- HTML
- JPEG
- Plain Text
- PNG
- Rich Text
- TIFF
- Click
Save
 .
.