Configure a SMTP Relay Server Connection for Microsoft Outlook
Use the Server Manager to create a Simple Mail Transfer Protocol (SMTP) Connection to avoid possible Automation Process Service overload. If numerous e-mails are automatically sent from associated Outlook accounts, a SMTP Relay Server allows outgoing e-mails to be distributed between multiple server queues. Doing so prevents possible server overload by transferring e-mails from the Automation Process Service to the SMTP Relay Server.
A SMTP Relay Server Connection requires a Web Server (IIS) Connection. During SMTP installation, users are prompted to install or upgrade the IIS Connection if needed. For more information about configuring mail Relay Connections, visit Microsoft's website.
To create a SMTP Relay Server Connection:
- Install the SMTP Server Role:
- Open the Server Manager: Click .
- Click the Manage drop-down.
- Click Add Roles and Features. The Add Roles and Features Wizard opens.
- Click the Next button on the Before You Begin section.
- Select the Installation Type radio button (example: Role-based or feature-based installation).
- Click Next.
- Select a location for the Roles to be installed (example: Select a server from the server pool).
- Select the
name of the
location from the Server Pool field (example: SERVERNAME05).
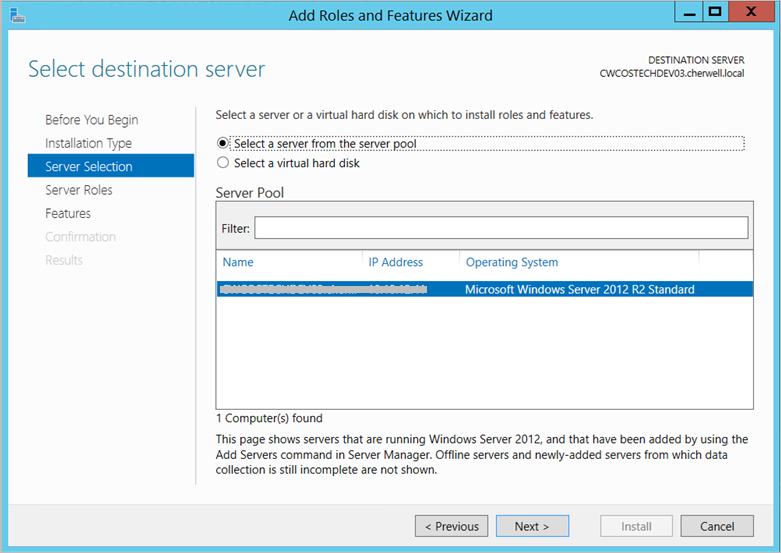
- Click Next.
- Server Roles:
- Click Next to accept the default Role selections or customize the selections based on your organization's needs.
- Features Section:
- Select the SMTP Server radio button. An informational pop-up displays and specifies features of the SMTP server.
- Select Add Features to accept these features.
- Click
Next.
Important: Depending on your server version, you may be prompted to install additional required features for the SMTP Server Connection before installation can occur. Click Add Features on the notification window to also install the required components.
- Review the summary of changes and click Install.
- Click Close after the installation is finished.
- Configure the SMTP Server:
- Open the Internet Information Services: .
- Ensure an SMTP Virtual Server connection is populated the left-hand navigation pane.
- If the SMTP Server Connection is missing, right-click on the computer name. If the SMTP Server Connection already exists, move to Step M.
- Select . The New SMTP Virtual Server Wizard opens.
- Provide a unique name for the server.
- Click Next.
- Select an IP Address from the drop-down.
- Click Next.
- Select a Home Directory from the drop-down.
- Click Next.
- Provide a Default Domain name for the virtual server.
- Click Finish. The new SMTP Virtual Server name now populates the left-hand navigation pane.
- Right-click on the
SMTP Server Connection name and select
Properties to customize the Server
Connection to fit your organization's needs.
Important: Virtual Server settings are extremely important if your Relay Server is connected to the Internet. Security breaches can occur from spam and malware being sent via an open-Relay Server. We recommend careful customization and working alongside your organization's Security Team to ensure the Virtual Server Connection is Security Compliant.
- Customize the following Properties:
- General Tab: Provide a Connection time-out limit (example: 10 minutes).
- Access Tab: Control forms of Authentication accepted by the server and establish IP Address or Internet domain access rights.
- Messages Tab: Provide data for e-mail messaging limits or accept the default settings.
- Security Tab: Click Add to establish which Window's user accounts are allowed to access the server.