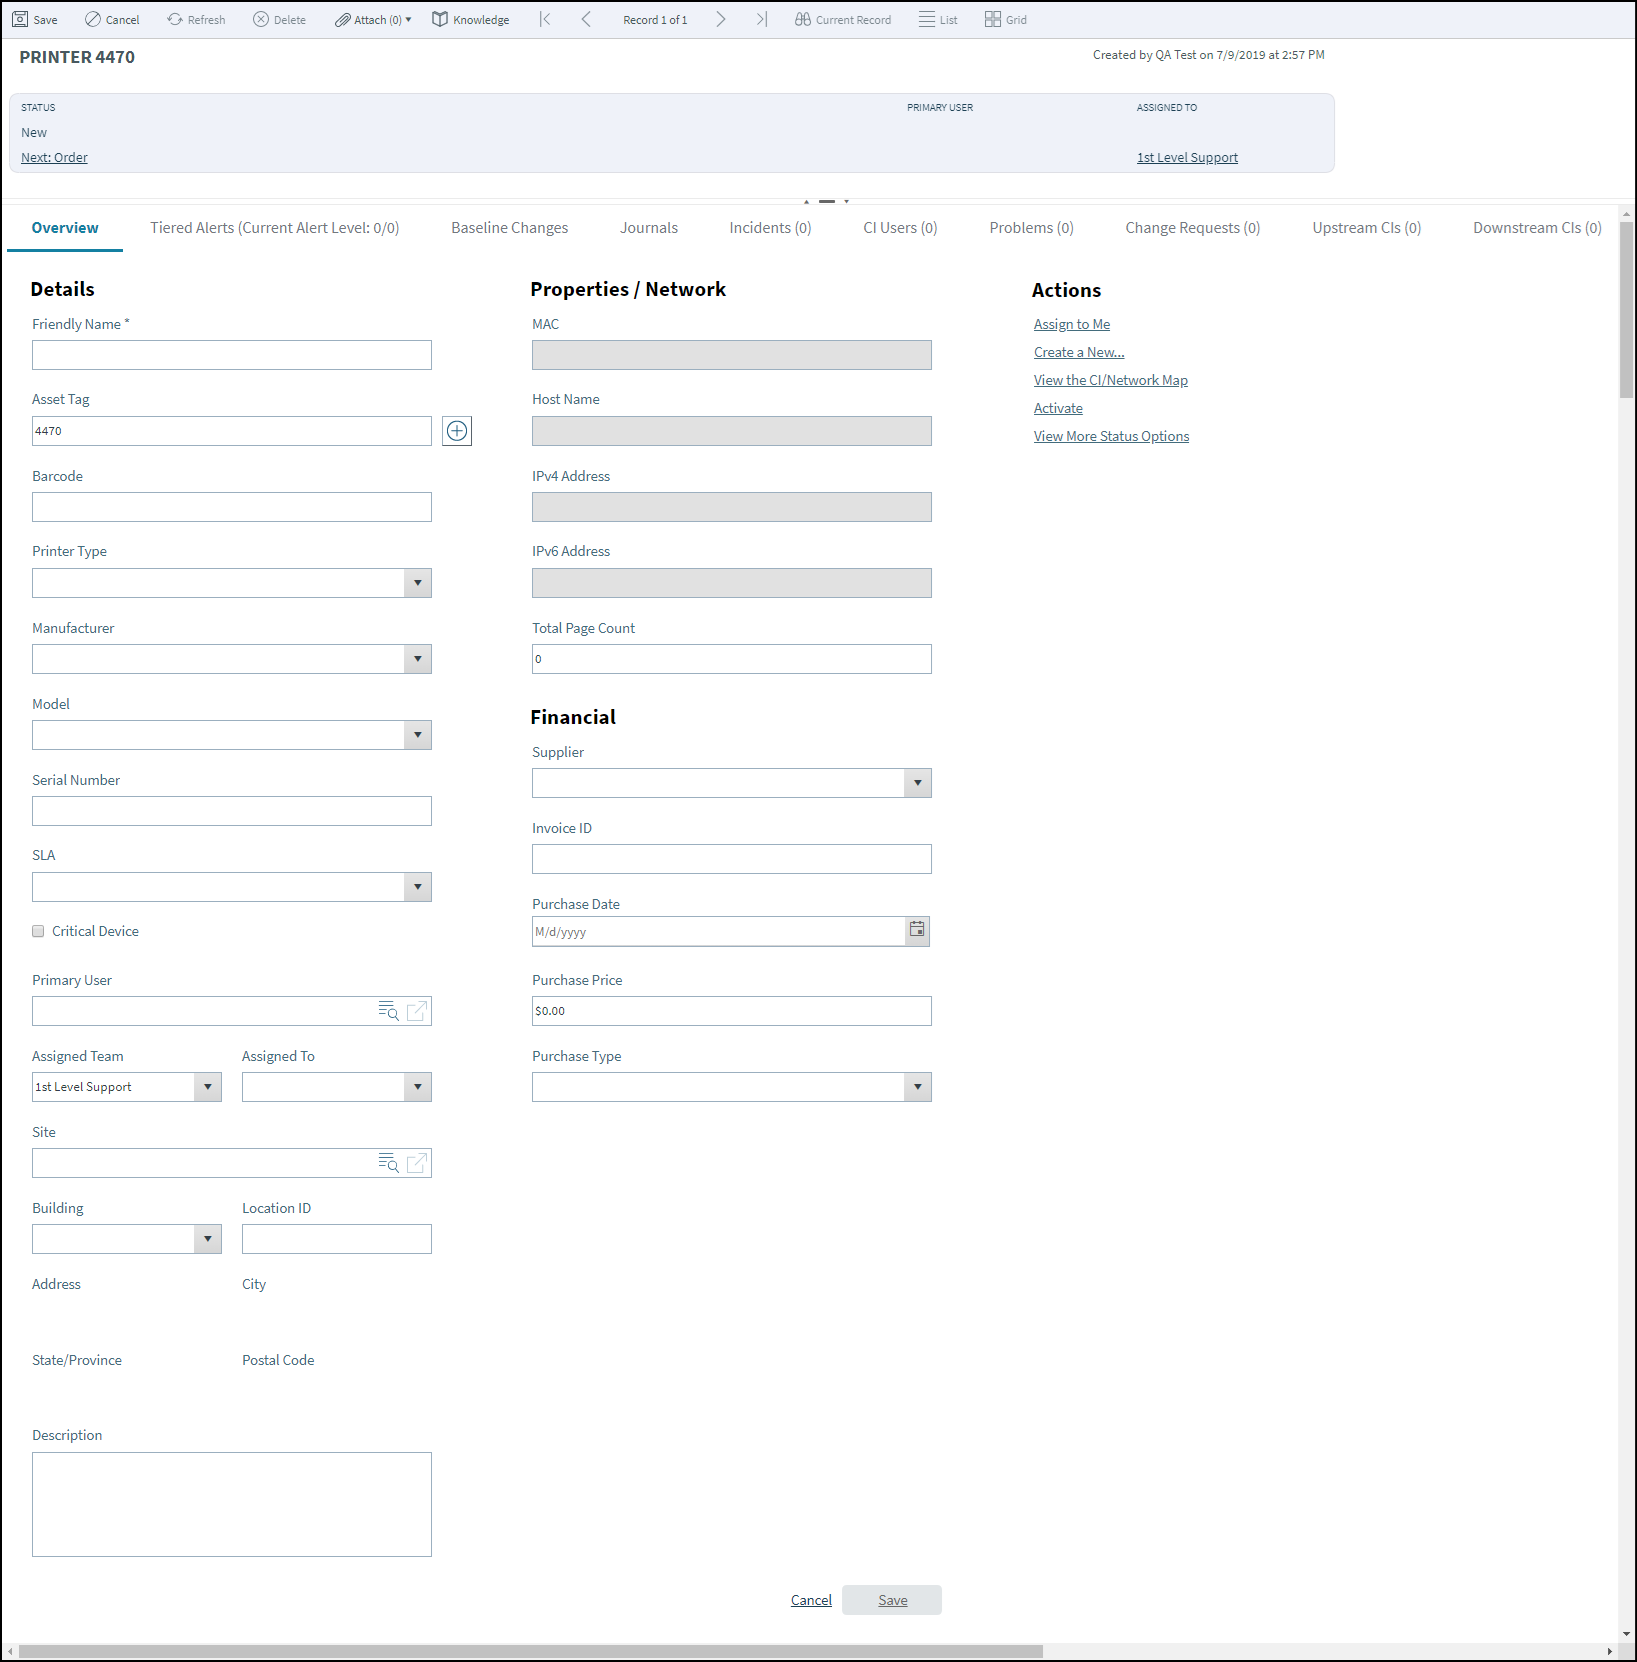
Create a Configuration Item (Printer)
Hardware forms and Software forms vary based on the specific
Configuration Item (CI). The following image shows a Printer Configuration Item
form.

To create a CI:
- On the
CSM Desktop Client toolbar, click
, and then select a
CI
(ex: New Config - Printer).
Tip: Another way to create a CI is to click from the CSM Desktop Client menu bar.
A CI Record is created with a unique Asset Tag ID (ex: 4476) and a status of New.
An Asset Tag can be auto-generated or provided by an administrator to customize it for business needs. - Enter a name for the CI in the Friendly Name field.
- Select a Primary User:
- Primary User: Provide the name (ex: Gina) of the person who
initiated the Change (not the creator of the record), and then press
Enter or
Tab to search for the Customer Record.
If an exact match is found, the Primary User Fields are auto-populated with the Customer’s name and e-mail. If multiple matches are found (ex: Multiple Customers named Gina), the Contact Manager opens to select the appropriate Customer.
The Primary User is also thought of as a Customer, technician, or internal User of an asset. In CMDB, the Customer is referred to as the Primary User.
- Primary User: Provide the name (ex: Gina) of the person who
initiated the Change (not the creator of the record), and then press
Enter or
Tab to search for the Customer Record.
- Select an Assigned Team and Assigned Owner for the CI from the
drop-down menus.
Select Assign to Me in the Actions List to make yourself the CI owner.
- The CI owner records the initial CI details.
Tip: Fields with drop-down arrows are populated based on Lookup Table values in Table Management. Add, edit, or delete Field values by selecting the Field, and then pressing F3.
- The asset owner orders the CI:
- In the Default Form beneath
Status, click
Next: Order.
The CI status changes to Ordered.
- In the Default Form beneath
Status, click
Next: Order.
- When the CI is received, the asset owner identifies the CI as in
stock:
- In the Default Form beneath
Status, click
Next: Mark as In Stock.
The CI status changes to In Stock.
If the CI needs to be tested before becoming operational, click View More Status Options in the Actions List. The CI Status Selector opens. Click In Testing, and then click OK. The status changes to In Testing.If the CI is stolen or lost, click the View More Status Options link in the Actions List to access the CI Status Selector, and then select the Stolen/MIA status.
- In the Default Form beneath
Status, click
Next: Mark as In Stock.
- Owner plans the use and location of the CI:
- In the Default Form beneath
Status, click
Planned.
The CI status changes to Planned.
If the CI needs to be tested before becoming operational, click View more status options in the Actions List. The CI Status Selector opens. Click In Testing, and then click OK. The status changes to In Testing.
- In the Default Form beneath
Status, click
Planned.
- When ready, owner activates the CI:
- In the Default Form beneath
Status, click
Next: Activate.
The CI status changes to Active.
If the CI needs to be repaired while active, click the Mark as "In Repair" link in the Actions list. The status changes to In Repair.
- In the Default Form beneath
Status, click
Next: Activate.
- (Optional) Owner deactivates the CI:
A CI is typically deactivated when it must be taken out of service temporarily (ex: Primary User leaves the organization).
- In the Default Form beneath
Status, click
Bring Down.
The status changes to Down.
Tip: CSM provides multiple OOTB Automation Processes that use Tiered Alerts to help manage CIs when they are out of service (status is Down). Use these Automation Processes, edit them, or create them to fit the organizational needs.
- In the Default Form beneath
Status, click
Bring Down.
- (Optional) Asset Owner retires the CI:
A CI is typically retired when it must be taken out of service permanently (ex: Printer is replaced).
- In the Actions List, click the
View More Status Options link.
The CI Status Selector opens.
- Click the Retired status.
Select OK.
The CI status changes to Retired.
- In the Actions List, click the
View More Status Options link.