Add Branches and Jumps
Use branches and jumps to customize your Business Object lifecycle.
Use branches to add divergent routes to your lifecycle. For example, for a Change Request lifecycle, you could have a branch for a Normal Change, another for an Emergency Change, and another for a Standard Change. Jumps allow you to go backwards through your lifecycle (example: if something is rejected or to reopen a Closed ticket.), skip ahead, jump to another, or to close off a lifecycle. In practice, branches give the users a choice of where to go next when using the Transition Status Control (example: Reject or Approve).
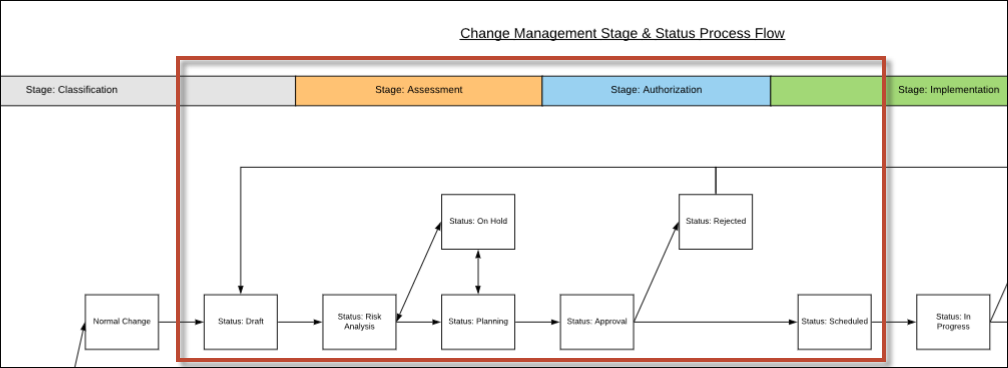
The following steps refer to example statuses from the image below. To see all the steps to replicate the section of this lifecycle marked by the red line, see Example: Create a Lifecycle.
To add a branch to a lifecycle:
- Drag a status on top of an existing status (example: Risk
Analysis).
A branch appears as shown below. Here, it has been named as status On hold.
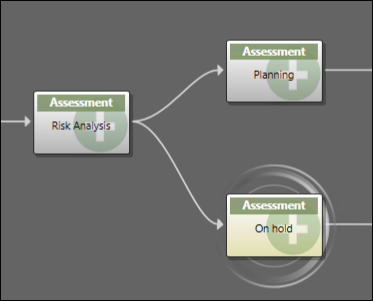 When you add branches, the transition information is added for you. In this example, there are transitions added for Risk Analysis -> Planning and Risk Analysis -> On hold.
To replicate the two-way arrows shown on the workflow above, for example, between statuses Risk Analysis and On hold, you need to use a jump.
To add a jump to a lifecycle:
- Drag a jump on to your lifecycle and drop it on to your source
status (example:
Planning).
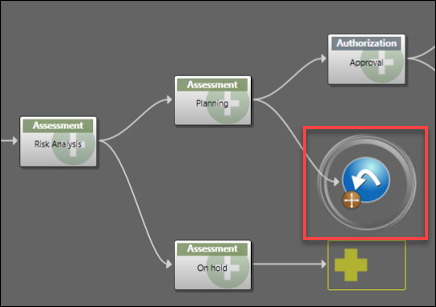
- Then drag the brown cross onto your destination status, in this
case,
On hold.
There is now a jump or two way arrow between the statuses Planning and On hold. You can tell which statuses are joined together by a jump by matching up the pairs of jump numbers.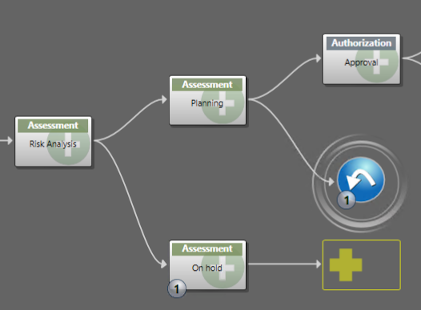 Tip: If you add multiple jumps which go to the same destination they all have the same jump number.