Create a Customer Record
Create a Customer record using the Customer - Internal form in the CSM Desktop Client. The Customer record stores the pertinent details and properties for the Customer, including:
- Identification information: Name, Department, Title, Manager.
- Details: Contact information, SLA level, organizational information.
Good to know:
- To save time, import Customers already stored in a Service Directory. See Import User and Customer Information Using Microsoft Active Directory.
- Department, Manager, Phone, E-mail, and SLA Subscription Level are highly recommended because some features (record ownership, One-Step Actions/Actions, Automation Processes, etc.), if configured, use them.
- SAM Account Name (a unique Microsoft® username attribute) is used for Customer information imported from Microsoft® Active Directory®.
- If configured, record ownership rights (View, Add, Edit, Delete rights) can be extended to Managers, Departments, and Teams/Workgroups. Carefully consider the implications of these relationships.
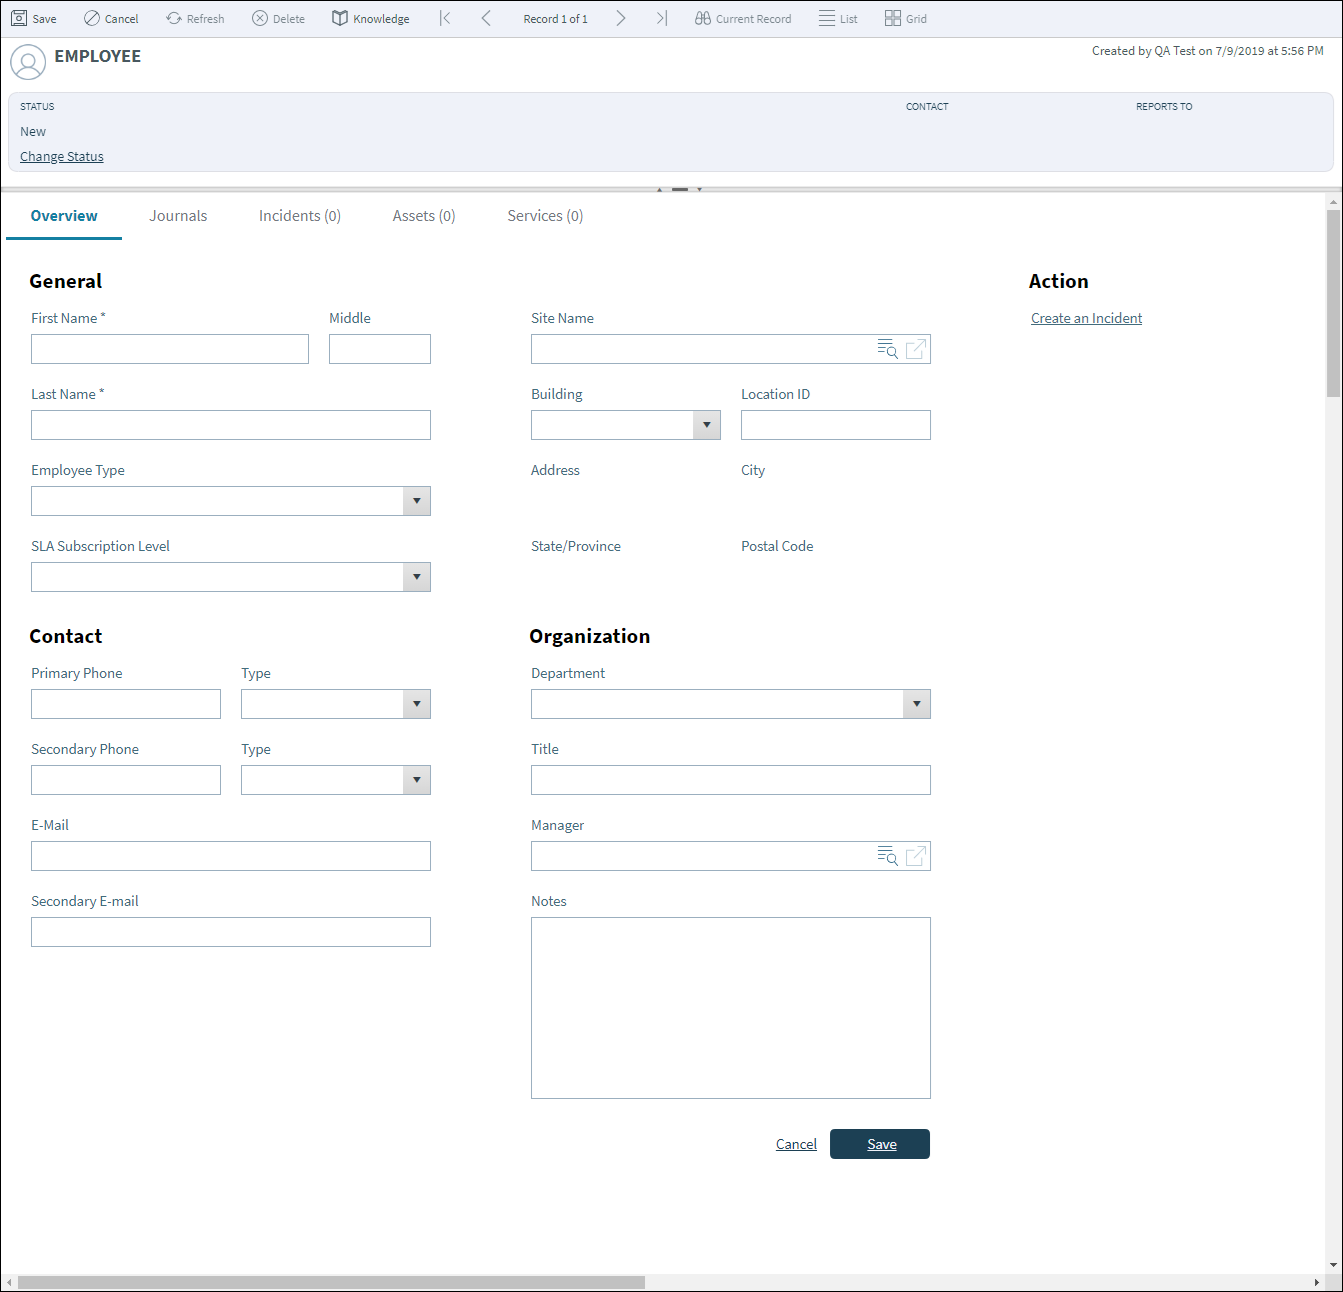
The following image shows the Customer - Internal form.
To create a Customer record:
- From the toolbar in CSM Desktop Client or CSM Browser Client, select New > New Customer - Internal.
- (Optional) In the Default Form, click the Image to add a photo or graphic to the Customer Record.
- Select Change Status in the Default Form. The Select Status dialog box opens.
- Select a status from the drop-down menu.
- Click OK.
- Complete the following fields in the General section of the Form Area:
Field Description First Name (Required) Customer's first name. Middle Customer's middle initial. Last Name (Required) Customer's last name. Employee Type Customer's type of employment. The drop-down menu includes the following options: - Contractor
- Full-Time
- Part-Time
- Temporary
SLA Subscription Level Customer's Service Level Agreement subscription level. Site Name The name of the site where the customer is located. Use the Related Item button to open the Site Selector dialog box. Building The building where the customer is located. The drop-down menu offers building names dynamically based on the Site Name field. Location ID The name or number of the customer's location within the Site and Building. - Complete the following fields in the Contact section:
Field Description Primary Phone Customer's primary phone number. Use the Type drop-down menu to select the type of phone: - Home
- Mobile
- Work
Secondary Phone Customer's secondary phone number. Use the Type drop-down menu to select the type of phone: - Home
- Mobile
- Work
E-mail Customer's primary email address. (Example, work email address.) If email is configured, CSM can send emails to this address. Note that Automation Processes and Actions/One-Step Actions can also use an email address.
Secondary E-mail Customer's secondary email address. (Example, private email address.) - Provide organization information:
Field Description Department Customer's work department. Title Customer's job title. Manager Immediate manager of the customer. Notes Text field to enter notes about the customer. - Click Save.
Unlike a User Profile, a Customer record does not store account credentials or Workgroup information. If the Customer requires a Portal login, you must also create portal login credentials to store username and password, assigned Security Group, and account details (password resets, etc.). Refer to create Portal credentials. If the Customer needs to share information with a team, you must assign the Customer to a Customer Workgroup.
The Create an Incident action in the Actions List allows you to create an Incident that is associated with the Customer. When you select Create an Incident, the Incident Form opens. See Create an Incident.