Displaying the Linked Contact Details in Outlook
When a message is linked to a GoldMine Contact, the GoldMine Panel is populated with Contact Information and Items for the linked contact.
To Modify the Display of Contact Information
|
1.
|
Click the Setup GoldMine Plus button. |
|
2.
|
Click the Contact Pane tab. |
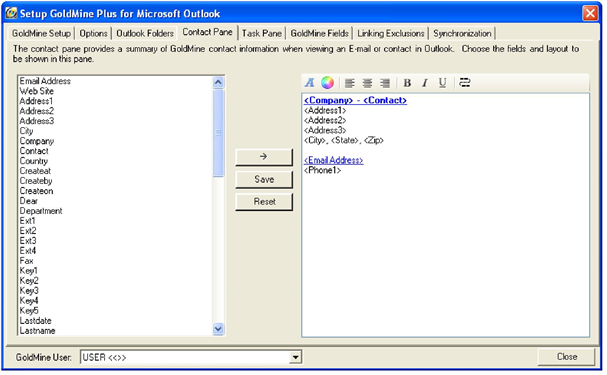
○ The panel on the left shows the available contact fields that you can add to the Contact Information panel in Outlook.
○ The panel on the right shows the layout of the contact information details as the display in the Contact Information panel in Outlook when viewing an E-mail or Contact. You can use the formatting tools at the top of this panel to adjust the color, alignment, and character styles of the display text.
|
3.
|
Select the area where you want the field to be placed in the right panel. |
NOTE: Where ever the blinking cursor is in the right panel is where the new field will appear.
|
4.
|
Click the field in the left panel, then click the Arrow button to add the field. |
|
5.
|
At the bottom of the Contact Pane tab, select the user that this change will affect. If this change should be for all users, select All users from the list. |
|
6.
|
When you are satisfied with the layout, click the Save button to save your changes. |
