GoldMine Web
GoldMine Web enables you to access a subset of GoldMine Premium's features using a web-based user interface. Future releases of GoldMine will continue to add to these web-based features.
GoldMine Web requires no additional licensing and can be used by any user of GoldMine PE.
You are required to login to GoldMine Web with the same username and password used to login to GoldMine PE.
NOTE: Passwords are sent in encrypted form when using either HTTP or HTTPS. HTTPS provides a higher level of security and also encrypts customer data sent over the network.
To Open GoldMine Web from a Link
If you were sent a link to the URL![]() Uniform Resource Locator. The global address of documents and other resources on the World Wide Web. in a message, follow the steps below.
Uniform Resource Locator. The global address of documents and other resources on the World Wide Web. in a message, follow the steps below.
| 1. | Open the message (email or text) and tap the link. |
| 2. | Your default web browser opens to the GoldMine Web login screen. |
| 3. | Enter your Username |
To Open GoldMine Web from your Mobile Phone's Home Screen
| 1. | Tap the GoldMine Web shortcut on the Home screen |
| 2. | Your default web browser opens to the login screen. |
| 3. | Enter your Username and Password and then tap Login. |
To Create a Shortcut on your Mobile Phone's Home Screen
If you do not have a shortcut to GoldMine Web on the Home screen of your mobile device, follow these steps to create one.
NOTE: The shortcut is created from the GoldMine Web Login screen. You must logout before creating the shortcut.
| 1. | Open the GoldMine Web location in your mobile browser. |
| 2. | Tap the Bookmarks button on the tab bar. |
| 3. | Tap Add to Home Screen. |
| 4. | Enter GoldMine Web (or your desired text) as the title, and click Add |
Viewing Contact Information
Once you are logged in to GoldMine Web, the Contacts list is displayed. You can access the following items.
■ Contact information:
○ Edit or Delete a record, Add a new Contact
○ View: Custom screens, Additional Contacts, Pending Activities![]() A time-specific or event-based action linked to Contacts; for example: calls, appointments, letters, To Do tasks, or events that are assigned to users., History, Additional Contacts, Details, and Notes.
A time-specific or event-based action linked to Contacts; for example: calls, appointments, letters, To Do tasks, or events that are assigned to users., History, Additional Contacts, Details, and Notes.
○ Schedule Activities: such as Calls, Actions (Other Actions) and Events (Timed or All-day)
○ View Pending Activities: for yourself or other users in a graphical calendar
○ Forecast a Sale
■ Search for a Record: by Name or Company
To Customize Contact Settings
GoldMine Web enables you to customize the settings for how you view contacts. You can rearrange or hide different sections that display contact details such as pending emails, email history, and associated links, notes, and so on.
The custom contact settings are per user and are saved in the database and local storage across all supported browser types.
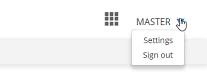
| 1. | On the Home page, expand the drop-down list next to your login name (upper right-hand corner of the page), and select Settings. |
| 2. | On the Settings page, you can display or hide the following settings for your GoldMine contacts: |
○ Custom screen details.
○ Pending emails or email history (one must always be visible). You can also set the order of how these sections display on screen if both are on.
○ Other information including details, additional contacts, opportunities, cases, links, and notes. You can also set the order of how these sections display on screen.
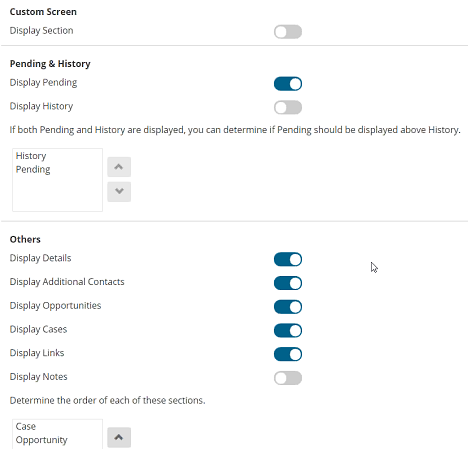
| 3. | Once you are finished, refresh the page to view the changes. |
To Link Pending Email Messages to Contacts
You can use GoldMine Web to link, relink, and unlink pending email messages to contacts. Any changes you make here will be reflected in your version of GoldMine PE as well.
| 1. | On the Home page, expand the My Pending Emails section. |
| 2. | Select an email address to view more details. Depending on actions you have already taken, the resulting page will display any of the following Linked to options: |
○ Click Relink Email to search for a different contact or create a new one for the pending message.
○ Click Unlink Email to unlink the pending message from the contact.
○ Click Link Email to link the pending message to a suggested (previous) contact, search for a different contact, or create a new one.
NOTE: When you create a contact from this page, the process is simplified to just three fields—contact name, company name, and email address. To add more details at a later time, you can search for the contact in the contacts list, then go to the Update Contact page and enter all necessary information.
| 3. | If you relink or link a contact, the email address may already be associated with another contact. If so, a dialog box will display asking if you want to move the address AND link the message to the selected contact, or simply link the email message. Select the preferred option and click Yes. |
