Case Manager Preferences
The Case Manager Preferences dialog allows you to customize the data that appears in the Case Manager.
To Access the Case Manager Preferences
| 1. | Open the Service Center Detail View. |
| 2. | Select Customize from the Service Center Toolbar. |
The Case Manager Preferences dialog contains four tabs: Options, Column Selection, Tab Selection, and Labels.
Options
The Options tab contains the following elements:
■ Case Number Mask (see About the Set Case Number Mask Dialog)
■ Default Follow-up Interval: Determine the default interval, in days, between the case's creation date and the date automatically set in the Deadline field (Detail View). For example, to set a default interval of 7 days, select “7” from the drop-down menu. This is the date when this case is scheduled to be resolved as displayed as the Deadline in the Case Details Window (see About the Case Details Window (Detail View)).
■ Default Assignment: Choose the user, if any, that cases will be assigned to by default
■ Default Template: Choose the case template, if any, that all cases will default to
■ Priority List: Select the types of cases that will be automatically be added to your priority list
TIP: Use the Priority List to create a custom filter for cases. For example, to display only unread cases in the Service Center for a user, select only the checkbox for Cases Unread in the Options window, then select My Priority List from the Show menu in the Service Center toolbar.
■ Show as an Alert: Select the types of cases that will automatically create alerts
Column Selection
Use the Column Selection tab to choose the columns to display in the Case List

Tab Selection
Use the Tab Selection tab to choose the tabs to display in the Case Manager.

Click the Tab Selection tab and select from the following options:
NOTE: For each tab title listed, clear the associated checkbox to hide tab from view.
■ Move Up. Repositions the tab. Select a tab and click Move Up. The tab moves up one position.
■ Move Down. Repositions the tab. Select a tab and click Move Down. The tab moves down one position.
■ Customize tab labels globally. Applies changes to all users. Select the checkbox if you want changes to apply to all users.
■ Rename. Renames the tab. Select a tab and click Rename. At the Edit Tab label dialog box, type in the new tab label and click OK. The new tab name appears.
■ Reset. Return the tabs to default order.
Labels
Use the Labels tab to change the labels for the fields used in the Case properties dialog box.
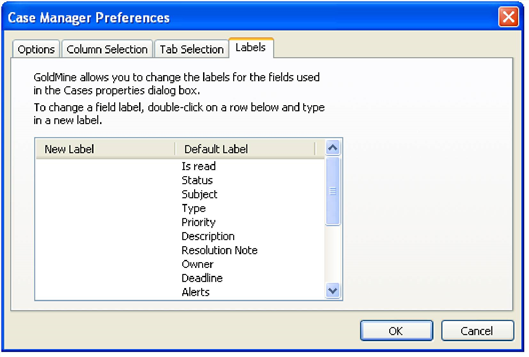
To change the field label, double-click the New Label field that corresponds to the Default Label. Enter a new label and then click OK.
About the Set Case Number Mask Dialog
Use the Set Case Number Mask dialog to set up protocols for case numbers in the Service Center.

The Set Case Number Mask dialog contains the following elements:
■ A Preview field: Preview your numbering format based on choices you make in the settings area below
■ A Settings area containing the following fields, menus, and check-boxes
○ Prefix: Specify a text string that always precedes your unique identifier number. Alternately, to use an automated date stamp as your prefix (MMDDYYYY) select the check-box labeled Use Timestamp
○ Separator (1): A punctuation mark that separates your prefix and unique identifier number
○ Identity Seed: A numeric value denoting the starting point for your unique identifier number
○ Identity Format: The total number of digits in your unique identifier number. This number must have at least 4 digits and no more than 10 digits
○ Suffix: Specify a text string that always follows your unique identifier number. Alternately, to use an automated date stamp as your prefix (MMDDYYYY) select the check-box labeled Use Timestamp
○ Separator (2): A punctuation mark that separates your unique identifier number and suffix
When finished, select OK to save changes, or select Cancel to exit the dialog without saving changes.
