Adding Fields to Screens
After you have created the fields and screens, place these types of fields on the screens:
■ Fields. Hold data.
■ Expression fields. Display titles, messages, or mathematical calculations based on other fields.
Use the Screen Designer to place the fields on screens. Only users with Master Rights can access the Screen Designer. The Screen Designer lets you click and drag fields in the display. Only unindexed fields can be dragged from the upper panes to the Fields tab![]() Displays user-defined fields grouped together in user-defined screens. area.
Displays user-defined fields grouped together in user-defined screens. area.
NOTE: If asked to rebuild the database, review Help topics regarding rebuilding and maintaining SQL.
Use the following procedure to add fields to a screen.
| 1. | At the Screen Designer, select the Fields tab and right-click in the area under the tab. |
| 2. | Select the screen to which you are adding the field. |
The selected custom screen becomes active under the Fields tab.
| 3. | Right-click and select Screen Design. |
The GoldMine Screen Designer Toolbar appears with a grid-like background in the contact record.
NOTE: Changing the field order position of Company, Contact, Phone1, or any of the Key 1–5 fields can cause problems–especially with synchronization and querying the database.
The Screen Design Toolbar appears when designing primary fields or Fields tab screens.
Right-click in the field area of the Fields tab and select Screen Design. The Screen Design Toolbar appears and the Contact Record![]() Standard unit of information in GoldMine that incorporates information, such as: name, company, phone, and address. It serves as the basis for all scheduled work, and acts as the central link between GoldMine’s Calendar and History by maintaining all past and pending events, related to the individual contact records in the GoldMine database. displays a grid-like series of lines.
Standard unit of information in GoldMine that incorporates information, such as: name, company, phone, and address. It serves as the basis for all scheduled work, and acts as the central link between GoldMine’s Calendar and History by maintaining all past and pending events, related to the individual contact records in the GoldMine database. displays a grid-like series of lines.
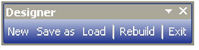
- New: Create a field.
- Save As: Save the screen as a new Primary Fields View.
- Load: Load the selected Primary Fields View.
- Rebuild: Rebuild the database and add the fields to the Contact2 table. Review details on rebuilding before proceeding.
- Exit: Exit the screen designer.
| 4. | Click New on the design toolbar. The Place Field dialog box opens. |
| 5. | From the Field drop-down list, select the field to place on the screen. |
TIP: Click New Field to create a new field without accessing Tools > Configure > Custom Fields.
| 6. | Click OK. The field appears in the upper left corner of the Fields tab. Drag and drop the field in the desired location on the Field Screen. |
NOTE: When working with Row and Column entries, do not delete indexed fields from the primary Contact Record display or move indexed fields to custom user screens. Moving or deleting indexed fields can reduce GoldMine’s ability to find records based on these fields when using search commands from the Lookup menu.
| 7. | Click the field. The Field Properties dialog box opens. |
| 8. | Make changes to the Profile, Color, Layout, and Security tabs and click OK. |
The field is placed on the screen with an n/a in the data area.
| 9. | Log out and back into GoldMine to see the field. |
| 10. | Select File > Exit and then relaunch GoldMine. |
