Creating E-mail Templates
Use the following procedure to create an e-mail template.
|
1.
|
Select Go To > Document Templates. |
|
2.
|
At the Document Management Center, at the User drop-down list on the toolbar, select the user to create the template for. If the template is for all users, select (public). |
|
3.
|
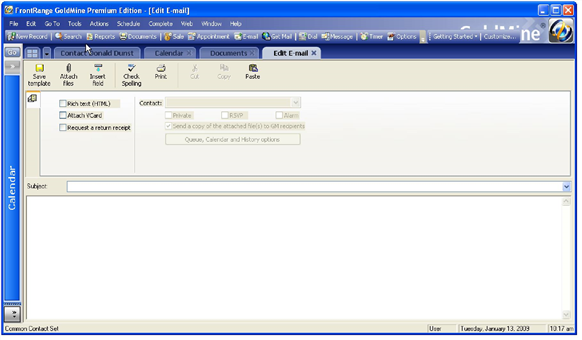
Right-click on E-mail Templates and select New. |
The Edit E-mail window opens.
|
4.
|
At the Subject field, type the subject of the e-mail. |
NOTE: The subject you type becomes the subject line when using the template; consider what you are sending to contacts. The subject is also the template name appearing in the Document Management Center, so it must be unique.
|
5.
|
Click Attach files button on the Edit E-mail toolbar to attach a file to the template. |
|
6.
|
Browse to locate the file you are attaching to the template. |
|
7.
|
Select the Options tab to configure template formatting and encoding options. |
|
8.
|
Select Rich text () to send the message in HTML. The Rich text format options lets you use specialized fonts and insert .bmp files. |
If your recipient's system does not support HTML, leave the check box blank to send the message as plain ASCII text.
|
9.
|
Wrap lines is the default. When a word is typed at the end of a line, the next word is placed at the beginning of the following line. |
When creating a template, you cannot change this option.
|
10.
|
Select Attach VCard to include a .vcf file with your message. The VCard contains basic contact information. |
|
11.
|
Select Request a return receipt to receive an e-mail acknowledgement from the recipient upon receipt. This option returns results only if the recipient's e-mail system supports the return receipt feature. |
|
12.
|
Click in the lower pane and begin creating the body of the message. Use these editing options to create the message: |
○ HTML Toolbar
○
|
13.
|
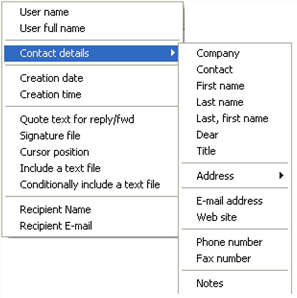
If desired, insert GoldMine fields into the message body, creating a dynamic e-mail message using data from the contact record in the merged document. Right-click in the message box and select Actions > Insert GoldMine Field. |
|
14.
|
To save the template, right-click and select Actions > Save template. |
TIP: Insert Key1-Key5 fields by placing the cursor at the location to insert the field and type. For example, <<key1>>, to insert the data from the Key1 field in the merged e-mail. Insert user-defined fields by placing the cursor and typing <<Contact2->Ufieldname>>
To Clone an Existing E-mail Template
|
1.
|
Select Go To > Document Templates. |
|
2.
|
At the Document Management Center, select the User from the drop-down list whose template you are cloning. |
|
3.
|
Right-click on the E-mail template name and select Clone. The Select a User dialog box appears. |
|
4.
|
Select the user to create the cloned template for from the User Name drop-down list. |
|
5.
|
Click OK. The Edit E-mail window appears. |
|
6.
|
Enter a Subject for the template. The Subject will become the name for the template and should a unique name to distinguish it from other templates. |
|
7.
|
Edit the template as needed, then click the Save template button. |
To Edit an E-mail Template
|
1.
|
Select Go To > Document Templates. |
|
2.
|
At the Document Management Center, select the User from the drop-down list whose template you want to edit. |
|
3.
|
Right-click on the E-mail template name and select Edit. The Edit E-mail window appears. |
|
4.
|
Make any desired changes, then click the Save template button. |