Adding or Editing Occasions
Use the following procedure to add or edit an occasion.
| 1. | Click the Day or Week tab at the bottom of the Calendar. |
○ To Add an Occasion, right-click the Occasions list area and select New to open the Create an Occasion dialog box.
○ To Edit an existing Occasion, select and item on the list, right-click the Occasions list area, and then select Edit to open the Edit an Occasion dialog box.
TIP: You can also create or edit an occasion by opening the Contact Details (Edit > Record Properties > Contact Details) and then clicking either the New or Edit button on the Occasions tab.
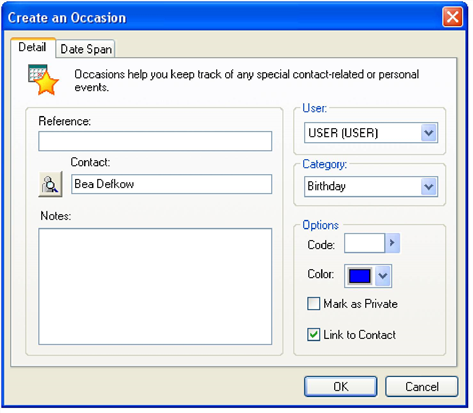
| 2. | Type the occasion name in the Reference text box. |
| 3. | Click the search button beside the Contact text box. and select one option: |
○ Select another contact from this Record. Select an additional contact on the current contact record.
○ Look up another contact. Opens the Contact Search Center to search for a contact.
○ Create a new contact. Opens the New Company and Contact dialog box to create a new contact.
| 4. | Type any notes about the occasion in the Notes field. |
| 5. | If the occasion is assigned to another user, select from the User drop-down list. |
| 6. | Select a category, such as birthday, in the Category drop-down list. |
| 7. | In the Options area, configure: |
○ Code. Select the code in the F2 Lookup![]() Special type of browse window that can be customized to contain frequently used or code-specific entries. Security options can control F2 lookups to ensure user input and allow standardization of data. list.
Special type of browse window that can be customized to contain frequently used or code-specific entries. Security options can control F2 lookups to ensure user input and allow standardization of data. list.
○ Color. Select the calendar display color for the occasion in the drop-down list.
○ Mark as Private. Select to keep others from seeing the occasion on the Pending tab.
○ Link to Contact. Select to link the occasion to the contact record and display on the Pending tab.
| 8. | Click the Date Span tab. |
| 9. | In the When area, select the starting Date from the F2 graphical calendar and type or select the number of days in the Duration: x day(s) field. |
| 10. | To place an alarm on the occasion, select Before: x day(s) and type or select the number of days. |
| 11. | In the Occurs area, select the frequency of the occasion in the Every: x year(s) field and select one of the following: |
| 12. | By Specific Date. Select the month and day in the drop-down lists. |
| 13. | By Day of the Week. Select the week of the month, day of the week, and month in the drop-down lists. |
| 14. | Click OK to close the window and add the occasion to the calendar. |
Occasions are linked to contacts but not displayed on the contact record until an activity is scheduled from the GoldMine Occasion Alarm dialog box appearing at the time specified on the Date Span tab.
For more information about removing occasions, see Deleting an Occasion.
