Creating a New Case
Use the following procedure to create a new service request (Case).
| 1. | Select Go To > Service Center or select Service from the main Navigation Panel. |
| 2. | At the Service Center, click New Case. |
The Contact Search Center window opens pre-filled with the current contact record.
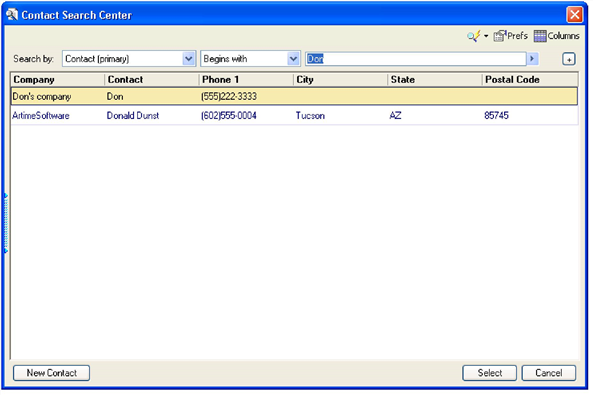
| 3. | Double-click on a contact and then click Select. |
If you have many records listed, use the Search capability at the top of the window. For more information on using the Contact Search Center, see Searching for Contact Records.
○ To create a case from a new contact, click New Contact and complete the New Record dialog box.
The Service Center window opens and the new case appears with a system-generated case number in the Case Number field. Depending on the case, some fields also might be system-generated.
| 4. | Complete each field by clicking next to the field and either entering text in the field box or selecting values by clicking the down arrow on the box. |
NOTE: As the user, you (or your administrator) define the values in the drop-down box using F2 Lookup![]() Special type of browse window that can be customized to contain frequently used or code-specific entries. Security options can control F2 lookups to ensure user input and allow standardization of data.. If you have not created any values, no values will appear.
Special type of browse window that can be customized to contain frequently used or code-specific entries. Security options can control F2 lookups to ensure user input and allow standardization of data.. If you have not created any values, no values will appear.
| 5. | Click on the Pending tab and schedule activities as needed. |
For more information on the Pending tab, see Scheduling Activities.
| 6. | Click on the Notes tab and then click Add Notes. |
Type any notes you have in the workspace, as needed and then click the Save icon in the top left side of the Notes workspace.
| 7. | Click on the Team tab and complete the team information as needed. |
○ To add a team member, click Add. At the Add Member dialog box, select a user from the drop-down box and type in the user’s role in the Role field.
○ To edit a team member, either double-click on the team member or click on the team member and click Edit, and then make the changes.
○ To delete a team member, click on the team member and then click Delete.
| 8. | Click on the Task tab and complete the tasks properties as needed. |
○ To add a task, click Add and complete the New Task dialog box.
○ To edit a task, double-click on the task or select the task and click Edit.
○ To mark a task Complete, click Complete and at the Complete Task > Options section, select or type 100 in the % completed field.
○ To print a task, select the task and click Print > Print.
○ To delete a task, select the task and click Delete.
| 9. | Click on the Attachments tab and add attachments as needed. |
○ To add an attachment, click Add and complete the New Attachment![]() Any file (such as a Word document) created outside GoldMine and attached as a linked document, or an InfoCenter or email attachment dialog box.
Any file (such as a Word document) created outside GoldMine and attached as a linked document, or an InfoCenter or email attachment dialog box.
○ To delete an attachment, click on the attachment and click Delete.
○ To view an attachment, click View.
| 10. | Click on the Resolution tab to add resolution information to the case, as needed. |
○ To add a note, click Add Note and type the note in the workspace.
○ To search the Knowledge Base, click Search Knowledge Base.
○ To delete a Knowledge base entry, click Remove Knowledge Entry.
| 11. | When an activity or task has been completed, it is moved from the Pending or Tasks tab to the History tab |
| 12. | Click on the Contacts tab to view the contacts associated with this case. |
To Customize the New Record Tabs
After completing the new record, customize the tabs for the record. You can have additional tabs on your system.
TIP: To view the tabs that are off screen, click the left or right arrow at the end of the tabs.
| 1. | Click on the Pending tab and complete the dialog box as needed. |
For more information on the Pending tab, see the GoldMine User’s Guide. or online help.
| 2. | Click on the Notes tab and then click Add Notes. |
Type any notes you have in the workspace, as needed and then click the Save icon in the top left side of the Notes workspace.
| 3. | Click on the Team tab and complete the team information as needed. |
○ To add a team member, click Add. At the Add Member dialog box, select a user from the drop-down box and type in the user’s role in the Role field.
○ To edit a team member, either double-click on the team member or click on the team member and click Edit, and then make the changes.
○ To delete a team member, click on the team member and then click Delete.
| 4. | Click on the Task tab and complete the tasks properties as needed. |
○ To add a team member, click Add and complete the New Task dialog box.
○ To edit a task, double-click on the task or select the task and click Edit.
○ To mark a task Complete, click Complete and at the Complete Task > Options section, select or type 100 in the % completed field.
○ To print a task, select the task and click Print > Print.
○ To delete a task, select the task and click Delete.
| 5. | Click on the Attachments tab and add attachments as needed. |
○ To add an attachment, click Add and complete the New Attachment dialog box.
○ To delete an attachment, click on the attachment and click Delete.
○ To view an attachment, click View.
| 6. | Click on the Resolution tab to add resolution information to the case, as needed. |
○ To add a note, click Add Note and type the note in the workspace.
○ To search the Knowledge Base, click Search Knowledge Base.
○ To delete a Knowledge base entry, click Remove Knowledge Entry.
| 7. | When an activity or task is competed, it is moved from the Pending or Tasks tab to the History tab. Click on the History tab and double-click on an activity or task to view additional details about the history of that item. |
| 8. | Click on the Contacts tab to view the contacts associated with this case. |
| 9. | Save this case by clicking on the Save icon in the toolbar. |
