Managing Data Sources
The Data Source Manager is only accessible while in the Design mode on the Dashboards. To open the Data Source Manager, click the Data sources manager link located below the Objects tree in the pane to the left immediately above the Navigation buttons.
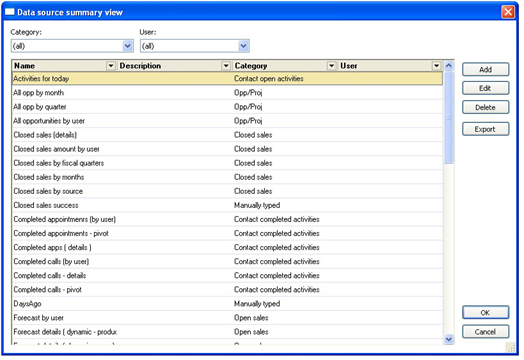
Using the buttons on the Data Source Manager, you can:
■ Add a new Data Source using the New Data Source wizard (see To Create a New Data Source)
■ Edit the selected Data Source in the Edit Data Source dialog box (see To Edit a Data Source).
■ Delete the selected Data Source from the list of available data sources (see To Delete a Data Source ).
■ Export the selected Data Source and save it as an Datasources (*.ds.xml) file (see To Export a Data Source).
To Create a New Data Source
| 1. | On the Data Source Manager, click the Add button to start the New Data Source wizard. |
| 2. | Select the Type of Data and Creation Method. |
NOTE: The Manually Typed data source type refers to one in which the database is not a GoldMine database. You must be familiar with this database in order to enter the SQL query manually.
| 3. | the Name and optional Description, and then click Next. |
| 4. | Select the Security Level from the drop-down list. |
○ None
○ Show ‘n/a’
○ Hide
| 5. | Select the Owner. |
| 6. | Select the Output type: (Table or Matrix) and then click Next. |
| 7. | Specify the Columns to bind to a Dashboard control. |
| 8. | Add fields to the list or modify existing fields using the following options. |
○ Select the maximum number of records to include from the drop-down list.
○ Click Add to add a new entry.
○ Click Edit to modify an existing selected entry.
○ Click Delete to remove a selected entry.
○ Click Up or Down to move the selected entry on the list.
| 9. | Specify the search criteria for the data source. |
○ Click Add to add a new entry.
○ Click Edit to modify an existing selected entry.
○ Click Delete to remove a selected entry.
| 10. | Specify the runtime search criteria for the data source by clicking Add and entering the following information, then click Next. |
○ Enter the Name and choose whether or not to Interpret as String.
○ Choose Field Based or Custom for the search string
○ The Default Value option activates the string entered in the associated text box.
| 11. | Specify how to group and sort the data and then click Next. |
○ Open the Group![]() Fixed set of contact records that meet an initial set of conditions. Once selected, member records subsequently have instantaneous access to the subset. This method can be used instead of filters, to maintain a subset of data. by drop-down list and select an item. Then use the buttons to add, arrange, or delete the list items.
Fixed set of contact records that meet an initial set of conditions. Once selected, member records subsequently have instantaneous access to the subset. This method can be used instead of filters, to maintain a subset of data. by drop-down list and select an item. Then use the buttons to add, arrange, or delete the list items.
○ Open the Sort by drop-down list and select an item. Then use the buttons to add, arrange, or delete the list items.
| 12. | Review the SQL template. |
○ Click the Check button to perform an automated inspection of the SQL query code.
○ Click the Query button to run a preview of the SQL query.
If you want to edit the template manually, check the Edit manually option and then modify the text in the box below.
| 13. | Click Finish to save the SQL template. |
To Edit a Data Source
| 1. | On the Data Source Manager, select the data source on the list to modify. |
| 2. | Click the Edit button to open the Edit Data Source dialog box. |
| 3. | Click the appropriate tab an make your modifications as needed. |
| 4. | Click the Query tab and Inspect the changes. |
○ Click the Check button to perform an automated inspection of the SQL query code.
○ Click the Query button to run a preview of the SQL query.
| 5. | Click Apply to save your changes and OK to close the dialog box. |
To Delete a Data Source
NOTE: If you think you might want to use this data source again in the future, you can Export the data source and use it at a later date to create a new data source (see To Export a Data Source).
| 1. | On the Data Source Manager, select the data source on the list to delete. |
| 2. | Click the Delete button to remove the selected data source. |
| 3. | Click OK the delete the data source. |
To Export a Data Source
| 1. | On the Data Source Manager, select the data source on the list to Export. |
| 2. | Click the Export button open the Save As dialog box. |
| 3. | Browse to the desired location to save the file. |
| 4. | Enter a name for the file and then click Save. |
NOTE: An exported Data Source can be used during the creation of a new Data Source by checking the Import datasource definition from a file option on the first screen of the New Data Source wizard (see To Create a New Data Source).
