Creating Deployment Package for Win 11 Arm64
The instructions below explain how to create a client installation package using the Ivanti Device and Application Control Client Deployment tool.
-
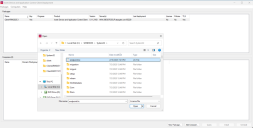
Extract the Client folder from the installation package (e.g., DeviceAndApplicationControl_2025.3.zip\client) and copy it to the machine where the SMC Console is installed.
The Ivanti Device and Application Control Client Deployment tool is installed as part of the SMC Console setup.
-
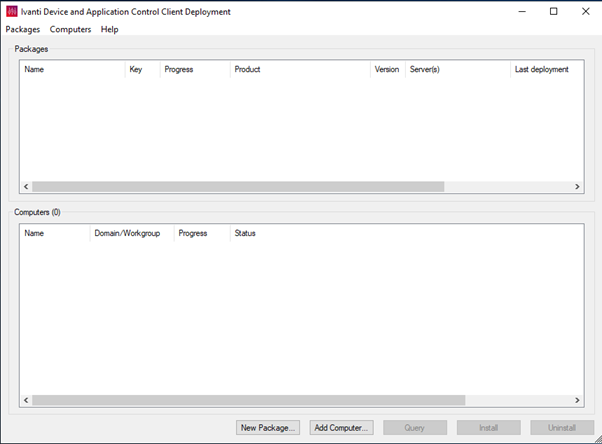
Launch the Client Deployment Tool - Ivanti Device and Application Control.
-
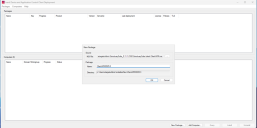
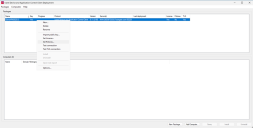
Select Packages and then click on New.
-
Navigate to the 'client' folder and choose the MSI installation file (ARM MSI).
-
Provide a name for the package and then click OK. It is advisable to name the package clearly to reflect its contents and version. For example, ClientARM2025.3.
-
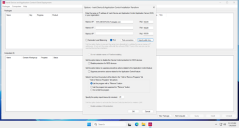
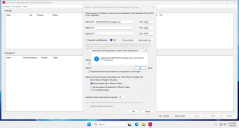
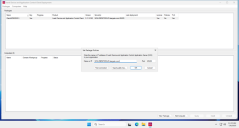
Enter the IP address of the server. If using TLS, the FQDN is required.
-
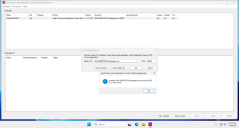
Select Import public key and choose the public key to use. The sx.public.key can be found on the SXS server at C:\Windows\SysWOW64.
-
Test the connection to verify if the settings are correct. If you see the message– Successful, click OK.
The SXS server service must be running for the test connection to succeed.
-
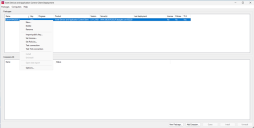
In the main view, right-click the newly created package and select Set License.
-
Navigate to your license file location and select it.
-
In the main view, right-click the newly created package and select Set Policies.
-
Enter the IP address or hostname of your SXS Server (if you are using a TLS connection), then click OK.
You can also click Test Connection to ensure that the server is reachable.
-
The Deployment Tool should now indicate that all requirements for a healthy package are met.
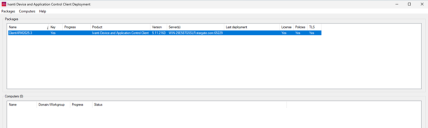
If TLS is not being used, it will simply display No; however, the package will still be usable.
-
For manual installation, locate and copy the entire package folder to drive C:\ on the endpoint where you want to install the client. The folder location is specified in the Directory field when creating a new package.
-
Open the Command Prompt as an Administrator and navigate to the folder location using the command cd c:\actualfoldername (without apostrophes and actualfoldername should be replaced with the actual folder name).
-
Navigate to the c:\clientfoldername directory and execute the following command to install the client:
msiexec /i ClientARM.msi /q TRANSFORMS=ClientARM.mst /L*v %TMP%\setupcltsu.log
Disable the Qualcomm Spectra Camera ISP driver in Device Manager to prevent system crashes (BSOD). Keep it disabled until Qualcomm releases an updated driver.