Authorizing File Execution
An initial scan using the Scan Explorer module allows you to quickly add executable files, scripts, and macros to the Ivanti Device and Application Control database.
Once your initial scan is complete, you create files groups and assign the authorized files to file groups. You manage the files added to the database with the User Explorer and Database Explorer modules by linking file groups to users or user groups. Files not added to the database are designated as unauthorized and are denied execution.
Creating a File Scanning Template
You can create a template to identify new file authorization changes to make when new software is installed.
You can scan for files by creating a template with the following rules:
- Scan all executables matching the pattern *.exe or *.dll in the %SYSTEMROOT% directory and subdirectories.
- Scan all files matching the pattern *.exe or *.dll in the %PROGRAMFILES% directory and subdirectories.
- From the Management Console, select View > Modules > Scan Explorer > Perform New Scan >Create New Template.
The Create New Template dialog opens.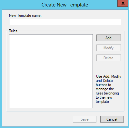
- In the New Template name: field, enter the name for the new template.
- Click Add.
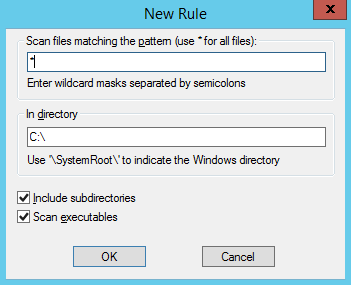
The New Rule dialog opens.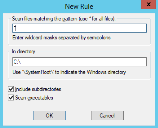
- In the Scan files matching the pattern (use * wildcard for all files) field, enter the name patterns to use for scanning.
- In the In directory field, enter the path name for the directory you want to scan.
- Select one or more of the following options:
- Click OK.
The New rule dialog closes and the rules you define appear on the Rules box. - Click Save.
The Perform New Scan dialog lists the new template in the From Template drop-down list.

Caution: When you specify wildcard masks, for example: *.com, you can miss scanning for files that do not use standard file extensions such as: *.exe, or *.dll, and so forth. The result is that these types of files will not be authorized, which means that these applications will not work or work properly.
|
Option |
Description |
|---|---|
|
Include subdirectories |
Scan subdirectories of the root directory. |
|
Scan executables |
Scan for executable files and ignore all other file types. The scan also searches for 16-bit executables. Attention: If you do not select the Scan Executables option, you must specify the *.exe and *.sys for the matching pattern to scan for these types of files. |
Scanning Files on a Client Computer
You can scan all files on a computer, or you can create a template to scan selected directories or specific file types for example, *.exe, *.com, *.dll, *.ocx, *.sys, *.drv, *.cpl, *.vbs, *.js, to reduce the scan time required.
Prerequisites:
Before you scan a computer, create a file scanning template.
Important: If you are using Application Control with Device Control enabled, you must set the following Device Control permissions before scanning a secondary hard drive.
Device Class: Removable
User: LocalSystem
Permissions: Read
Encryption: Unencrypted (Unencrypted or unknown encryption type)
Bus: All
Drive: Hard Drive
- From the Management Console, select View > Modules > Scan Explorer.
The Scan Explorer window opens. - Click Perform New Scan.
The Perform New Scan dialog opens.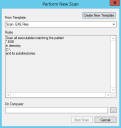
- In the From Template field, select a template from the drop-down list.
- Click the ellipsis
 adjacent to the On Computer field.
- Type the computer name.
- Click Search or Browse.
- Select the computer from the list.
- Click OK.
You can type the computer name directly or use wildcard, such as * and ?.
The Select Computer dialog opens.
- Click Start Scan.
The Perform New Scan dialog opens.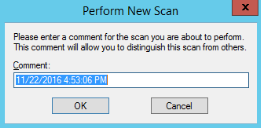
- Enter a name or comment to distinguish this scan in the Comment field.
- Click OK.
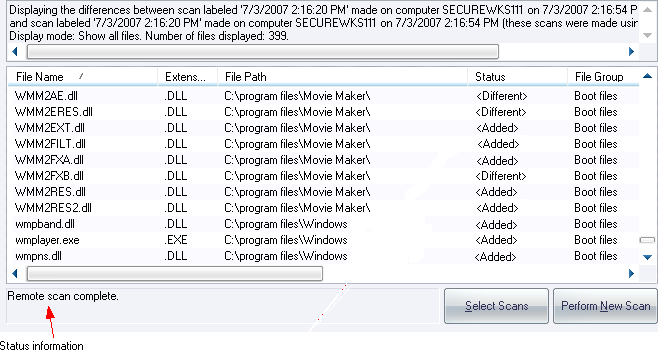
Ivanti Device and Application Control scans the specified file directories, calculates digital signatures for all executable files, scripts, and macros, and adds these digital signatures to the database. The results are shown in the Scan Explorer main window as follows.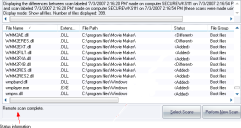


Adding a File Group
File groups simplify the process of administering large numbers of executable, script, and macro files for users. Instead of individually authorizing files, you can logically group files together logically by creating file groups.
- In the Management Console, select View > Modules > Exe Explorer > Explorer > Manage File Groups.
The File Group Management dialog opens. - Click Add File Group.
The Add File Group dialog opens. - Enter the name of the file group in the File Group field.
- Click OK.
The file group is added to the File Groups list. - Click Close.
The file group is added to the list. You can now assign files to the new file group.
You must grant dedicated accounts such as LocalSystem the right to use the appropriate file groups containing services. For example, if you create a Windows File Group where you place all operating system executable files (including Windows services that run with the LocalSystem account), you should grant LocalSystem the right to use this Windows file group.
Assigning Files to File Groups
After you create the necessary file groups and required parent-child relationships, you can assign executable files, scripts, and macros to file groups.
- In the Management Console, select View > Modules > Database Explorer.
- Select the file(s) to assign to a file group.
- Right-click the file selection.
- Select the Assign to File Group option.
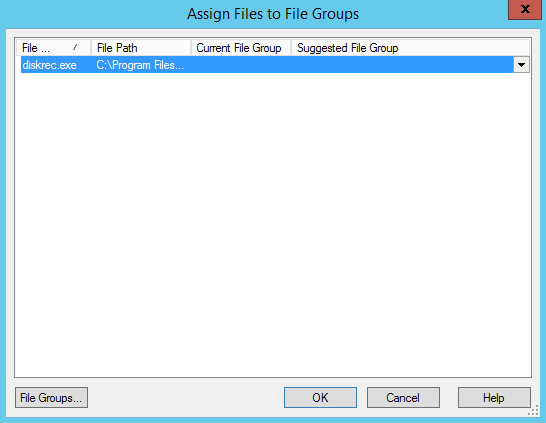
The Assign Files to a File Group dialog opens.
Assign Files to File Groups Columns:
- Select a file group from the drop-down list in the Suggested File Group column.
- Click OK.
The file(s) are now assigned to the designated file group.
|
Column |
Description |
|---|---|
|
File |
Name of the file including extension. |
|
File Path |
Complete file path name, including the drive. |
|
Current File Group |
The file group to which the file currently belongs. Files that are not assigned to a file group are designated as <Not Authorized>. |
|
Suggested File Group |
A proposed file group based on the file name. A file having the same name as another file in the database is suggested to belong to the same file group as the initial file. |
You can assign a script or macro to a file group as a script, as distinguished from an executable file.
Creating Parent-Child Relationships
You administer parent-child relationships between file groups using the Database Explorer Groups tab.
Prerequisites:
You must create parent and child file groups before creating parent-child relationships.
Parent-child relationships may be direct or indirect. A direct relationship exists when a file group has a direct line of descendants between parent and child file groups. All other file group relationships are indirect relationships.
- From the Management Console, select View > Modules > Database Explorer.
The Database Explorer page opens. - Select the Groups tab.
- Select the desired group from the File Groups list.
- To assign a relationship, by selecting a file group from the Relationships list and click one of the following:
- Add child
- Add parent
- Remove
The Type column changes from Available to:
- Child
- Parent
- Child (Indirect)
- Parent (Indirect)
The parent-child relationship associations are shown with one of the following icons indicating the relationship status:
|
Icon |
Description |
|---|---|
|
|
The file group is a parent of the one selected in the File Groups panel. |
|
|
The file group is child of the one selected in the File Groups panel. |
|
|
The file group is an indirect parent of the one selected in the File Groups panel. |
|
|
The file group is an indirect child of the one selected in the File Groups panel. |
|
|
A file group created by an Ivanti Device and Application Control administrator that can be deleted or renamed. |
|
|
A file group created by the program that is blocked and cannot be deleted. |
You cannot delete indirect relationships, you must first proceed to the directly related file group and then remove the relationship.
The following examples demonstrate hierarchical parent-child file group relationships.
Example:
The file group 16 Bit Applications is the parent of Accessories, and also has indirect child Alternative and CAD software: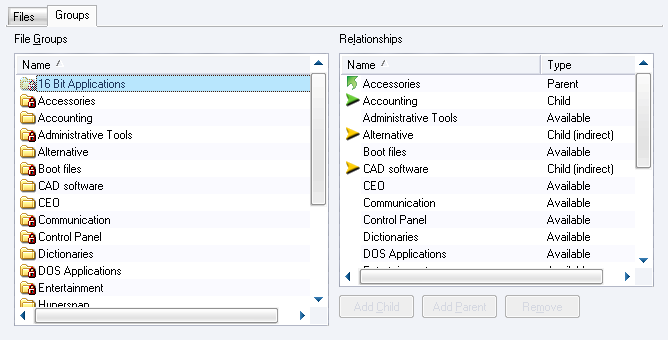
The File Group Accounting is the child of Marketing who also has an indirect child Payroll: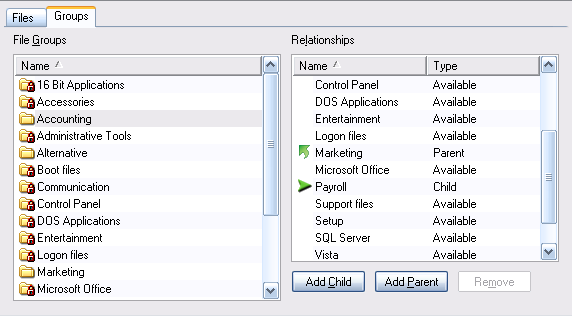
This is the consequence of the following parent-child assignments: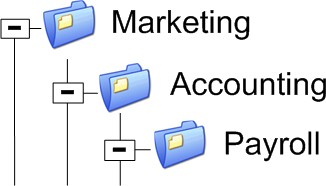
When assigning the file group Payroll to a user or user group; there is also an indirect assignment because of this relationship:
You can view indirect parent-child relationship assignments by using the File Groups by User tab of the User Explorer module.
Assigning File Groups to Users
After creating file groups and parent-child relationships you want to use, you can assign file groups to users or user groups.
- In the Management Console, select View > Modules > User Explorer.
The User Explorer window opens. - Select the File Groups by User tab.
- In the Users, Groups, Computers and Domains panel, select a user or user group.
- Select one or more file groups from the Not Authorized list.
- Select one of the following options:
|
Command |
Action |
|---|---|
|
Authorize |
Adds the selected file group to the list of file groups directly authorized for the selected user or user group. |
|
Authorize All |
Adds the names of file listed as Not Authorized to file groups directly authorized for the selected user or user group. |
Changes to file authorizations or user membership for a file group can remove users that are indirectly authorized for a file group.
The user or user group is now assigned to the designated file group.
After Completing This Task
You can send the updated authorization(s) immediately to the client computers using the Control Panel > Tools > Send Updates option. If you do not send updates to protected clients, they automatically receive updates when they restart or at next user log in.
Sending Updates to All Computers
After you define or update device permissions or file permissions, you can send the information to all client computers immediately. Otherwise, updated information will automatically upload the next time a user logs in or the computers are restarted.
- From the Management Console, select Tools > Send Updates to All Computers.
The Send updates to all computers dialog opens. - Select one of the following options from the Send updates to all computers dialog.
|
Option |
Description |
|---|---|
|
Yes |
Immediately updates connected computers. Ivanti Device and Application Control can take a long time to send updates depending on the number of computer connections. The Management Console dialog remains open until the Application Server finishes sending the updates. |
|
No |
Asynchronously updates connected computers. The Management Console dialog closes while the Application Server finishes sending the updates. You can continue working with the console while the update is done in the background. |
|
Cancel |
Closes the Send updates to all computers dialog and halts the update process. |
Updates are distributed to all computers running the Ivanti Device and Application Control clients that are registered in the Application Server (s) online table(s). A message appears in the Output window when the updates are complete.
Remember: Any computer that is switched off, locked, or disconnected from the network receives the updates at the next network connection.
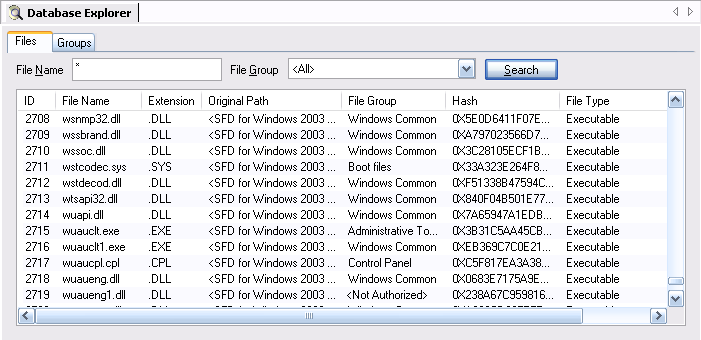
Viewing Database Records
The Database Explorer module displays a list of the executable, script, and macro files, digital signatures, and assigned file groups stored in the Ivanti Device and Application Control database.
- From the Management Console, select View > Modules > Database Explorer.
The Database Explorer page opens.
- Select the Files tab.
- Type a file name in the File name field. You can use wild cards (* and ?).
- Select a file group from the File Group list.
- Click Search.
You can view the files stored in the database including the digital signature and file group assignment.
Caution: Your request may process slowly when you have a large Ivanti Device and Application Control database.