Audit Mode
Are you unsure of the kind of policy you require? Do you want to know what users are plugging in and what they are copying? And would you like to see all of this in some nice reports? If so, Audit Mode will help you and will also help you to determine a policy.
This section isn’t about testing the features – you should do that separately – but describes the best practice for when you first set up the system. Audit Mode enables you to see how good or bad things really are without blocking or denying access at first. You can then use the information you gain to create a policy, add devices, and then lock down in an appropriate, considered manner. Audit Mode enables you to test that the client is compatible with other endpoint software without blocking or denying any devices just yet, but just listening and learning – while logging everything that inserted and all file movements.
The agent needs to be deployed for Audit Mode, so make sure that the solution is installed and operational. Also it is easier to test policy on a few endpoints – maybe endpoints you can visibly see so you can see how the policy changes look on the endpoint.
Configuring Audit Mode
Firstly, we are going to switch on logging. This is off by default.
To switch on logging:
- In the console, on the Tools menu, click Default Options.
The Default Options dialog appears. - On the Computer tab, select Device log.
- Clear the Disabled check box, then in the Device log drop-down, select Enabled and click Apply.
This ensures things are logged and that the Log Explorer shows useful information.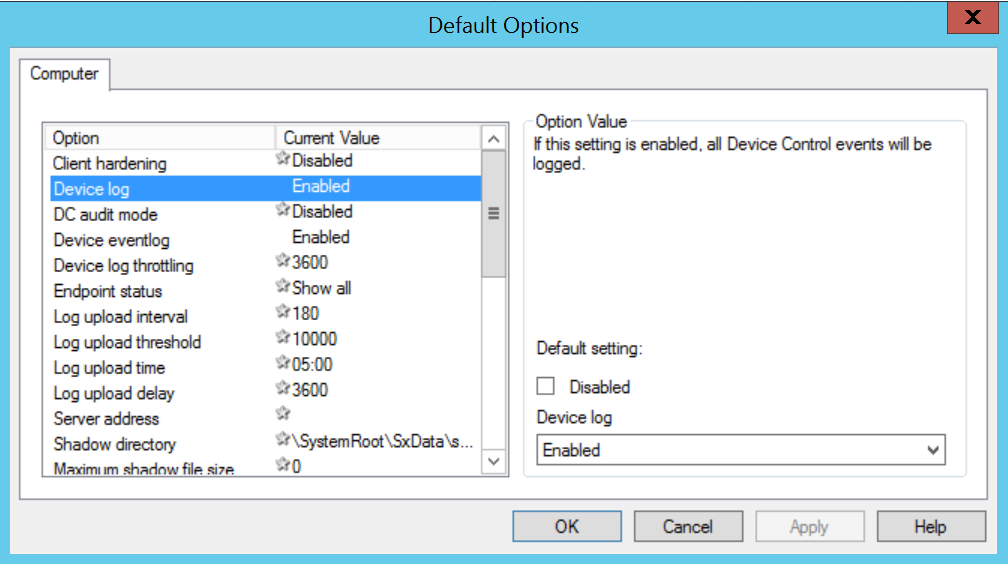
When you first install Ivanti Device Control you want to put the system into non-blocking mode: you don't want to inadvertently stop people from doing what they need to do.
To configure non-blocking mode:
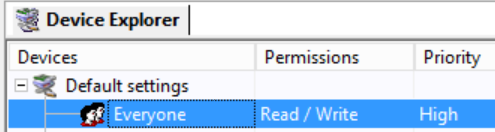
- In the Control Panel of the console, click Device Explorer.
- At the top of the Device Explorer tree, right click Default Settings then click Add/Modify Permissions.
The Permissions dialog appears. - Add Everyone and give them Read and Write permission:
The next step is to switch on shadowing to create a log of all files transferred by users that you can see in the Log Explorer.
To switch on shadowing:
- In Device Explorer, right-click Removable Storage Devices, then click Add Shadow.
- Add the Everyone group, then select FILENAME only on read / write and keep all the other defaults.

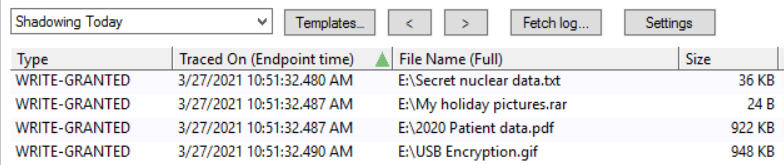
You can see the results from the audit mode in the Log Explorer.
The Shadow report shows files transferred:
Devices Connected report:

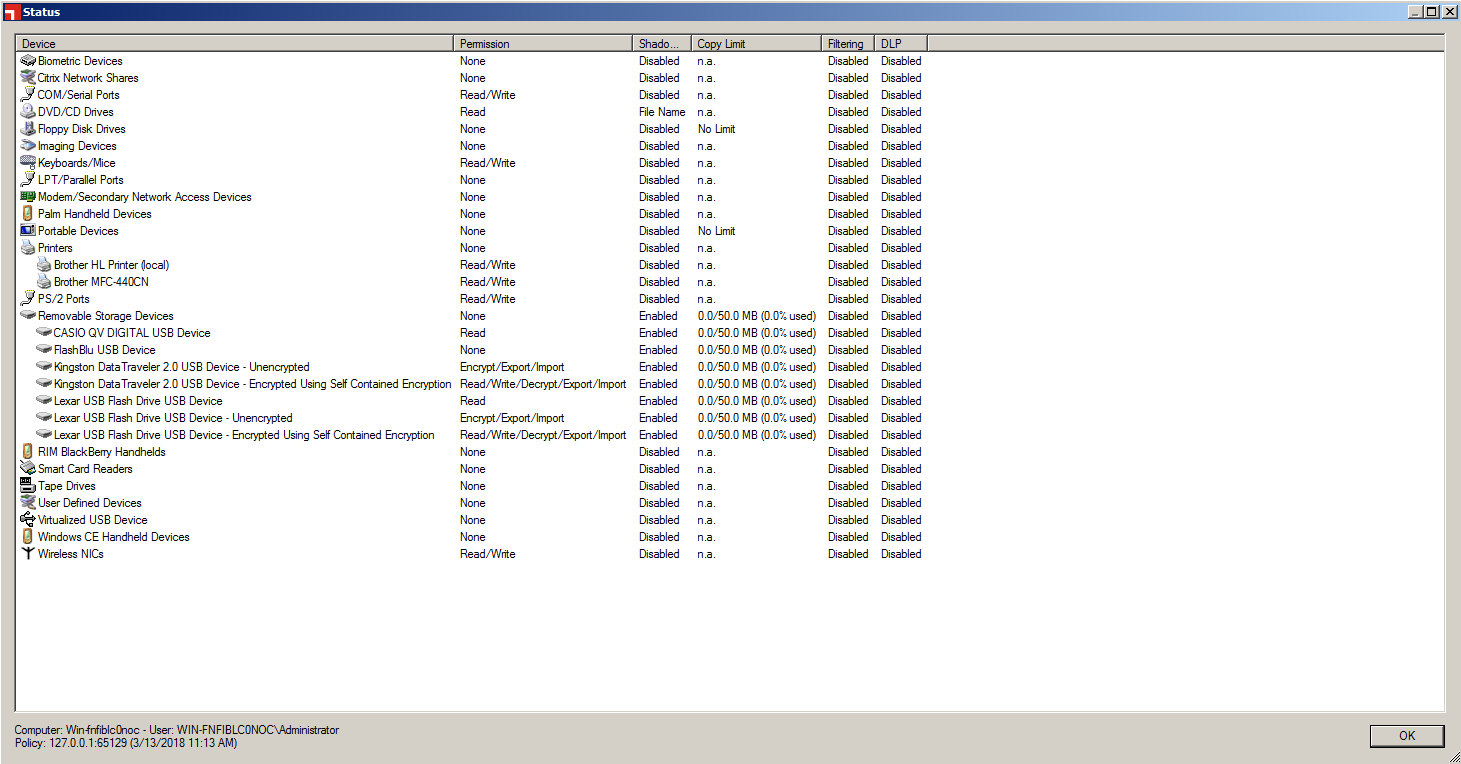
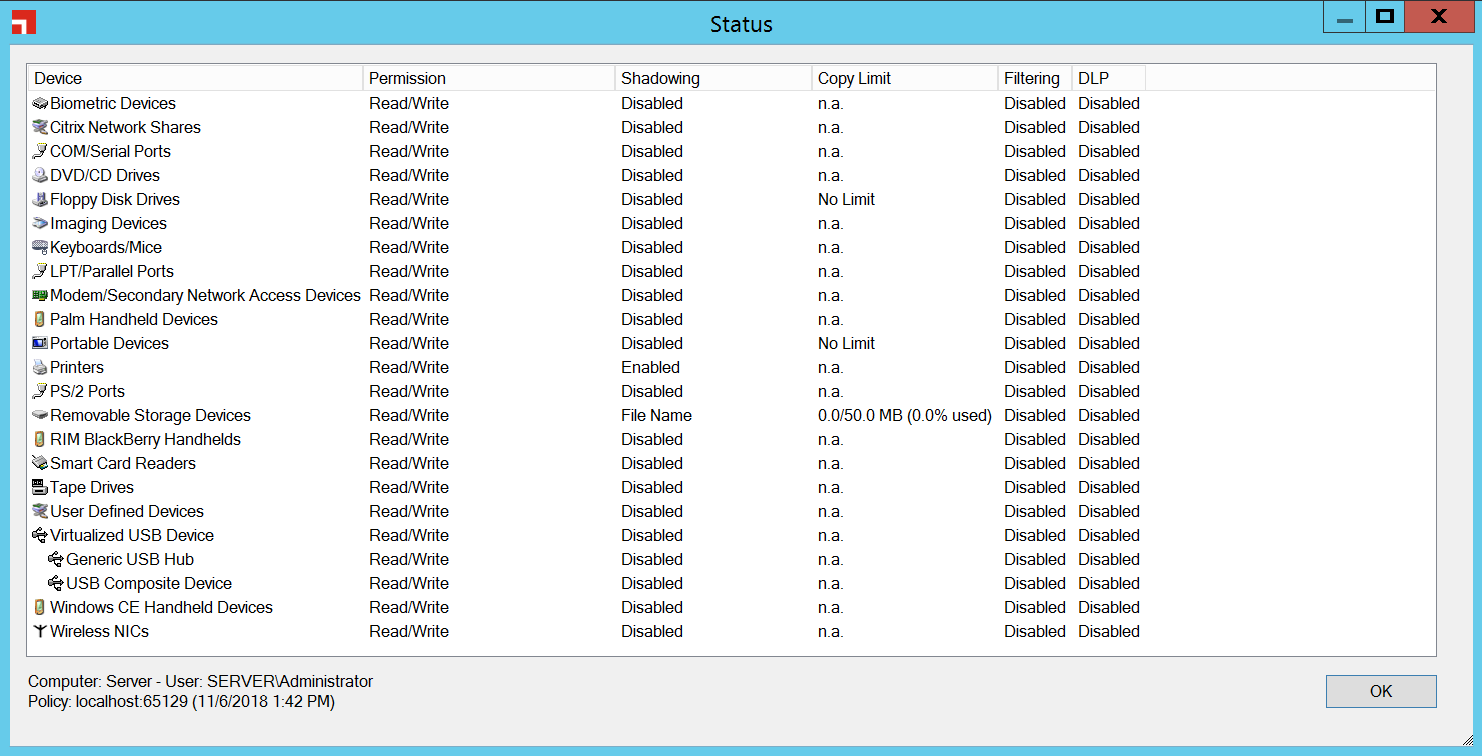
When all of that is complete, your Agent Status (on your test endpoint when installed) has Read/Write all of the way down with File Name set for Shadowing.
Remember, this mode isn't for testing features such as encryption, but provides a good look at what is going on in your environment – this information is vital in helping to create a policy.
When you start to create a whitelist, add encryption, use the copy limit feature, and so on and then configure Lockdown Mode, you will have something like the image below. But that is for the future.