Create Workflows and Groups
You and your organization need to determine the best practices for patching your organization. You'll need to do some research about your organization to determine how you want to group them in Endpoint Security, as well as who will be doing that work, what policies are applied to those groups, etc.
To Create Workflows and Groups:
- Plan your Ivanti Patch and Remediation workflow by collecting the following information:
- Survey your network topography. Categorize your endpoints based on criteria such as:
- Endpoint Function: Is the endpoint a public facing server? A domain controller? Group endpoints that have a similar function together.
- Endpoint Data: Endpoints containing sensitive data (like customer information) should be grouped together.
- Attack Likelihood: Security threats target specific endpoints. Group these endpoints so that you can run more restrictive policies on them.
- Plan patching policies:
- Monitor endpoint operating hours. You need to determine when your endpoints are used for mission-critical tasks, and when they are safe to patch without negatively impacting your business.
- Determine endpoint ownership. Each endpoint has various stakeholders attached to it, and you'll need to work with them throughout the patching process. Some examples include:
- IT ownership: Who is the IT admin responsible for administration of the endpoint?
- User: You need to keep workstation end users aware of administration tasks that impact them.
- Management: You'll need to keep management informed of patching progress.
- Business Owner: Which parts of the business are impacted if a server needs to be rebooted to apply patches? You need to communicate the patching schedule to the business owners to confirm that business operations are not adversely affected.
- Survey your network topography. Categorize your endpoints based on criteria such as:
- Create Custom Endpoint Security Groups. After surveying your network topography, use the results to recreate that topography in Endpoint Security.
These groups should mimic how you plan to deploy patches to your organization. For example, you could create a test group (the first group that you'll deploy to test new patches) and a group for each department in your organization.
- From the Endpoint Security Console, select Manage > Groups.

- From the Groups browser, select Custom Groups.
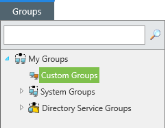
- From the View list, select Group Membership.

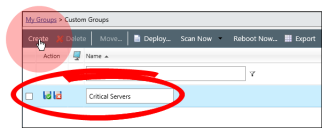
- From the toolbar, click Create. Then name your new group something that describes it, and then click the Save icon.
- From the View list, select Endpoint Membership.

- From the Group browser, select your new group.
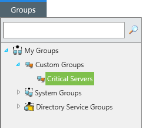
- From the toolbar, click Membership.
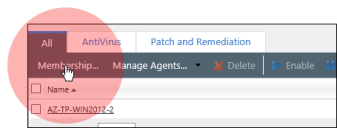
- Add the appropriate endpoints to the group.
Repeat steps e. through h. for each group you created.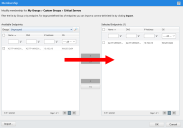
Repeat steps a. through d. to create the number of groups needed to mimic your topography.
- From the Endpoint Security Console, select Manage > Groups.
- Create Agent Policy Sets.
Agent Policy Sets are a collection of individual rules, called policies, that govern endpoint behavior. We're interested in one particular policy at the moment called Hours of Operation (or HOP). This policy determines when endpoints can communicate with the Endpoint Security Server and apply patches. You can also use Agent Policy Sets to determine other endpoint behaviors that we're going to skip over for now. - From the View list, select Agent Policy Sets.

- From the Group browser, make sure that one of your custom groups is selected.

- From the toolbar, click Create.
- Name the Policy Set.
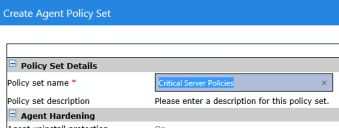
- Scroll down to Patch Agent Communication. Click the Define button next to Hours of Operation.
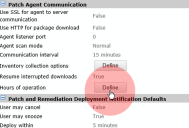
- Use the dialog that opens to set Agent Hours of Operation. These options set the hours that endpoint patching is permitted. We recommend only patching workstations during hours that staff aren't working. For servers running business applications, check with your business owners to negotiate server hours of operation and whether there are any restrictions that must be followed.
You can use Endpoint Security: Wake on LAN to boot offline endpoints.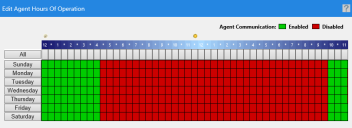
- Set any other policies that you want to set, and then click Save.
For more information on what each policy does, refer to the following guides available on Product Documentation.- Endpoint Security User Guide
- Ivanti Patch and Remediation and Remediation User Guide
- Repeat steps a. through g. for each group that you created.
- Create Endpoint Security Users. You likely won't be the only person in your organization using Endpoint Security. Therefore, you'll need to create additional logins and assign them access rights for the different system features that the user is entitled to.
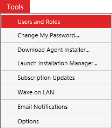
- From the Navigation Menu, select Tools > Users and Roles.
- From the Users tab, click the Create button. Begin completing the dialog that opens to create a new user.
We recommend adding domain users as new Endpoint Security users.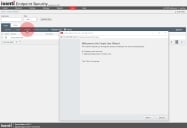
- When you get to the User Roles page (or Create User page, depending on whether you're adding a local or domain account), select a User Role, which grants the user access to different Endpoint Security pages and features.

These roles include:
- Administrator: Entitles the user to full access in the Endpoint Security Console.
- Manager: Entitles the user to all Endpoint Security pages and features with the exception of Endpoint Security Server upgrades. Suitable for most IT administrators.
- Operator: Entitles the user to basic Endpoint Security features and reports. Suitable for managers who want information about their network.
- User: Entitles the user to view Endpoint Security pages, but not use them meaningfully. Suitable for end users.
- Need another role not described here? Create a custom role from the Roles tab.
- Finish and close the wizard.
Groups and Agent Policy Sets are created for your organization. Continue to the next section.
