Creating Remote Accounts
When installing Ivanti Endpoint Security using a remote instance of SQL server, you must first create two user accounts on the server hosting your instance: a Web client account and a service account. Ivanti Endpoint Security uses these accounts to operate components critical to the system. Without these accounts, Ivanti Endpoint Security will be unable to access the remote SQL Server.
Create these accounts on the server hosting your SQL Server instance.
If using domain accounts, these accounts do not have to be created locally. However, any domain account used as the service account must be added to the database server's administrators group. To use a domain account as a service account, complete this task, skipping steps 3-13.
- Log in to the server hosting your SQL Server instance using either a local or domain user account with system administrator privileges.
If your SQL Server instance uses mixed mode authentication, ensure that the user account you log in with supports SQL Server login. - Open the Computer Management dialog.
- Open Windows Control Panel.
- Open Administrative Tools.
- Open Computer Management.
The Computer Management dialog opens. - Expand the tree to the Users folder (System Tools > Local Users and Groups > Users).
- Right-click the Users folder.
- Select New User.
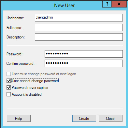
The New User dialog opens.
- In the User name field, type the desired Web client account name (or service account name).
Ivanti recommends clientadmin for the Web client account, and serviceadmin for the service account. - In the Password field, type the desired password.
- In the Confirm Password field, retype the Password.
- Ensure the User must change password at next logon check box is cleared.
Important: When creating these accounts, failure to clear the User must change password at next logon will deny you access to the Ivanti Endpoint Security Web site following installation.
- Select the Password never expires check box.
- Click Create.
The Web client account is created. - Repeat steps 5 through 11 to create the service account.
The service account is created. - Click Close.
- Expand the directory tree structure to the Groups folder (System Tools > Local Users and Groups > Groups).
- In the main pane, double-click Administrators.
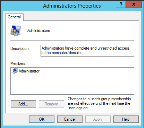
The Administrators Properties dialog opens.
- Click Add.
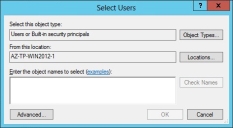
The Select Users dialog opens.
- In the Enter the object names to select field, type your service account name.
- Click OK.
The service account is added to the Administrators group. - Click OK.
The Web client and service accounts are created.