Creating an Enterprise Patch Distribution Website
When using Community Subscribe and Community Publish wizards, a web server (Apache, IIS, etc.) is required. Ivanti recommends using an Apache server.
Installing the Apache Server
Installing an Apache server is the first step in creating an enterprise patch distribution website. Apache server version 2.2 and higher are supported.
Prerequisites:
At least 50MB disk space is required for the Apache server installation. After installation, Apache occupies 10MB of hard disk space. The actual space requirements for Apache depends on the configuration, the third-party module, and the library you select to account for the logs and cache files.
- Download the latest installation software from the Apache website (https://www.apache.org/).
- Double-click the installation file.
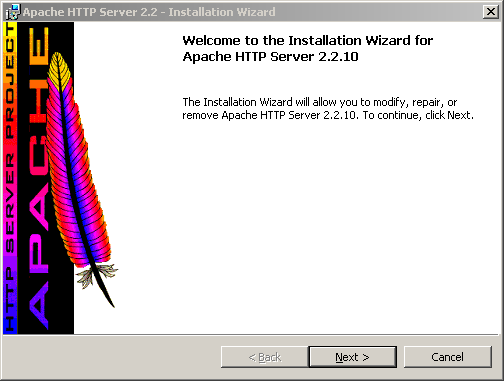
The Apache HTTP Server Installation Wizard opens.
- Click Next.
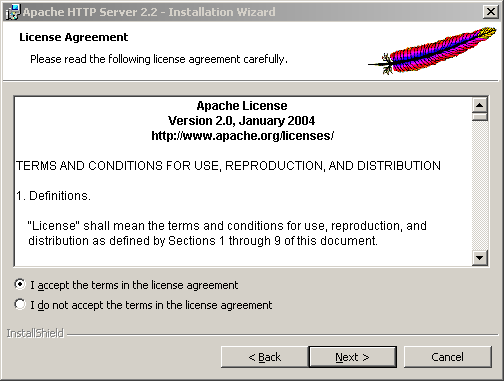
The License Agreement page opens.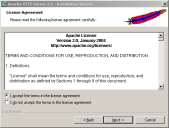
- Accept the terms of the license agreement if you wish to proceed with the installation process.
- Select I accept the terms in the license agreement.
- Click Next.
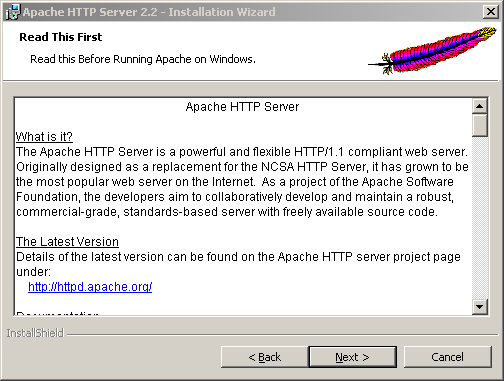
The Read This First page opens.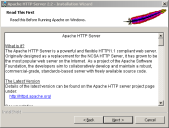
- Click Next.
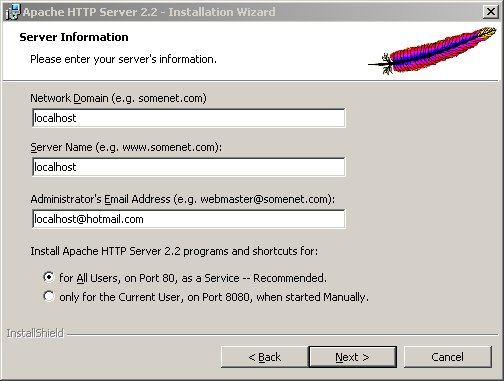
The Server Information page opens.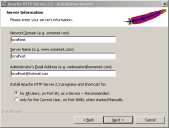
- Specify the server information.
- Type localhost in the Network Domain field.
- Type localhost in the Server Name field.
- Type the administrator's email address in the Administrator's Email Address field.
- Select for All Users, on Port 80 as a Service -- Recommended.
- Click Next.
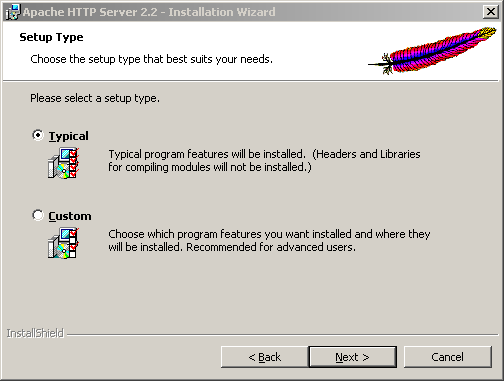
The Setup Type page opens.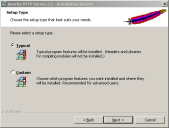
- Select the type of setup that you want to use. The default option is Typical.
- Click Next.
The Destination Folder page opens.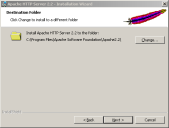
- Select the installation folder for the server.
Click Change to install the server in a location that you specify. - Click Next.
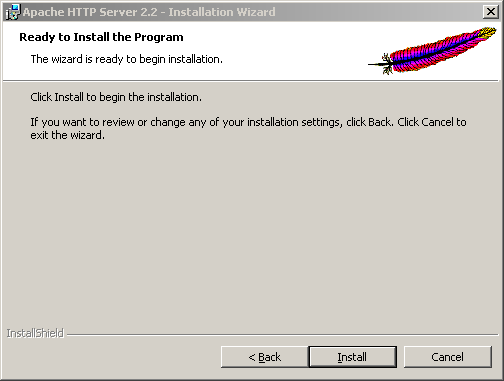
The Ready to Install the Program page opens.
- Click Install.
The Installation Wizard Completed page opens.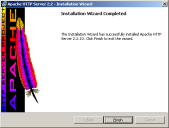
- Click Finish.
The Apache HTTP Server Installation Wizard closes.


The Apache HTTP server is successfully installed at the selected location.
Configuring the Apache HTTP Server
You can configure the Apache HTTP server to meet your specific requirements. To configure the server, edit the httpd.conf file in a text editor.
- Create a copy of the httpd.conf file for backup.
- Open the httpd.conf file.
By default, this file is located in C:\Program Files\Apache Software Foundation \Apache2.2\conf\. - Modify the default port Listen 80 to any other available port.
- Select File > Save.
The Apache HTTP server configuration is changed.
Starting the Apache Server Service
You can start the Apache HTTP server by clicking on the desktop icon or from the Windows Start menu.
- Select Start > Programs > Apache HTTP Server 2.2.
The Apache HTTP Server opens. - Click Monitor Apache Servers.
A small red icon appears in the taskbar. - Click the red icon in the taskbar.
The Apache Server Monitor window opens.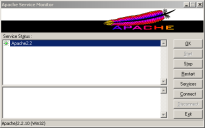
- Select a service.
- Click Start.
The selected service becomes active.
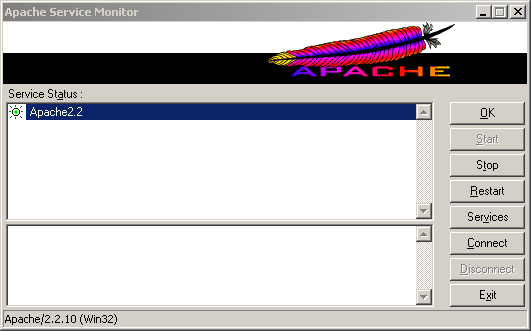
You can begin using the selected Apache service.
Testing the Apache Server
You must test the Apache server that you have installed before creating the enterprise patch distribution website. Testing is performed by trying to get a successful response from the localhost.
- Open a web browser window.
- Type http://localhost:8080/.
You can also type http://localhost:8080/index.html.
Using the HTTPS connection type is not recommended. If you must use the HTTPS connection type, the SSL needs to be configured and the keys will need to be imported into the cache on the machines running the Ivanti Content Wizard.
A success message is displayed.
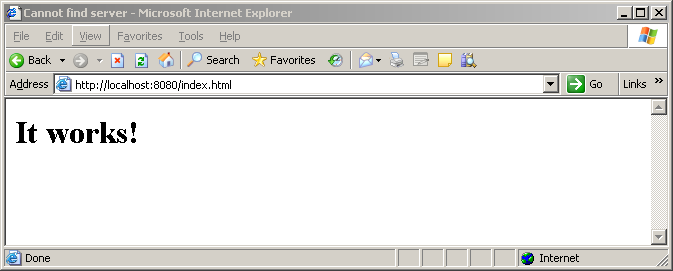
The Apache HTTP server is successfully tested.