Configuring Endpoints for Discovery
For Ivanti Endpoint Security to discover Windows endpoints, they must have both network discovery and file sharing enabled. Target endpoints without these features enabled will not be discovered.
Note: If your organization uses a third-party firewall:
- Do not complete the steps in this procedure for creating Windows Firewall exceptions. Your third- party firewall makes them unnecessary.
- You must create exceptions for Ivanti Endpoint Security within you third-party firewall. For additional information, refer to Port and ICMP Requirements for an Agent Management Job.
You can perform this procedure on endpoints with the following operating systems:
- Windows 10
- Windows 8.1
- Windows Server 2019
- Windows Server 2012 R2
- Windows Server 2012
First, ensure that the services necessary for successful discovery scanning are started.
- Open Administrative Tools.
- Double-click Services.
The Services dialog opens. - Ensure the necessary services are started.
The following list itemizes the services that must be started for job completion.In environments that use a third-party firewall, ensure the Windows Firewall service is instead disabled.
- DCOM Server Process Launcher
- Remote Procedure Call (RPC)
- Server
- Windows Firewall
- Windows Management Instrumentation
- Right-click the applicable service and select Properties.
The properties dialog for the service opens. - Ensure the Startup type list is set to Automatic. If edits are necessary, click Apply after selecting Automatic from the list.
- Click Start.
The service starts. - Click OK.
The properties dialog for the service closes. - If necessary, repeat the sub-steps for each unstarted service.
- Close the Services dialog and the Administrative Tools dialog.
Tip: Leave Control Panel open.
- Next, configure your Network Discovery and (optionally) Sharing settings. The discovery setting allows the endpoint to be seen by the Ivanti Endpoint Security server during discovery scanning.
- From Control Panel, click Network and Internet.
Control Panel opens to the Network and Internet options. - Click Network and Sharing Center.
Control Panel opens to the Network and Sharing Center. - Click Change advanced sharing settings.
The Change sharing options for different network profiles window opens. - Ensure Network discovery is enabled.
Enabling this setting makes the endpoint publicly known within the network.- Expand one of the following network locations:
- Private
- Guest or Public
- Domain
- Scroll to Network discovery.
- Ensure Turn on network discovery option is selected.
- Ensure Turn on automatic setup of network connected devices option is cleared.
- If necessary, click Save Changes.
- Repeat these steps for each profile section.
Endpoint Security uses the information shared by this setting to return more detailed information about the endpoint during discovery scanning.
- Expand one of the following network locations:
- Ensure File sharing is enabled.
- Expand one of the following sections:
- Private
- Guest or Public
- Domain
- Scroll to File and printer.
- Ensure Turn on file and printer sharing option is selected.
- If necessary, click Save Changes.
Repeat these steps for each profile section.
- Expand one of the following sections:
- Close the Change sharing options for different network profiles window.
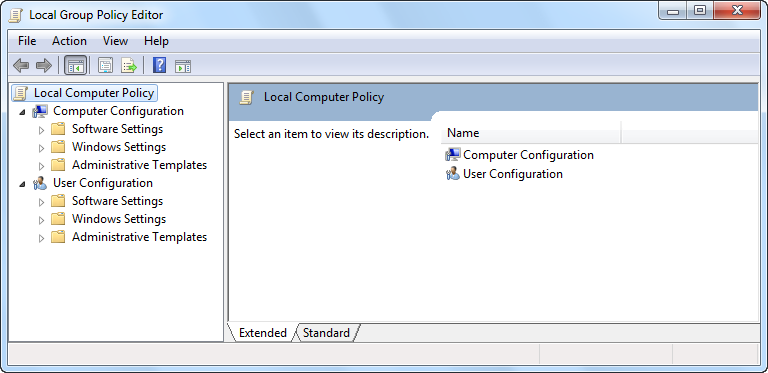
- Open a run prompt.
- Type gpedit.msc in the Open field and press ENTER.
The Local Group Policy Editor opens. - Windows Firewall: Do not allow exceptions
- Windows Firewall: Allow inbound file and printer sharing exceptions
- Windows Firewall: Allow ICMP exceptions
- Expand the local computer policy tree to Computer Configuration > Administrative Templates > Network > Network Connections > Windows Firewall > Domain Profiles. Ensure the Domain Profiles folder is selected.
- Disable the Windows Firewall: Do not allow exceptions setting.
- From the main pane, right-click Windows Firewall: Do not all exceptions and select Edit (or Properties).The setting dialog opens.
- Ensure the Disabled option is selected.
- Click OK.
- [Optional] Configure the Windows Firewall: Allow inbound file and printer sharing exceptions setting.
Tip: Enable this setting if you turned on File and Printer Sharing earlier in the procedure.
- From the main pane, right-click Windows Firewall: Allow inbound file and printer sharing exceptions and select Edit (or Properties).
The setting dialog opens. - Ensure the Enabled option is selected.
- [Optional] Define an IP range in the Allow unsolicited incoming messages from field. Ivanti recommends defining this field using your Ivanti Endpoint Security Server IP address.
To define a range, you may use the following syntax. This input is not validated.
- * (any IP address)
- 10.3.2.0/24 (specific Class C subnet)
- localsubnet (for local subnetwork access only)
- Click OK.
The Windows Firewall: Allow inbound file and printer sharing exceptions setting is configured for discovery scanning. - Configure the Windows Firewall: Allow ICMP exception setting.
- From the main pane, right-click Windows Firewall: Allow ICMP exceptions setting and select Edit (or Properties).
The setting dialog opens. - Ensure the Enabled option is selected.
- Within Options, ensure the Allow inbound echo request check box is selected.
- Within Options, ensure all other check boxes are cleared.
- Click OK.
The Windows Firewall: Allow ICMP exceptions setting is configured for agent management.
- From the main pane, right-click Windows Firewall: Allow ICMP exceptions setting and select Edit (or Properties).
- Windows Firewall: Do not allow exceptions
- Windows Firewall: Allow inbound file and printer sharing exception
- Windows Firewall: Allow ICMP exceptions
- Expand the local computer policy tree to Computer Configuration > Administrative Templates > Network > Network Connections > Windows Firewall > Standard Profile. Ensure the Standard Profile folder is selected.
- Disable the Windows Firewall: Do not allow exceptions setting.
- From the main pane, right-click Windows Firewall: Do not all exceptions and select Edit (or Properties).
The setting dialog opens. - Ensure the Disabled option is selected.
- Click OK.
The Windows Firewall: Do not allow exceptions setting is configured for agent management.
- From the main pane, right-click Windows Firewall: Do not all exceptions and select Edit (or Properties).
- [Optional] Configure the Windows Firewall: Allow inbound file and printer sharing exceptions setting.
Tip: Enable this setting if you turned on File and Printer Sharing earlier in the procedure.
- From the main pane, right-click Windows Firewall: Allow inbound file and printer sharing exceptions and select Edit (or Properties).
The setting dialog opens. - Ensure the Enabled option is selected.
- [Optional] Define an IP range in the Allow unsolicited incoming messages from field. Ivanti recommends defining this field using your Ivanti Endpoint Security Server IP address.
To define a range, you may use the following syntax. This input is not validated.
- * (any IP address)
- 10.3.2.0/24 (specific Class C subnet)
- localsubnet (for local subnetwork access only)
- Click OK.
The Windows Firewall: Allow inbound file and printer sharing exceptions setting is configured for discovery scanning.
- Configure the Windows Firewall: Allow ICMP exception setting.
- From the main pane, right-click Windows Firewall: Allow ICMP exceptions setting and select Edit (or Properties).
The setting dialog opens. - Ensure the Enabled option is selected.
- Within Options, ensure the Allow inbound echo request check box is selected.
- Within Options, ensure all other check boxes are cleared.
- Click OK.
The Windows Firewall: Allow ICMP exceptions setting is configured for agent management.
- From the main pane, right-click Windows Firewall: Allow ICMP exceptions setting and select Edit (or Properties).
- Close the Local Group Policy Editor (or the Group Policy Object Editor).
- 445/TCP
- 139/TCP
- 135/UDP
- 137/UDP
- From a Command Prompt, type net share and press ENTER.
The endpoint network shares are listed. - Ensure that the following shares are listed in the Share name column.
- C$
- ADMIN$
If they are already listed, proceed to the next step. If these shares are not listed, complete the following sub-steps to enable them. If one of the necessary shares is enabled but not the other, only enable the share that needs to be enabled.
- From the Command Prompt , type the necessary command(s) to enable any required network shares.
- To enable the C$ share, type NET SHARE C$=C and press ENTER.
- To enable the ADMIN$ share, type NET SHARE ADMIN$ and press ENTER.
You have enabled the required share(s). All enabled shares remain active until the system reboots.
- From the Command Prompt , type the necessary command(s) to enable any required network shares.
- Close the Command Prompt.
The Command Prompt closes.
If all of the listed services required for your configuration purposes have a Server status of Started, continue to the next step. If any of the listed services for your configuration purposes are not started, complete the following sub-steps to start them.
Next, ensure the Windows Firewall is configured to allow exceptions for discovery scans. A Windows Firewall that does not allow exceptions will blocks pings and other discovery scan processes. Ensure that firewall exceptions are in place for successful discovery scanning.
Create the firewall exceptions using the Local Group Policy Editor. Create exceptions for both the standard and domain profiles.
In environments using a third-party firewall, do not complete the steps to create Windows Firewall exceptions. Instead, create exceptions in your third-party firewall. For additional information, refer to Port and ICMP Requirements for an Agent Management Job.
Once you have selected the domain profile, you must configure the following firewall exception settings (and their subsettings) for discovery purposes.
The following steps fully explain how to configure each setting.
The Windows Firewall: Do not allow exceptions setting is configured for agent management.
After configuring firewall exceptions for the domain profile, you must also complete identical steps to configure firewall exceptions for your standard profile.
Configure the following settings for discovery purposes:
The following steps fully explain how to configure each setting.
Note: The creation of Windows Firewall exceptions opens the following ports, which are required for job completion:
Finally, complete configuration of your endpoint by ensuring the C$ and ADMIN$ network shares are shared. Enabling these shares lets the Ivanti Endpoint Security server access your endpoint.
The endpoint is configured for discovery.