Configure Endpoints to Use the Caching Proxy
You must configure the agents on your endpoints to use the Caching Proxy server. We will also deploy some content to a small number of endpoints to test it.
-
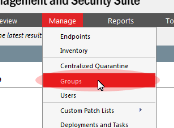
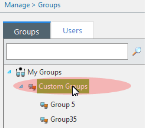
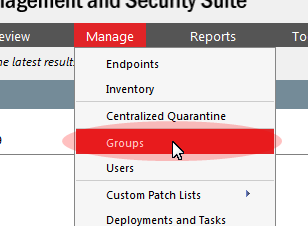
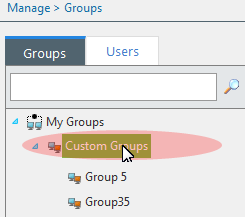
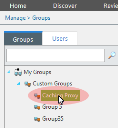
From the Navigation menu, select Manage > Groups.
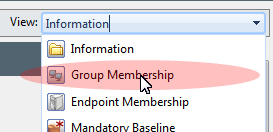
-
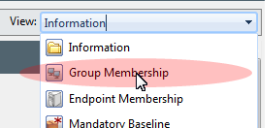
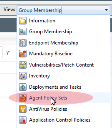
From the View list, select Group Membership.
-
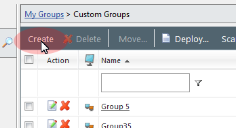
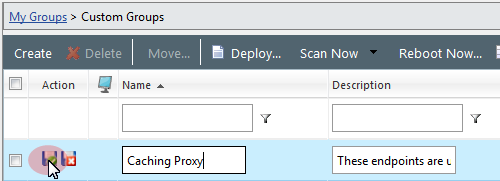
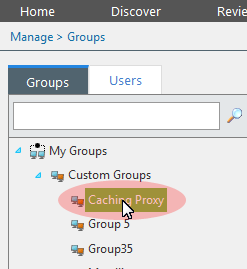
In the navigation tree, select Custom Groups.
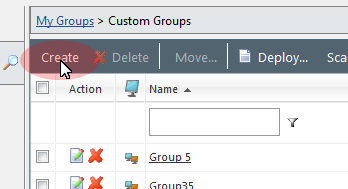
-
Click Create.
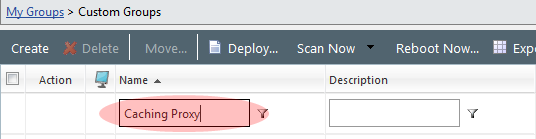
-
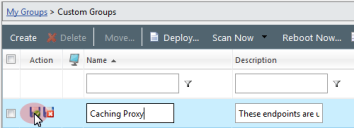
In the Name field, type a name for the group. In this example we will use Caching Proxy.

-
Type a brief description about the group in the Description field. In this example we will write "These endpoints are using the caching proxy server".

-
Click the Save icon associated with the new group.

-
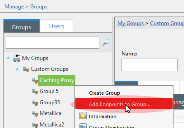
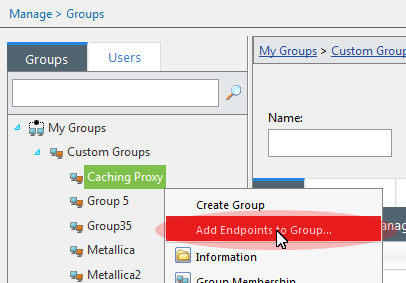
In the navigation tree, right-click on the Caching Proxy custom group and select Add Endpoints to Group. The Memberships dialog appears.
-
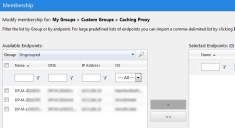
Search for and select the endpoints you want to add to this group, then click OK.

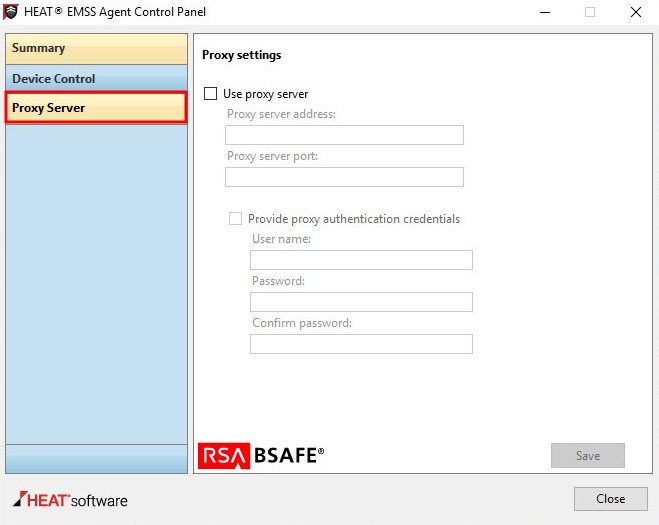
FastPath only works with endpoints with the Patch & Remediation module installed.
Those endpoints without it can be configured using their Agent Control Panel (Proxy Server section).
-
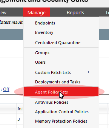
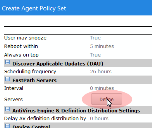
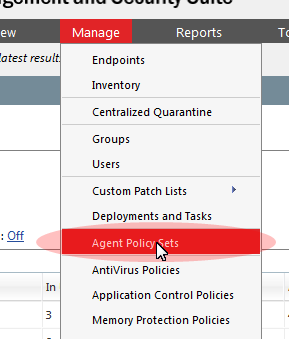
From the Navigation Menu, select Manage > Agent Policy Sets.
-
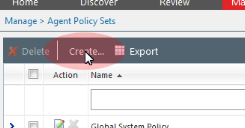
Click Create. A dialog for creating an agent policy set opens.
-
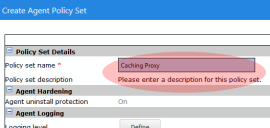
In the Policy Set Details section, enter a Policy set name and Policy set description.
-
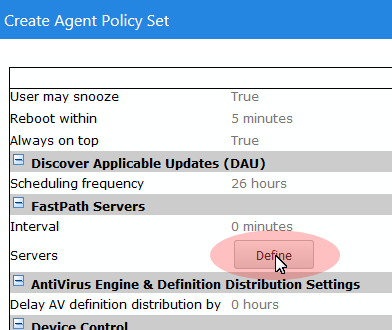
Scroll down to the FastPath Servers section and click Define. The Edit FastPath Servers dialog opens.
-
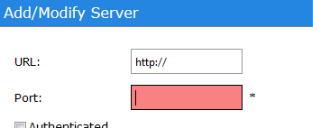
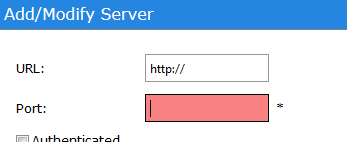
Click Add. The Add/Modify Server dialog opens.

-
Define the FastPath server information by entering the URL and Port number for the Caching Proxy server.
-
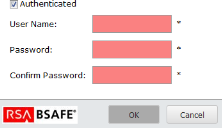
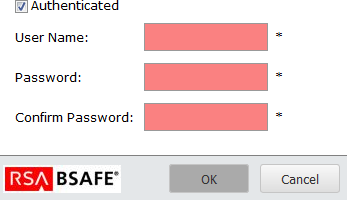
Select Authentication and enter the proxy server user name and password.
-
Click OK.


Endpoints will not begin connecting to the caching proxy server until the Agent on the endpoint has received the policy containing the FastPath server details. After establishing the policy containing Fast Path server details, wait until the communication interval between the Agent and the server has passed to ensure that the policy is downloaded and applied to the endpoint before executing the deployment in the next step.
-
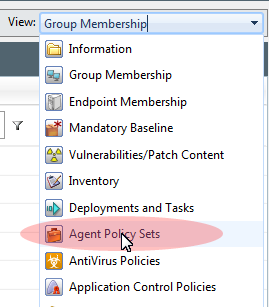
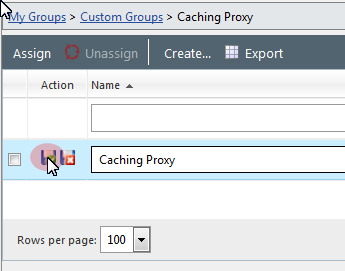
From the Navigation Menu, select Manage > Groups.
-
From the View list, select Agent Policy Sets.
-
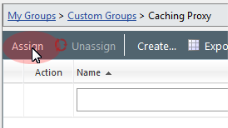
Select your custom Caching Proxy group from the directory tree.
-
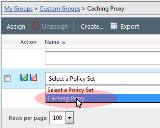
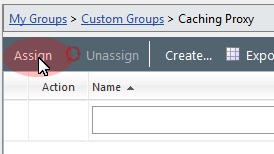
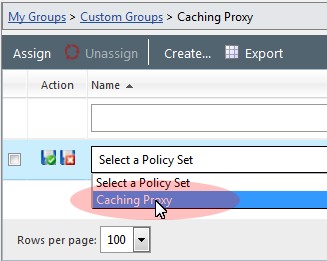
Click Assign. The Select a Policy Set list becomes active.
-
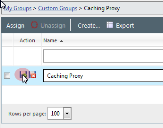
Select the Caching Proxy agent policy set you created.
-
Click the Save icon to save your changes.
When the deployment is complete, the content is cached on the Caching Proxy server.
-
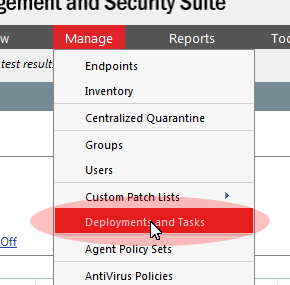
From the Navigation Menu, select Manage > Deployments and Tasks.
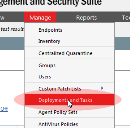
-
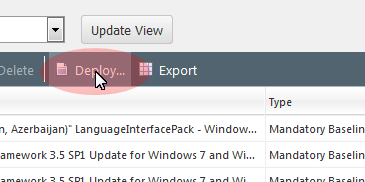
Click Deploy.

-
Complete the wizard.
Make sure you select just a few endpoints from your custom group for this test deployment.