Working with Denied Applications Policy
Administrators can use a Denied Applications policy to add applications to a blacklist of applications that are not authorized to run. It can be used to block applications that are considered dangerous, unnecessary, or unproductive in the enterprise.
The Denied Applications feature is implemented through the Denied Applications Wizard. The administrator can specify what is to be blocked at file, application, and application group level.
The file, application, and application group structure is configured in the Application Library. See Working with Application Library for more information.
The policy is then applied to specified endpoints or endpoint groups, and users. Whenever a user attempts to run a blacklisted application, a warning dialog is displayed, explaining that the application can not run on that endpoint (or for that user).
Denied Applications in Practice
A Denied Applications policy that blocks an application from running can be applied at any time and always overrides any permission the application has to run.
Denied Applications policies are often applied after an administrator reviews application usage on the network. The process usually begins with Easy Auditor and continues through Easy Lockdown. Easy Auditor allows new applications to run even though it does not add them to the whitelist. If an administrator decides that an application is undesirable, it can be added to a Denied Applications policy so that attempts to run it will be blocked.
You can also use Denied Applications policies to block undesirable applications (such as hacking tools, music streaming software, or unapproved messaging programs) even if they are not currently on the network. To do this, you install the unwanted software on a test endpoint, scan with Easy Auditor, group it in Application Library, and apply a Denied Applications policy.
Important: A Denied Applications policy always overrides any permission to run granted by any other Application Control policy.
Some Windows 8 applications are developed with JavaScript/HTML. It is not possible to block these script-based applications.
Creating a Denied Applications Policy
You can create a Denied Applications policy that blocks execution of specific applications on endpoints and groups, for specified users.
- Select Manage > Application Control Policies.
- Select Create > Denied Applications Policies.
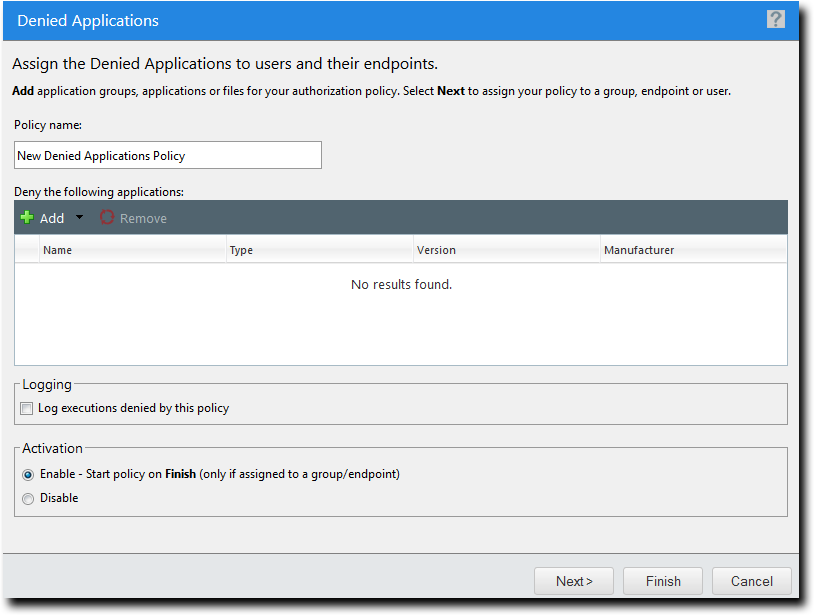
The Denied Applications Wizard opens to the Deny execution for the listed applications page.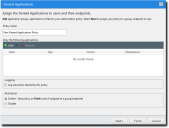
- Type a name for the new Denied Applications policy.
- Build a list of denied applications (based on application groups, applications, or individual files):
- Click Add > Application Groups.
- Enter an application group name in the search field.
- Click Search.
- Select one or more of the results.
- Click Add Application Groups.
- Click OK.
- Click Add > Applications.
- Enter an application name in the search field.
- Click Search.
- Select one or more of the results.
- Click Add Applications.
- Click OK.
- Click Add > Files.
- Enter a file name in the search field.
- Click Search.
- Select one or more of the results.
- Click Add Files.
- Click OK.
- Select Log executions denied by this policy if you want a record of the attempts to run the denied application(s).
- Select an option under Activation.
- Click Next.
- The policy must be assigned to at least one endpoint or endpoint group. Assign the policy to endpoints:
- Select a group or groups from the Groups list.
- Click Add >.
- Select an endpoint or endpoints from the Endpoints list.
- Click Add >.
- Select a group or groups from the Assigned List.
- Click < Remove.
- Select an endpoint or endpoints from the Assigned List.
- Click < Remove.
- The policy must be assigned to at least one user or user group. Assign the policy to users:
- Select one or more users from the Users list.
- Click Add >.
- Select one or more users from the Assigned list.
- Click < Remove.
- Click Finish.
The Denied Applications policy is created and assigned to the selected user(s) and endpoint(s).The new policy is displayed on the Managed Policies tab.
Give the policy a descriptive name. For example, if this Denied Applications policy relates to unauthorized browsers, you could name it Unauthorized Browsers Policy.
|
Method |
Steps |
|---|---|
|
To add application groups: |
|
|
To add applications: |
|
|
To add files: |
|
The application groups, applications, and files available through this dialog are based on the contents of the Application Library. See Working with Application Library for more information.
One or more application groups, applications or files are displayed in the Assigned List.
Even if this control is not selected, logging may occur when other policy types (such as Easy Auditor or Easy Lockdown) have logging enabled.
|
Option |
Description |
|---|---|
|
Enable |
The policy will be enabled once it is created, as long as you assign it to at least one endpoint or group and one user. |
|
Disable |
The policy will be disabled once created, even if it is assigned to an endpoint/group and user. You can enable it at a later time. |
If you click Finish at this point, the policy will be created but not assigned to any endpoints or users. You can assign the policy at a later time.
The Denied Applications Wizard opens to the Assign the Denied Applications to groups, endpoints, and/or users page.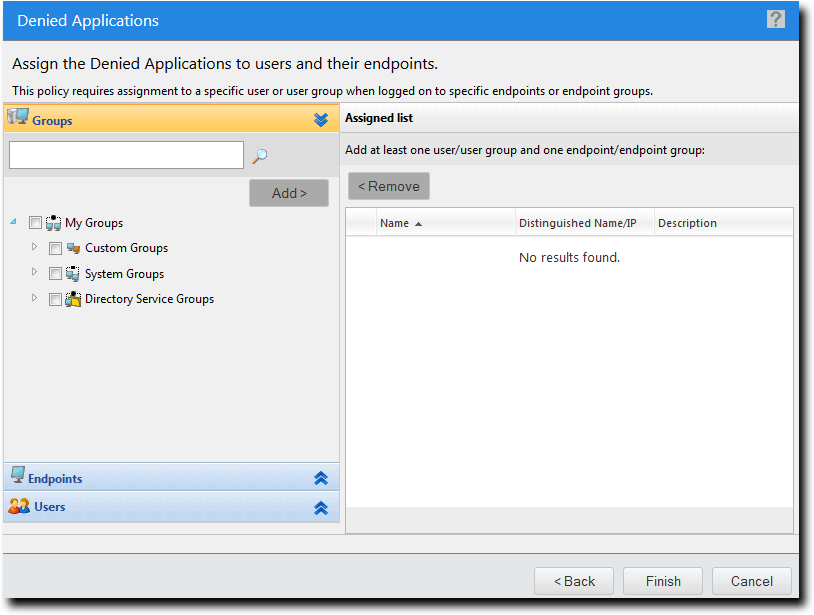
|
Method |
Steps |
|---|---|
|
To add groups of endpoints: |
|
|
To add individual endpoints: |
|
|
To remove groups of endpoints: |
|
|
To remove individual endpoints: |
|
Use the double-arrows (![]()
![]() ) to switch between groups and endpoints.
) to switch between groups and endpoints.
The selected groups and/or endpoints are displayed in the Assigned List.
|
Method |
Steps |
|---|---|
|
To add users: |
If you cannot locate a specific user, click the Add Individual User button. See Adding an Individual User to a Policy for more information. |
|
To remove users: |
|
Important: Both a user/user group AND an endpoint/endpoint group must be assigned.
The selected users are displayed in the Assigned list.
When endpoint users get multiple blocked application notifications, they can close them all at once by right-clicking on the task bar icon for the notifications and selecting Close all windows.
Adding Application Groups to a Policy
You can add application groups to a Denied Applications policy or a Supplemental Easy Lockdown/ Auditor policy using the Add Application Groups dialog.
This dialog is accessed by clicking the Add button on the Denied Applications dialog or the Authorize button on the Supplemental Easy Lockdown/Auditor wizard, then selecting Application Groups from the drop-down.
The application groups available through this dialog are based on the contents of the Application Library. See Working with Application Library for more information.
- Type the name of an application group in the search field.
- Click Search.
- Select the required application group(s).
- Click Add Application Groups.
The selected application groups are added to the list. - Click OK.
Application groups are added to the policy. The dialog closes and you return to the wizard.
Sub-string matching is supported, so you do not have to type the application group's full name. Typing a partial name may result in multiple matches.
You can remove an application group from the list if required by selecting it and clicking Unassign.
Adding Applications to a Policy
You can add applications to a Denied Applications policy or a Supplemental Easy Lockdown/Auditor policy using the Add Applications dialog.
This dialog is accessed by clicking the Add button on the Denied Applications dialog or the Authorize button on the Supplemental Easy Lockdown/Auditor wizard, then selecting Applications from the drop-down.
The applications available through this dialog are based on the contents of the Application Library. See Working with Application Library for more information.
- Type the name of an application in the search field.
- Click Search.
- Select the required application(s).
- Click Add Applications.
The selected applications are added to the list. - Click OK.
Applications are added to the policy. The dialog closes and you return to the wizard.
Sub-string matching is supported, so you do not have to type the application's full name. Typing a partial name may result in multiple matches.
You can remove an application from the list if required by selecting it and clicking Unassign.
Adding Files to a Policy
You can add files to a Denied Applications policy or a Supplemental Easy Lockdown/Auditor policy using the Add Files dialog.
This dialog is accessed by clicking the Add button on the Denied Applications dialog or the Authorize button on the Supplemental Easy Lockdown/Auditor wizard, then selecting Files from the drop-down.
The files available through this dialog are based on the contents of the Application Library. See Working with Application Library for more information.
- Type the name of a file in the search field.
- Click Search.
- Select the required file(s).
- Click Add Files.
The selected files are added to the list. - Click OK.
Files are added to the policy. The dialog closes and you return to the wizard.
Sub-string matching is supported, so you do not have to type the file's full name. Typing a partial name may result in multiple matches.
You can remove a file from the list if required by selecting it and clicking Unassign.
Removing Applications from a Denied Applications Policy
You can remove applications from a Denied Applications policy.
- Select Manage > Application Control Policies.
A list of policies is displayed. - Select a Denied Applications policy.
The selected policy is highlighted. - Click Edit.
The Denied Applications Wizard opens. - Select the application(s) you want to remove from the Denied Applications policy.
- Click Remove.
A confirmation dialog is displayed. - Click Yes.
- Click Finish.
The specified application groups, applications or files are removed from the Denied Applications policy.
Applications can be defined at file, application, and application group level in the Application Library.
The Remove button is enabled.
Adding an Individual User to a Policy
You can add one or more individual users to a policy using the Add Individual Users dialog.
This dialog is accessed by clicking the Add Individual User button on a User pane. This feature is available on wizards that support user assignment.
- Search for users using either of the following methods:
- Type a user name in the Username field.
- Click Search.
- Select one or more users.
- Click Add Users.
The users are added to the selection list. - Click OK.
The Add Individual Users dialog closes and you return to the Users pane of the policy wizard, with the new user(s) added to the Users list.
|
Option |
Steps |
|
|---|---|---|
|
Search for all users |
Leave the Username field blank and click Search. This returns all existing users in the current domain. |
|
|
Search for one or more selected users |
Sub-string matching is supported, so you do not have to type the full name. Typing a partial name may result in multiple matches |
|
One or more users appear in the results list.
If you cannot find the user(s) you want, try searching other available domains. Select a searchable domain controller from the Domain drop-down list.
Assigning a Denied Applications Policy
You can select an existing Denied Applications policy and assign it to endpoints/endpoint groups and users/user groups.
A Denied Applications policy requires both an endpoint/endpoint group and a user/user group assignment.
- Select Manage > Application Control Policies.
The Managed Policies tab on the Application Control Policies page is displayed. - Select a Denied Applications policy.
- Click Assign.
The Denied Applications dialog is displayed. - The policy must be assigned to at least one endpoint or endpoint group. Assign the policy to endpoints:
- Select a group or groups from the Groups list.
- Click Add >.
- Select an endpoint or endpoints from the Endpoints list.
- Click Add >.
- Select a group or groups from the Assigned List.
- Click < Remove.
- Select an endpoint or endpoints from the Assigned List.
- Click < Remove.
- The policy must be assigned to at least one user or user group. Assign the policy to users:
- Select one or more users from the Users list.
- Click Add >.
- Select one or more users from the Assigned list.
- Click < Remove.
- Click OK.
The Denied Application policy is assigned to selected endpoints/endpoint groups and users/ user groups.
Filter the Policy Name and Policy Type columns to locate the required Denied Application policy.
The selected policy is highlighted.
|
Method |
Steps |
|---|---|
|
To add groups of endpoints: |
|
|
To add individual endpoints: |
|
|
To remove groups of endpoints: |
|
|
To remove individual endpoints: |
|
Use the double-arrows (![]()
![]() ) to switch between groups and endpoints.
) to switch between groups and endpoints.
The selected groups and/or endpoints are displayed in the Assigned List.
|
Method |
Steps |
|---|---|
|
To add users: |
If you cannot locate a specific user, click the Add Individual User button. See Adding an Individual User to a Policy for more information. |
|
To remove users: |
|
Important: Both a user/user group AND an endpoint/endpoint group must be assigned.
The selected users are displayed in the Assigned list.
Unassigning a Denied Applications Policy
You can unassign a Denied Applications policy, removing the link to the endpoints and users it was assigned to. Policies that are no longer assigned remain in the system as unassigned policies, which you can re-assign to endpoints and users at a later time.
- Select Manage > Application Control Policies.
A list of policies is displayed. - Select one or more Denied Applications policies.
- Click Unassign.
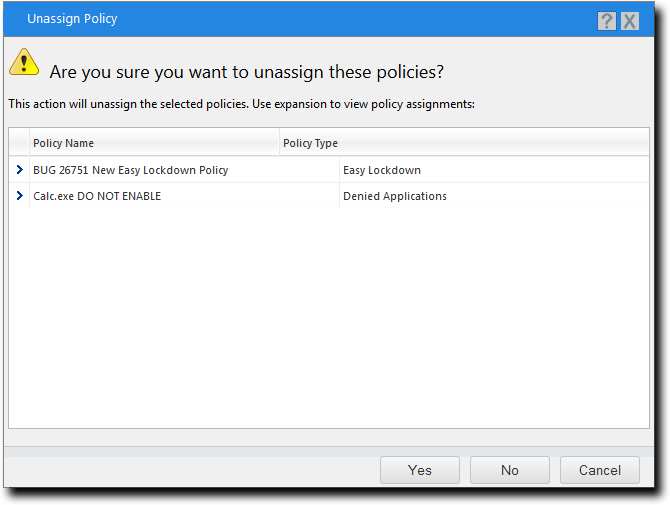
One of two confirmation dialogs is displayed, depending on whether you selected a single policy or multiple policies.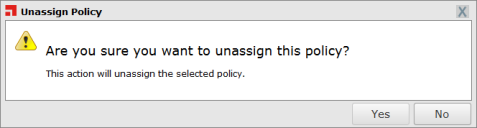
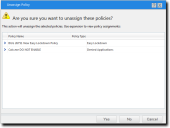
- Click Yes.
One or more Denied Applications policies are unassigned.
Filter the Policy Name and Policy Type columns to locate the required policies.
The selected policies are highlighted.

Editing a Denied Applications Policy
You can edit a Denied Application policy and, for example, change the logging option or the endpoints to which it is assigned.
- Select Manage > Application Control Policies.
A list of policies is displayed. - Select a Denied Applications policy.
- Click Edit.
The Denied Applications Wizard opens. - [Optional] Edit the Policy Name.
- [Optional] Add one or more applications to the blacklist of denied applications (based on application groups, applications, or individual files):
- Click Add > Application Groups.
The Add Application Groups dialog opens. - Enter an application group name in the search field.
- Click Search.
- Select one or more of the results.
- Click Add Application Groups.
- Click OK.
- Click Add > Applications.
The Add Applications dialog opens. - Enter an application name in the search field.
- Click Search.
- Select one or more of the results.
- Click Add Applications.
- Click OK.
- Click Add > Files.
The Add Files dialog opens. - Enter a file name in the search field.
- Click Search.
- Select one or more of the results.
- Click Add Files.
- Click OK.
- [Optional] Remove one or more applications from the blacklist of denied applications:
- Select one or more applications from the list.
- Click Remove.
- [Optional] Change the Logging option.
- [Optional] Change the Activation option.
- Click Next.
The Denied Application Wizard opens to the Assign the Denied Applications to groups, endpoints and/or users page. - The policy must be assigned to at least one endpoint or endpoint group. Assign the policy to endpoints:
- Select a group or groups from the Groups list.
- Click Add >.
- Select an endpoint or endpoints from the Endpoints list.
- Click Add >.
- Select a group or groups from the Assigned List.
- Click < Remove.
- Select an endpoint or endpoints from the Assigned List.
- Click < Remove.
- The policy must be assigned to at least one user or user group. Assign the policy to users:
- Select one or more users from the Users list.
- Click Add >.
- Select one or more users from the Assigned list.
- Click < Remove.
- Click Finish.
The Denied Applications policy is edited.
You can only edit one policy at a time.
The selected policy is highlighted.
|
Method |
Steps |
|---|---|
|
To add application groups: |
|
|
To add applications: |
|
|
To add files: |
|
The application groups, applications, and files available through this dialog are based on the contents of the Application Library. See Working with Application Library for more information.
One or more application groups, applications or files are added to the blacklist.
Even if this control is not selected, logging may occur when other policy types (such as Easy Auditor or Easy Lockdown) have logging enabled.
|
Option |
Description |
|---|---|
|
Enable |
The policy will be enabled once it is created, as long as you assign it to a group or endpoint. |
|
Disable |
The policy will be disabled once created, even if it is assigned to a group or endpoint. You can enable it at a later time. |
|
Method |
Steps |
|---|---|
|
To add groups of endpoints: |
|
|
To add individual endpoints: |
|
|
To remove groups of endpoints: |
|
|
To remove individual endpoints: |
|
Use the double-arrows (![]()
![]() ) to switch between groups and endpoints.
) to switch between groups and endpoints.
The selected groups and/or endpoints are displayed in the Assigned List.
|
Method |
Steps |
|---|---|
|
To add users: |
If you cannot locate a specific user, click the Add Individual User button. See Adding an Individual User to a Policy for more information. |
|
To remove users: |
|
Important: Both a user/user group AND an endpoint/endpoint group must be assigned.
The selected users are displayed in the Assigned list.
Disabling a Denied Applications Policy
You can disable a Denied Applications policy without deleting it. The details of the policy are retained and you can enable it again at a later time.
- Select Manage > Application Control Policies.
A list of policies is displayed. - Select the enabled policies that you want to disable.
- Click Disable.
The selected Denied Applications policy or policies are disabled.
Filter the Policy Name and Policy Type columns to locate the policy.
The selected policies are highlighted.
Enabling a Denied Applications Policy
You can enable a Denied Applications policy that is currently disabled.
- Select Manage > Application Control Policies.
A list of Application Control policies is displayed. - Select the check box(es) for the disabled Denied Applications policies that you want to enable.
- Click Enable.
The selected Denied Applications policy or policies are enabled.
Filter the Policy Name and Policy Type columns to locate the policy.
The selected policies are highlighted.
Deleting a Denied Application Policy
You can delete a Denied Application policy, as long as it is not assigned to any endpoint.
- Select Manage > Application Control Policies.
A list of Application Control policies is displayed. - Select the required Denied Applications policy.
- Click Delete.
A confirmation dialog is displayed. - Click Yes.
The Denied Applications policy is deleted.
The policy must not be assigned to an endpoint (Assigned column value of Not Assigned). If it is assigned, you must first unassign it to continue.
The selected policy is highlighted.
If the policy is currently in use, a message is displayed telling you that the policy can not be deleted until it has been unassigned.
Exporting Denied Applications Policies
You can export a list of Denied Applications Policies to a CSV (Comma Separated Value) file. To export data, refer to Exporting Data.
The list of policies is saved as a CSV file with the following columns:
|
Name |
Description |
|---|---|
|
Status |
Enabled or Disabled |
|
Policy Name |
The name of the policy |
|
Assigned |
Assigned/Not Assigned (if assigned, export includes the groups and endpoints that the policy is assigned to) |
|
Policy Type |
The type of policy (Denied Applications, Trusted Updater, and so on) |
|
Blocking |
Off, On, Authorized, Non-authorized, or (Authorized, Non-authorized) |
|
Logging |
Authorized, Non-authorized, or Off |
|
Last Updated Date |
The date the policy was last changed |