Working with Trusted Publisher
A Trusted Publisher policy allows an application that has been signed with a digital certificate from a trusted source to run on an endpoint.
When administrators create a Trusted Publisher policy, they have the option to search for executables that contain a signature that is marked as having originated from a specific manufacturer or other trusted source.
MSIs that are not Trusted Updaters are blocked automatically.
Later, when applications signed with that same certificate are executed, Ivanti Application Control compares the digital signature of the certificate being executed to the list of Trusted Publishers. If the signatures match then the executable is allowed to run.
Some applications require more than one certificate to execute and have all application features work correctly. Each Trusted Publisher policy may have multiple certificates associated with it.
Trusted Publishers are displayed on the Trusted Change tab of the Application Control Policies page. You can filter the Policy Type column to display only Trusted Publisher policies.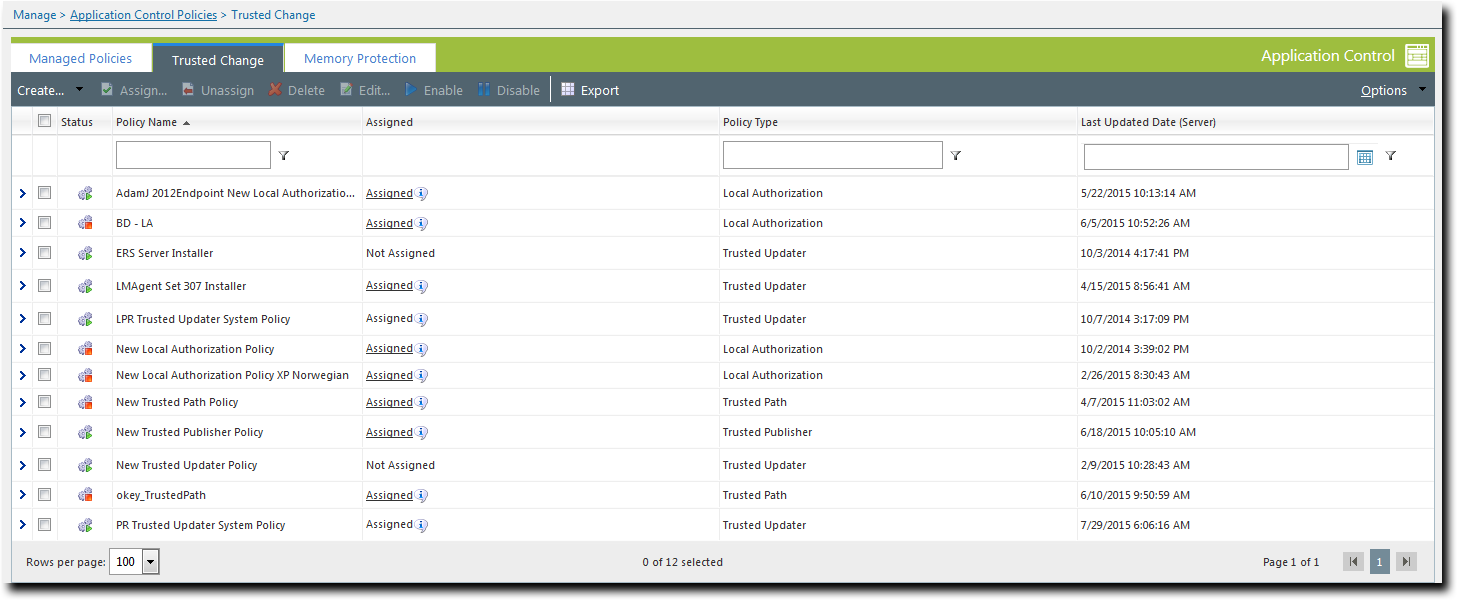
Trusted Publisher in Practice
A Trusted Publisher policy permits the running of executable files that have a signed certificate from a trusted source.
Trusted Publishers may be software manufacturers such as Microsoft, Adobe, WebEx, McAfee, and so on. But proprietary software may also be authorized with a Trusted Publisher policy if it has an internal corporate certificate.
Note:
- Some Windows Store (formerly Metro) apps do not have signed executables. It is not possible to apply a Trusted Publisher policy to these applications.
- >MSIs that are not Trusted Updaters are blocked automatically.
An important role for Trusted Publisher is to allow applications that depend on signed ActiveX controls being downloaded into a browser. The online collaboration program WebEx is an example of such a program, which cannot be installed with Trusted Updater.
Another role for Trusted Publisher is allowing signed lightweight applications that do not require an installation process. (These are the type of applications that you typically drop on the desktop and click to run.)
Caution: In theory you can apply Trusted Publisher to a signed installer program but this is NOT recommended. Even if it installs, there is no guarantee the application will run. Also, Trusted Publisher could overwrite shared files (.exes or .dlls) on the whitelist and this could stop other programs from running, or even cause the endpoint to fail.
Important: Because Trusted Publisher is certificate based, all applications signed by a specific certificate are allowed to run once one of the applications has been added to a Trusted Publisher policy. If there is a need to block applications that have been authorized in this way, they can be added to a Denied Applications policy.
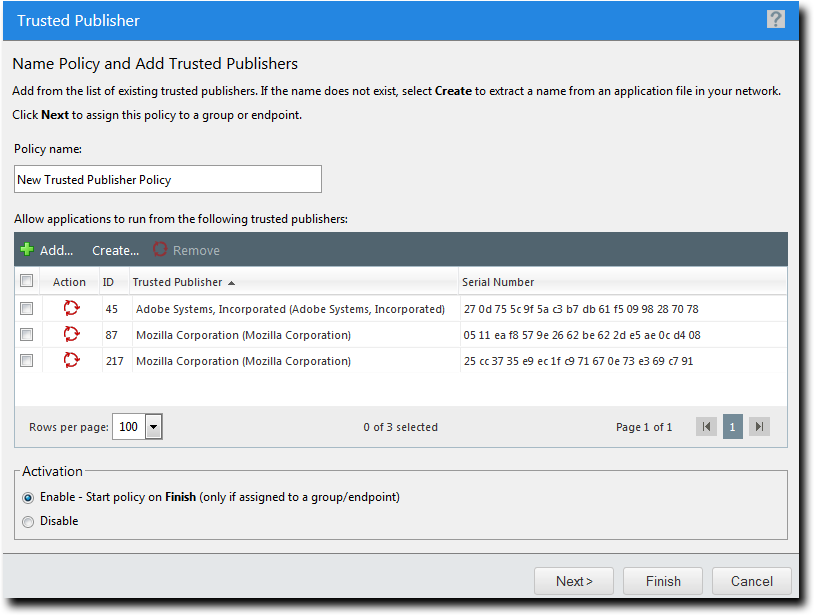
Creating a Trusted Publisher Policy
A Trusted Publisher policy specifies one or more publishers that are allowed to run executable files on an endpoint/endpoint group.
- Select Manage > Application Control Policies.
- Click the Trusted Change tab.
- Click Create > Trusted Publisher.
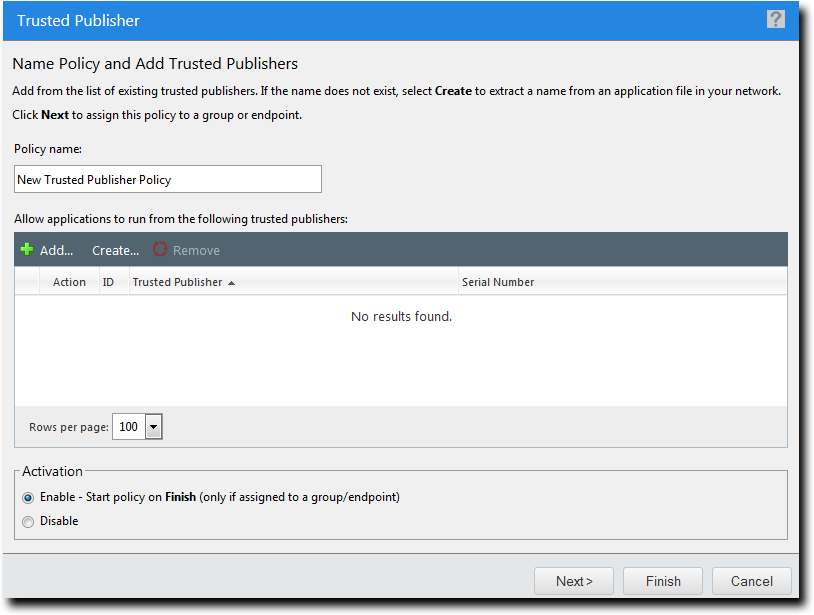
The Trusted Publisher Wizard opens to the Name Policy and Add Trusted Publishers page.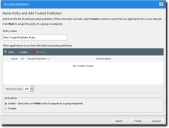
- Type a Policy Name for the new Trusted Publisher policy.
- Click Add.
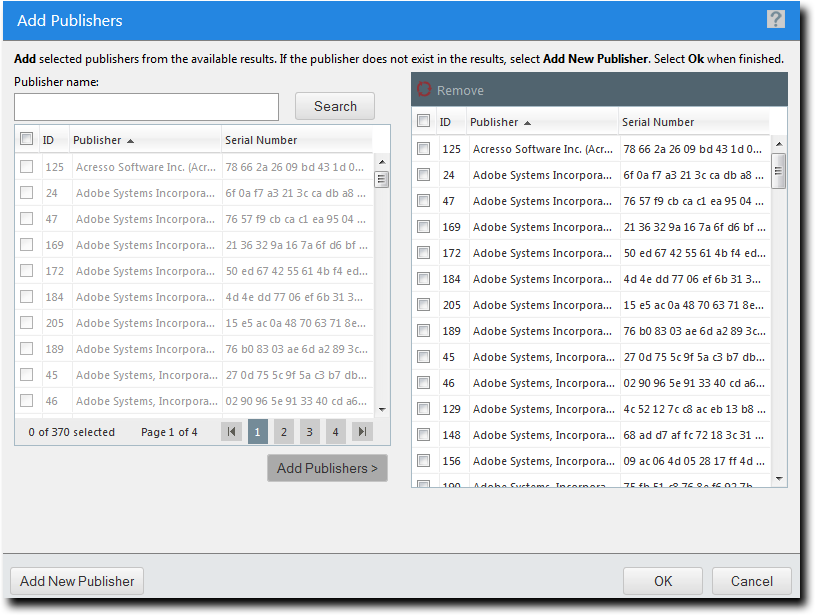
The Add Publishers dialog is displayed. Initially, it does not display any publishers.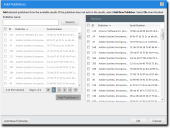
- Search for existing publishers using either of the following methods:
- Type a publisher name in the Publisher name field.
- Click Search.
- Select one or more publishers.
- Click Add Publishers.
The publishers are added to the policy. - Click OK.
The Add Publishers dialog closes. - Select an option under Activation.
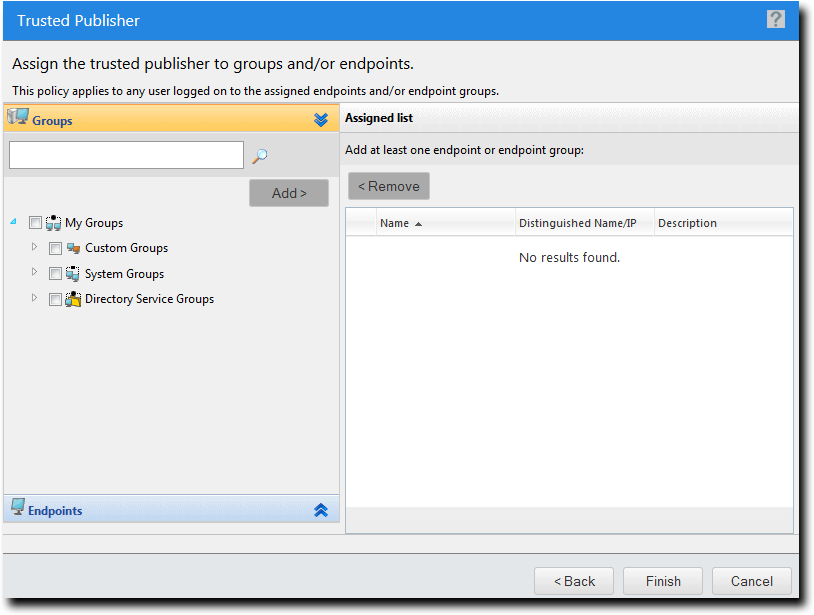
- Click Next to assign the policy to endpoints.
- Build a list of targets (groups or endpoints) for the policy, using any of the following methods:
- Select a group or groups from the Groups list.
- Click Add >.
- Select an endpoint or endpoints from the Endpoints list.
- Click Add >.
- Select a group or groups from the Assigned List.
- Click < Remove.
- Select an endpoint or endpoints from the Assigned List.
- Click < Remove.
- Click Finish.
The Trusted Publisher policy is created and assigned to groups or endpoints.
Give the policy a descriptive name. For example, if this Trusted Publisher policy relates to particular applications published by Adobe you could name it Adobe Applications.
|
Method |
Steps |
|---|---|
|
Search for all publishers |
Leave the Publisher name field blank and click Search. This returns all existing publishers. |
|
Search for selected publishers |
Sub-string matching is supported, so you do not have to type the full name. A partial name may return multiple results. |
One or more publishers appears in the results list.
If the list is empty, or you cannot see the publisher you want, you will have to add the publisher yourself. See Adding a New Publisher for more information.
Several publishers may share the same name, but the serial number is unique and is associated with the digital signature of the file from which the metadata was taken.
|
Option |
Description |
|---|---|
|
Enable |
The policy will be enabled once it is created, as long as you assign it to a group or endpoint. |
|
Disable |
The policy will be disabled once created, even if it is assigned to a group or endpoint. You can enable it at a later time. |
If you click Finish at this point, the policy will be created but not assigned to any endpoints. You can assign the policy to endpoints at a later time.
The Trusted Publisher Wizard opens to the Assign Groups and Endpoints page.
|
Method |
Steps |
|---|---|
|
To add groups of endpoints: |
|
|
To add individual endpoints: |
|
|
To remove groups of endpoints: |
|
|
To remove individual endpoints: |
|
Use the double-arrows (![]()
![]() ) to switch between groups and endpoints.
) to switch between groups and endpoints.
The selected groups and endpoints are displayed in the Assigned List.
Important: When a Trusted Publisher policy is assigned to an endpoint, it allows signed applications resident on that endpoint's drive(s) to execute. However, it does not allow the execution (on that endpoint) of signed applications that are resident on a network share that the endpoint can access.
Adding an Existing Publisher
An existing publisher is added to a Trusted Publisher policy using the Add Publishers dialog.
This dialog is accessed by clicking the Add button on the Trusted Publisher Wizard.
- Search for existing publishers using either of the following methods:
- Type a publisher name in the Publisher name field.
- Click Search.
- Select one or more publishers.
- Click Add Publishers.
The publisher is added to the Trusted Publisher policy. - Click OK.
The Add Publishers dialog closes and you are returned to the Trusted Publisher Wizard.
|
Method |
Steps |
|---|---|
|
Search for all publishers |
Leave the Publisher name field blank and click Search. This returns all existing publishers. |
|
Search for selected publishers |
Sub-string matching is supported, so you do not have to type the full name. A partial name may return multiple results. |
One or more publishers appears in the results list.
If the list is empty, or you cannot see the publisher you want, you will have to add the publisher yourself. See Adding a New Publisher for more information.
Several publishers may share the same name, but the serial number is unique and is associated with the digital signature of the file from which the metadata was taken.
Adding a New Publisher
A publisher is added by identifying an executable or certificate file, extracting the vendor information, and adding it to the list of known publishers. This is done using the Add New Publisher dialog.
This dialog can be accessed from different locations.
- If you know that the application file has not yet been defined as trusted, you can access it directly from the Trusted Publisher Wizard.
- If you are on the Add Publishers dialog and you find that the application file has not yet been defined as trusted, you can access it from there as well.
- Open the Add New Publisher dialog.
- Add a new publisher by identifying the appropriate file, which can be an .exe, a .dll, or a .cer (certificate) file. Use one of the following methods:
- Click Browse.
- In the file upload dialog that opens, select an appropriate file to identify its vendor as a publisher you wish to use for Trusted Publisher policies. The filename and path appear in the Application field.
- Click OK.
The certificate metadata is extracted from the file and uploaded. While this is happening, a progress indicator is displayed.
|
Context |
Steps |
|---|---|
|
From the Trusted Publisher Wizard: |
Click Create. |
|
From the Add Publishers dialog: |
Click Add New Publisher. |
The Add New Publisher dialog opens.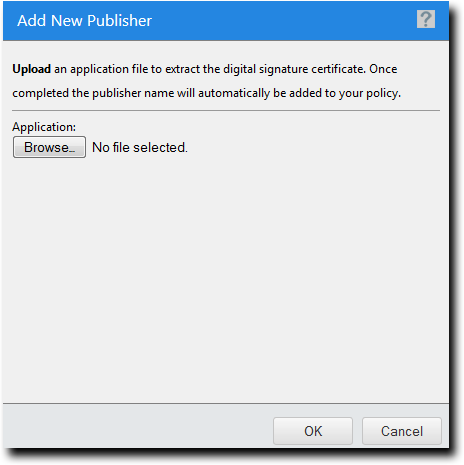
|
Method |
Steps |
|---|---|
|
Name the file explicitly |
Type the filename and path in the Application field. |
|
Browse for the file |
Browsing occurs on the local file system. Network devices may also be browsed to if the logged-on user has valid credentials. |
Assigning a Trusted Publisher Policy
You can select a Trusted Publisher policy and assign it to endpoints and/or groups of endpoints.
- Select Manage > Application Control Policies.
- Click the Trusted Change tab.
- Select a Trusted Publisher policy.
- Click Assign.
The Trusted Publisher dialog is displayed. - Build a list of targets (groups or endpoints) for the policy, using any of the following methods:
- Select a group or groups from the Groups list.
- Click Add >.
- Select an endpoint or endpoints from the Endpoints list.
- Click Add >.
- Select a group or groups from the Assigned List.
- Click < Remove.
- Select an endpoint or endpoints from the Assigned List.
- Click < Remove.
- Click OK.
The Trusted Publisher policy is assigned to endpoints and/or groups of endpoints.
Filter the Policy Name and Policy Type columns to locate the policy.
The selected policy is highlighted.
|
Method |
Steps |
|---|---|
|
To add groups of endpoints: |
|
|
To add individual endpoints: |
|
|
To remove groups of endpoints: |
|
|
To remove individual endpoints: |
|
Use the double-arrows (![]()
![]() ) to switch between groups and endpoints.
) to switch between groups and endpoints.
The selected groups and endpoints are displayed in the Assigned List.
Important: When a Trusted Publisher policy is assigned to an endpoint, it allows signed applications resident on that endpoint's drive(s) to execute. However, it does not allow the execution (on that endpoint) of signed applications that are resident on a network share that the endpoint can access.
Assigning a Trusted Publisher Policy to a Group
You can assign a Trusted Publisher policy to a group of endpoints using the Assign Policy dialog.
The Assign Policy dialog is also used to assign a Trusted Publisher policy to a selected endpoint. See Assigning a Trusted Publisher Policy to an Endpoint if you are assigning the policy to an endpoint.
- Select Manage > Groups.
The Groups page is displayed. - Select a group from the Browser tree.
- From the View list, select Application Control Policies.
The Application Control policies for the selected group are displayed.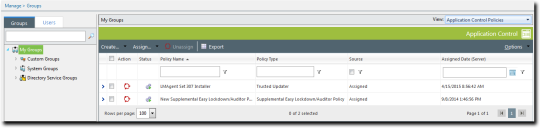
- From the toolbar, select Assign > Trusted Publisher.
The Assign Policy dialog is displayed. - Select one or more Trusted Publisher policies.
- Click OK.
The Trusted Publisher policy is assigned to the group of endpoints.
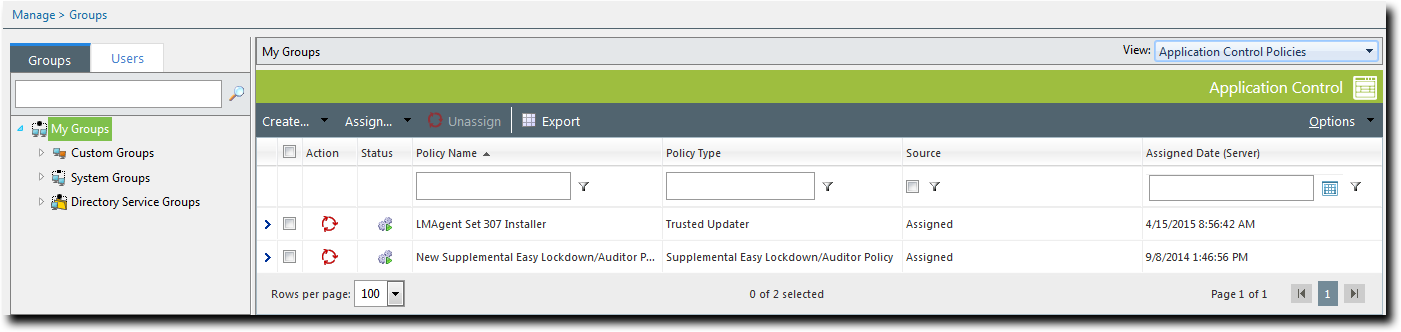
Inherited policies can not be selected. In addition, the Source column reads Inherited.
Important: When a Trusted Publisher policy is assigned to an endpoint, it allows signed applications resident on that endpoint's drive(s) to execute. However, it does not allow the execution (on that endpoint) of signed applications that are resident on a network share that the endpoint can access.
Assigning a Trusted Publisher Policy to an Endpoint
You can assign a Trusted Publisher policy to an endpoint.
- Select Manage > Endpoints.
The Endpoints page opens to the All tab. - In the Endpoint Name column, click an endpoint link.
Detailed information for the selected endpoint is displayed. - Select the Application Control Policies tab.
A list of Application Control policies assigned to the endpoint is displayed.
- From the toolbar, select Assign > Trusted Publisher.
The Assign Policy dialog is displayed. - Select one or more Trusted Publisher policies.
- Click OK.
One or more Trusted Publisher policies are assigned to the endpoint.
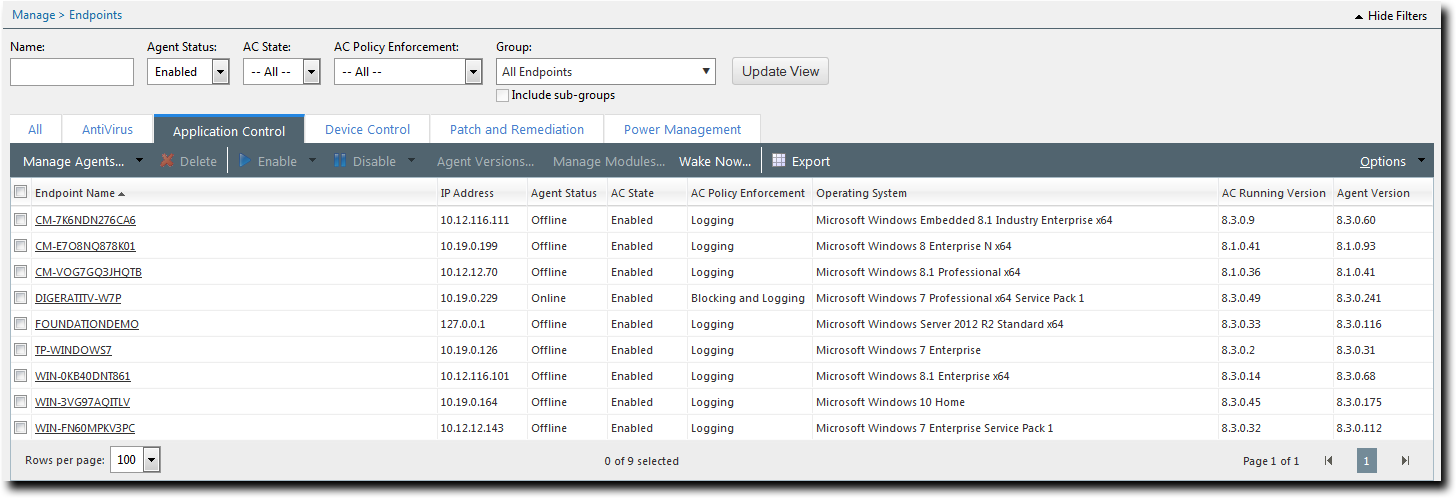
Important: When a Trusted Publisher policy is assigned to an endpoint, it allows signed applications resident on that endpoint's drive(s) to execute. However, it does not allow the execution (on that endpoint) of signed applications that are resident on a network share that the endpoint can access.
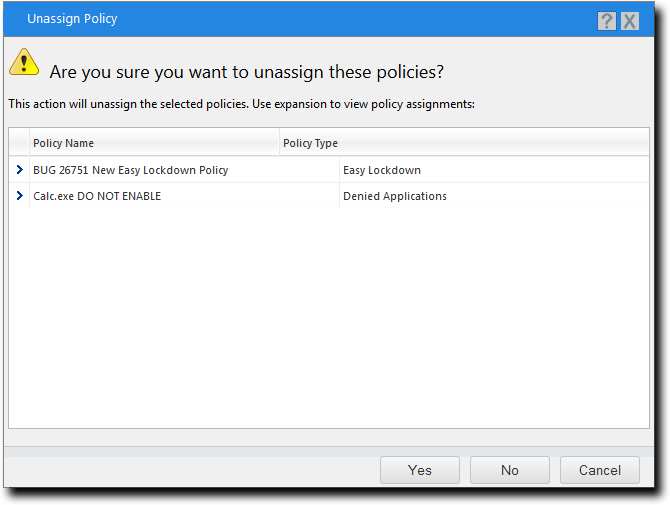
Unassigning a Trusted Publisher Policy
You can unassign a Trusted Publisher policy, removing the association between it and any endpoints. Policies that are no longer assigned remain in the system as unassigned policies, which you can re- assign to endpoints at a later time.
- Select Manage > Application Control Policies.
- Click the Trusted Change tab.
- Select one or more Trusted Publisher policies.
- Click Unassign.
One of two confirmation dialogs is displayed, depending on whether you selected a single policy or multiple policies.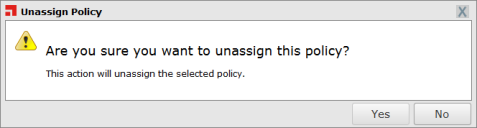
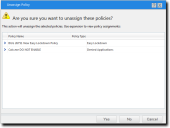
- Click Yes.
One or more Trusted Publisher policies are unassigned.
Filter the Policy Name and Policy Type columns to locate the policy.

Editing a Trusted Publisher Policy
You can edit a Trusted Publisher policy with the Trusted Publisher Wizard. For example, you might want to add a new Trusted Publisher to the policy, or assign it to different endpoints or groups.
- Select Manage > Application Control Policies.
- Click the Trusted Change tab.
- Select a Trusted Publisher policy.
- Click Edit.
The Trusted Publisher Wizard opens to the Name Policy and Add Trusted Publishers page.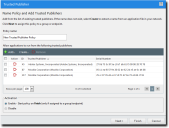
- [Optional] Edit the Policy Name.
- [Optional] Add a Publisher to the policy using one of the following options:
- Click Add to open the Add Trusted Publisher dialog.
- Select a Trusted Updater from the Trusted Publishers drop- down list.
- Click OK.
- Click Add to open the Add Trusted Publisher dialog.
- Click Add New Trusted Publisher to open the Add New Trusted Publisher dialog.
- In the Add New Trusted Publisher dialog, click Browse.
- Locate the application file and click Open.
- Click OK.
- Click OK.
- [Optional] Remove a Trusted Publisher from the policy:
- Select a Trusted Publisher.
- Click Remove.
The Remove Trusted Publisher dialog is displayed. - Click Yes.
The Remove Trusted Publisher dialog is closed.
- [Optional] Edit the Activation options.
- Click Next.
The Trusted Publisher Wizard opens to the Assign Groups and Endpoints page.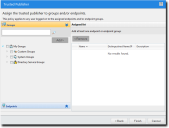
- [Optional] Edit the list of targets (groups or endpoints) for the policy, using any of the following methods:
- Select a group or groups from the Groups list.
- Click Add >.
- Select an endpoint or endpoints from the Endpoints list.
- Click Add >.
- Select a group or groups from the Assigned List.
- Click < Remove.
- Select an endpoint or endpoints from the Assigned List.
- Click < Remove.
- Click Finish.
The Trusted Publisher policy has been edited.
Filter the Policy Name and Policy Type columns to locate the policy.
The selected policy is highlighted.
Give the policy a descriptive name. For example, if this Trusted Publisher policy relates to applications published by Microsoft you could name it Microsoft Applications.
|
Option |
Steps |
|---|---|
|
Add an existing Publisher |
|
|
Add a new Publisher |
|
One or more publishers appears in the results list.
If the list is empty, or you cannot see the publisher you want, you will have to add the publisher yourself. See Adding a New Publisher for more information.
|
Option |
Description |
|---|---|
|
Enable |
The policy will be enabled once it is created, as long as you assign it to a group or endpoint. |
|
Disable |
The policy will be disabled once created, even if it is assigned to a group or endpoint. You can enable it at a later time. |
|
Method |
Steps |
|---|---|
|
To add groups of endpoints: |
|
|
To add individual endpoints: |
|
|
To remove groups of endpoints: |
|
|
To remove individual endpoints: |
|
Use the double-arrows (![]()
![]() ) to switch between groups and endpoints.
) to switch between groups and endpoints.
Disabling a Trusted Publisher Policy
You can disable Trusted Publisher policies without deleting them. The details of the policies are retained and you can enable the policies at a later time.
- Select Manage > Application Control Policies.
- Click the Trusted Change tab.
- Select the enabled Trusted Publisher policies that you want to disable.
- Click Disable.
One or more Trusted Publisher policies are disabled.
Filter the Policy Name and Policy Type columns to locate the policy.
The selected policies are highlighted.
Enabling a Trusted Publisher Policy
You can enable a Trusted Publisher policy that is currently disabled.
- Select Manage > Application Control Policies.
- Click the Trusted Change tab.
- Select the disabled Trusted Publisher policy or policies that you want to enable.
- Click Enable.
One or more Trusted Publisher policies are enabled.
Filter the Policy Name and Policy Type columns to locate the policy.
The selected policies are highlighted.

Deleting a Trusted Publisher Policy
You can delete a Trusted Publisher policy, as long as it is not assigned to an endpoint.
- Select Manage > Application Control Policies.
- Click the Trusted Change tab.
- Select a Trusted Publisher policy that is not assigned to an endpoint (Assigned column value of Not Assigned).
- Click Delete.
A confirmation dialog is displayed. - Click Yes.
The Trusted Publisher policy is deleted.
Filter the Policy Name and Policy Type columns to locate the policy.
The selected policy is highlighted.
If the policy is currently in use, a message is displayed telling you that the policy can not be deleted until it has been unassigned.
Exporting Trusted Publisher Policies
You can export a list of policies to a CSV (Comma Separated Value) file. To export data, refer to Exporting Data.
The list of policies is saved as a CSV file with the following columns:
|
Name |
Description |
|---|---|
|
Status |
Enabled or Disabled |
|
Policy Name |
The name of the policy |
|
Assigned |
Assigned/Not Assigned (if assigned, export includes the groups and endpoints that the policy is assigned to) |
|
Policy Type |
The type of policy (Easy Lockdown, Trusted Updater, and so on) |
|
Last Updated Date (Server) |
The date and time (on the server) that the policy was last changed |