Using the Encrypt Medium Utility
The Encrypt Medium utility provides a wizard that allows you to select encryption options to easily encrypt a removable storage device that can be used with or without a network connection.
Using the Encrypt Medium utility you can perform the following tasks:
- Select an encryption access method that determines whether the removable storage device can be used inside (non-portable encryptions) or outside (portable encryption) of your corporate network.
- Assign user access for Windows®Active Directory users or password users.
- Save or erase existing data stored on the device.
- Securely erase unused space on the device.
The wizard pages that a user can access, based the Encrypt Medium utility configuration options, are described by the following process flow. See The Ivanti Device Control Options Page for additional information about using the default options that govern encryption.
- Select Access Method
The Select Access Method page is available for non-portable and the combined portable-non-portable encryption access options that are configured by the network administrator as follows. - The Microsoft CA Key Provider default option value is set to Enabled.
- The encryption permissions are set to Encrypt and Export to Media.
- User Access to Device
The User Access page is not available when the non-portable encryption access options are configured by the network administrator as follows. - The Microsoft CA Key Provider default option value is set to Enabled.
- The encryption permissions are set to Encrypt only.
- Add Additional User
The Add User page is only available when a user can access the User Access to Device page. - User List
The User List page is only available when a user accesses the Add User page. - Data Integrity
The Data Integrity page is available as follows. - Data must be stored on the removable storage device.
- The Encryption Retain Data default option set to Selected or Unselected.
- The user must have Read permission.
- Secure Unused Space
The Secure Unused Space page is available as follows. - The Clear unused space when encrypting default option set to Disabled.
- Start Encryption
The Start Encryption page is always available to users in any encryption scenario.
Portable Device Encryption Permission
Portable device encryption options can be assigned on a user or user group basis. Device permissions combined with specific device encryption default settings govern the behavior of the Encrypt Medium utility that runs on the client.
Prerequisites:
Set the Password Complexity and Password Minimum Length options. For detailed information about setting the Password Complexity and Password Minimum Length options for user password requirements, see The Ivanti Device Control Options Page.
An administrator must set the device encryption default options and permissions to enable the Encrypt Medium utility option for portable device access. Using portable encryption options, encrypted devices can be accessed on any Microsoft Windows computer.
- In the Device Control application, select Tools > Options.
The Options page displays. - Select the Device Control tab.
- Select Disabled from the Microsoft CA Key Provider drop-down list.
- Select Manage > Device Control Policies.
The Device Control Policies page opens. - Click Create.
The policy type drop-down menu appears. - Select Create class policy.
The Device Class Policy wizard appears.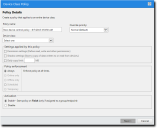
- Type the Policy name.
- Select the Override priority.
You can choose between Normal (Default) and High (Overrides Normal Priority). - Select Removable Storage Devices from the Device class drop-down list.
- Select the Permission settings check box.
- [Optional] Select the Shadow settings check box.
Shadow settings can only be enabled for the COM/Serial Ports, CD/DVD Drives, Floppy Disk Drives, LPT/Parallel Ports, and Removable Storage Devices classes. - [Optional] Select the Daily copy limit check box. Specify a copy limit value in the text box.
- Select the desired policy enforcement option.
- Select whether you want the policy to be applicable immediately.
The Enable radio button is selected by default, indicating that the policy is applicable immediately. If you want to delay when the policy will begin working, select Disable. - Click Next.
The Permission Settings page opens.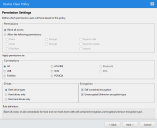
- Select the Allow access with following radio button.
- Select Encrypt.
- [Optional] Select any other permission that you want to apply.
For more information on setting permissions, refer to Permission Settings for a Policy. - Choose which Connections will apply.
- Select the applicable Drives.
- Select Unencrypted/Unknown encryption type from Encryption group box.
- Click Next.
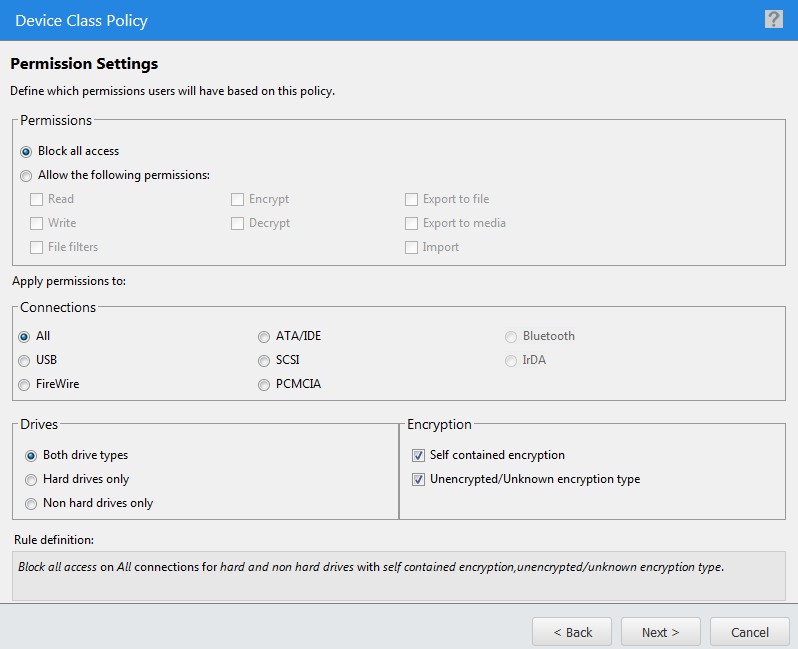
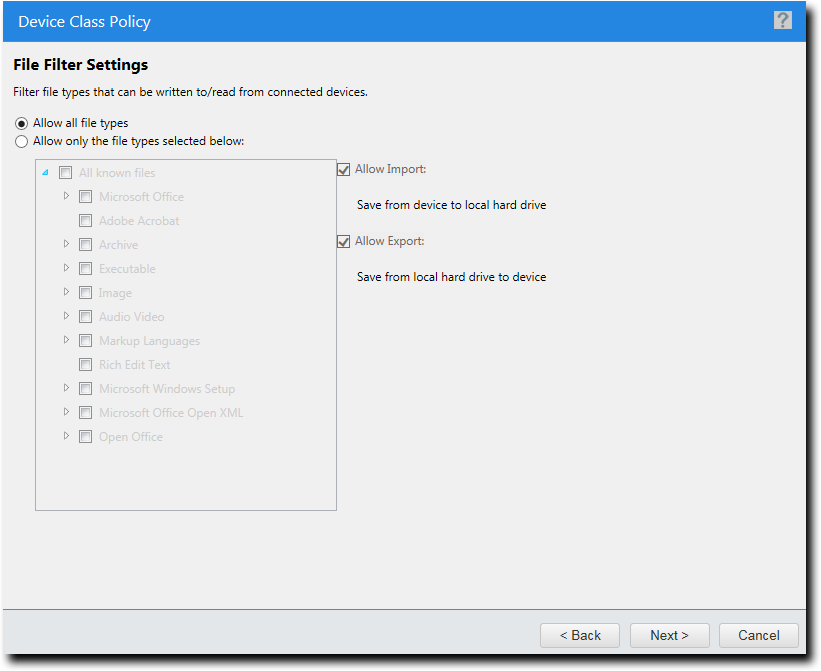
The File Filter Settings page opens.This page will only appear if you select File Filters in the Permission Settings page.
- Specify the file type filtering options.
For more information on file type filters, see File Type Filtering. - Click Next.
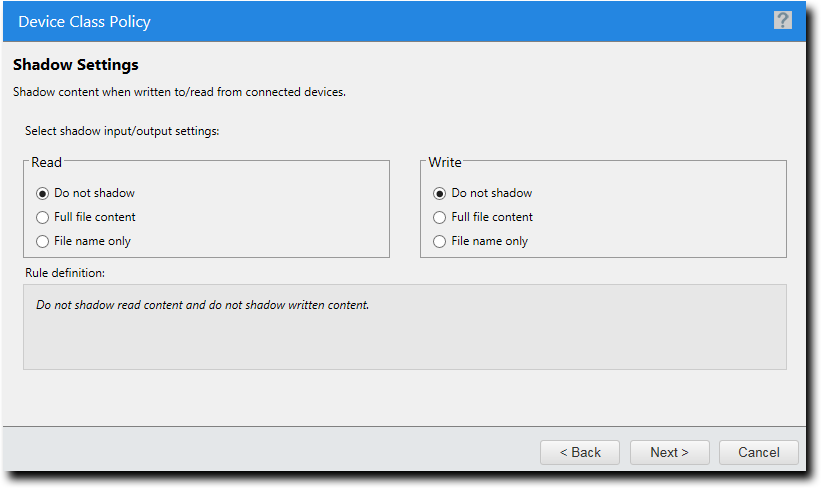
The Shadow Settings page opens.This page will only appear if you select Shadow settings in the Policy details page.
- Specify the shadow settings.
For more information on shadowing devices, see File Shadowing. - Click Next.
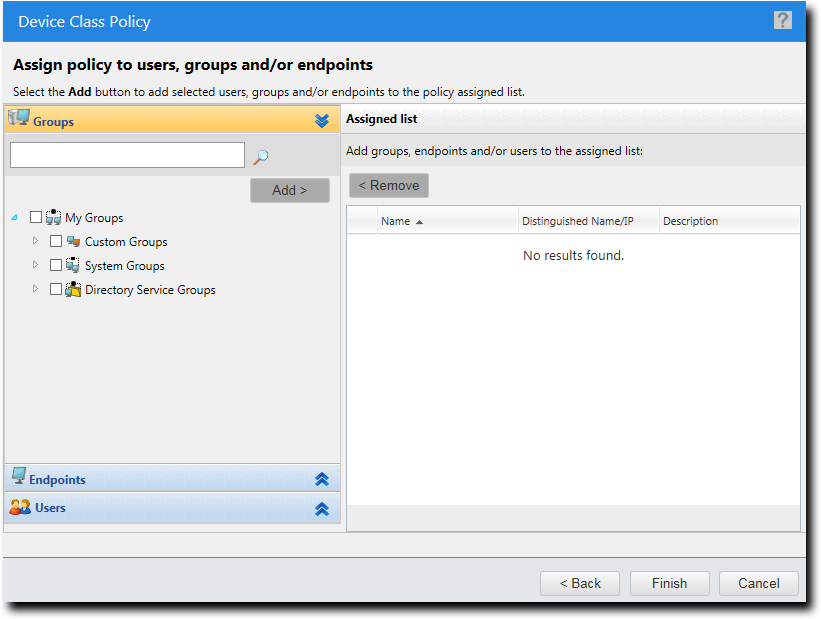
The Assign policy to users, groups and/or endpoints page opens.This page is skipped when the wizard is launched from the Groups, Endpoints, or Users page of the Manage menu.
- Select the group, endpoint, or user to which the policy will apply.
- Select a group or groups from the Groups list.
- Click Add.
- Select an endpoint or endpoints from the Endpoints list.
- Click Add.
- Select users or usergroups from the Users list.
- Click Add.
- Select a group or groups from the Groups list.
- Click Remove.
- Select an endpoint or endpoints from the Endpoints list.
- Click Remove.
- Select users or usergroups from the Users list.
- Click Remove.
- Click Finish.
The Device Class Policy wizard closes.

Only one copy limit setting per device class will be enforced. For example, copy limits configured for removable storage devices apply to hard drives and non-hard drives. To avoid ambiguity, it is recommended that you do not combine copy limit policies and permissions policies.
|
Option |
Description |
|---|---|
|
Always |
The policy will apply at all times. |
|
Online only |
The policy will apply only when the endpoint/user/group is connected to the server. |
|
Offline only |
The policy will apply only when the endpoint/user/group is disconnected from the server. |
|
Scheduled |
The policy will apply only during a set schedule. |
|
Temporary |
The policy will give one-time access for a specified period. |
Depending on the option you choose, additional settings are available in the right-side box.
|
Option |
Description |
|---|---|
|
To add groups of endpoints |
|
|
To add individual endpoints |
|
|
To add individual users or user groups |
|
|
To remove groups of endpoints |
|
|
To remove individual endpoints |
|
|
To remove individual users or user groups |
|
The selected groups, users, or endpoints are displayed in the Assigned List.
The Secure Volume Browser (SVolBro) is installed on the device during encryption. SVolBro runs on any supported Microsoft Windows computer and prompts the user for a password that allows device access, regardless of whether the machine runs the Device Control client or not. The password protects the encryption key, which is exported to the device during encryption.
When a user attempts to access an unencrypted removable storage device, the Encrypt Medium utility launches and guides the user through the device encryption process. The user will create a password for access to the encrypted device.
The following table show the Encrypt Medium pages that the user can see based on the encryption options configuration.
Nonportable Device Encryption Permission
Non-portable device encryption options can be assigned on a user or user group basis. Device permissions combined with specific device encryption default settings govern the behavior of the Encrypt Medium utility that runs on the client.
Prerequisites:
You must have a properly configured and working Microsoft® Certificate Authority which can issues certificates to users for the purpose of encryption.
An administrator must set the device encryption default options and permissions to enable the Encrypt Medium utility option for non-portable device access. Non-portable device access encryption force users to encrypt devices for use only on computers running the Device Control client that are connected to the corporate network.
- In the Device Control application, select Tools > Options.
The Options page displays. - Select the Device Control tab.
- Select Enabled from the Microsoft CA Key Provider drop-down list.
- Select Manage > Device Control Policies.
The Device Control Policies page opens. - Click Create.
The policy type drop-down menu appears. - Select Create class policy.
The Device Class Policy wizard appears. - Type the Policy name.
- Select the Override priority.
You can choose between Normal (Default) and High (Overrides Normal Priority). - Select Removable Storage Devices from the Device class drop-down list.
- Select the Permission settings check box.
- [Optional] Select the Shadow settings check box.
Shadow settings can only be enabled for the COM/Serial Ports, CD/DVD Drives, Floppy Disk Drives, LPT/Parallel Ports, and Removable Storage Devices classes. - [Optional] Select the Daily copy limit check box. Specify a copy limit value in the text box.
Only one copy limit setting per device class will be enforced. For example, copy limits configured for removable storage devices apply to hard drives and non-hard drives. To avoid ambiguity, it is recommended that you do not combine copy limit policies and permissions policies.
- Select the desired policy enforcement option. You can choose from the following options:
- Select whether you want the policy to be applicable immediately.
The Enable radio button is selected by default. If you want to delay when the policy will begin working, select Disable. - Click Next.
The Permission Settings page opens. - Select the Allow access with following radio button.
- Select Encrypt.
- [Optional] Select any other permission that you want to apply.
For more information on setting permissions, refer to Permission Settings for a Policy. - Choose which Connections will apply.
- Select the applicable Drives.
- Select Unencrypted/Unknown encryption type from Encryption group box.
- Click Next.
The File Filter Settings page opens.Note: This page will only appear if you select File Filters in the Permission Settings page.
- Specify the file type filtering options.
For more information on file type filters, see File Type Filtering. - Click Next.
The Shadow Settings page opens.This page will appear only if you select Shadow settings in the Policy details page.
- Specify the shadow settings.
For more information on shadowing devices, see File Shadowing. - Click Next.
The Assign policy to users, groups and/or endpoints page opens.This page is skipped when the wizard is launched from the Groups, Endpoints, or Users page of the Manage menu.
- Select the group, endpoint, or user to which the policy applies.
- Select a group or groups from the Groups list.
- Click Add.
- Select an endpoint or endpoints from the Endpoints list.
- Click Add.
- Select users or usergroups from the Users list.
- Click Add.
- Select a group or groups from the Groups list.
- Click Remove.
- Select an endpoint or endpoints from the Endpoints list.
- Click Remove.
- Select users or usergroups from the Users list.
- Click Remove.
- Click Finish.
The Device Class Policy wizard closes.
|
Option |
Description |
|---|---|
|
Always |
The policy will apply at all times. |
|
Online only |
The policy will apply only when the endpoint/user/group is connected to the server. |
|
Offline only |
The policy will apply only when the endpoint/user/group is disconnected from the server. |
|
Scheduled |
The policy will apply only during a set schedule. |
|
Temporary |
The policy will give one-time access for a specified period. |
Depending on the option you choose, additional settings are available in the right-side box.
|
Option |
Description |
|---|---|
|
To add groups of endpoints |
|
|
To add individual endpoints |
|
|
To add individual users or user groups |
|
|
To remove groups of endpoints |
|
|
To remove individual endpoints |
|
|
To remove individual users or user groups |
|
The selected groups, users, or endpoints are displayed in the Assigned List.
A user is forced to encrypt unencrypted devices before access to the device is allowed. No password is required for device access. After encrypting the device, the user can only access the device on computers running the client.
When a user attempts to access an unencrypted removable storage device, the Encrypt Medium utility launches and guides the user through the device encryption process.
Important: Verify that users have Read and/or Write permissions for devices encrypted using Self Contained Encryption.
Portable and Nonportable Device Encryption Permission
Portable and non-portable device encryption options can be assigned on a user or user group basis. Device permissions combined with specific device encryption default settings govern the behavior of the Encrypt Medium utility that runs on the client.
Prerequisites:
- You must have a properly configured and working Microsoft®Certificate Authority which can issue certificates to users for the purpose of encryption.
- You may set the Password Complexity and Password Minimum Length options for user password requirements, using the Tools > Default Options > Computer tab. For detailed information about using options, see The Ivanti Device Control Options Page.
An administrator must set the device encryption default options and permissions to enable the Encrypt Medium utility option for portable and non-portable device access.
- In the Device Control application, select Tools > Default Options.
The Options page opens. - Select the Device Control tab.
- Select Enabled from the Microsoft CA key provider drop-down list.
- Select Manage > Device Control Policies.
The Device Control Policies page opens. - Initiate creation of a device class policy.
- Click Create.
The policy type drop-down menu appears. - Select Create class policy.
The Device Class Policy wizard appears.
- Click Create.
- Type the Policy name.
- Select the Override priority.
You can choose between Normal (Default) and High (Overrides Normal Priority). - Select Removable Storage Devices from the Device class drop-down list.
- Select the Permission settings check box.
- [Optional] Select the Shadow settings check box.
Shadow settings can only be enabled for the COM/Serial Ports, CD/DVD Drives, Floppy Disk Drives, LPT/Parallel Ports, and Removable Storage Devices classes. - [Optional] Select the Daily copy limit check box. Specify a copy limit value in the text box.
Only one copy limit setting per device class will be enforced. For example, copy limits configured for removable storage devices apply to hard drives and non-hard drives. To avoid ambiguity, it is recommended that you do not combine copy limit policies and permissions policies.
- Select the desired policy enforcement option.
- Select whether you want the policy to be applicable immediately.
The Enable radio button is selected by default. If you want to delay when the policy will begin working, select Disable. - Click Next.
The Permission Settings page opens. - Select the Allow access with following radio button.
- Select Encrypt.
- [Optional] Select any other permission that you want to apply.
For more information on setting permissions, refer to Permission Settings for a Policy. - Choose which Connections will apply.
- Select the applicable Drives.
- Select Unencrypted/Unknown encryption type from Encryption group box.
- Click Next.
The File Filter Settings page opens.This page will appear only if you select File Filters in the Permission Settings page.
- Specify the file filtering options.
For more information on file filters, see File Type Filtering. - Click Next.
The Shadow Settings page opens.This page will appear only if you select Shadow settings in the Policy details page.
- Specify the shadow settings.
For more information on shadowing devices, see File Shadowing. - Click Next.
The Assign policy to users, groups and/or endpoints page opens.This page is skipped when the wizard is launched from the Groups, Endpoints, or Users page of the Manage menu.
- Select the group, endpoint, or user the policy will apply to.
- Select a group or groups from the Groups list.
- Click Add.
- Select an endpoint or endpoints from the Endpoints list.
- Click Add.
- Select users or usergroups from the Users list.
- Click Add.
- Select a group or groups from the Groups list.
- Click Remove.
- Select an endpoint or endpoints from the Endpoints list.
- Click Remove.
- Select users or usergroups from the Users list.
- Click Remove.
- Click Finish.
The Device Class Policy wizard closes.
|
Option |
Description |
|---|---|
|
Always |
The policy will apply at all times. |
|
Online only |
The policy will apply only when the endpoint/user/group is connected to the server. |
|
Offline only |
The policy will apply only when the endpoint/user/group is disconnected from the server. |
|
Scheduled |
The policy will apply only during a set schedule. |
|
Temporary |
The policy will give one-time access for a specified period. |
Depending on the option you choose, additional settings are available in the right-side box.
|
Option |
Description |
|---|---|
|
To add groups of endpoints |
|
|
To add individual endpoints |
|
|
To add individual users or user groups |
|
|
To remove groups of endpoints |
|
|
To remove individual endpoints |
|
|
To remove individual users or user groups |
|
The selected groups, users, or endpoints are displayed in the Assigned List.
When a user attempts to access an unencrypted removable storage device, the option Encrypt Medium utility launches and guides the user through the device encryption process.
- If a user selects the Non-portable encryption option, then the user is forced to encrypt unencrypted devices before access to the device is allowed. After encrypting the device, the user can only access the device any computer running the Device Control client; no password is required for device access.
- If a user selects the Portable encryption option, then the Secure Volume Browser (SVolBro) is installed on the device during encryption. SVolBro runs on any supported Microsoft Windows computer and prompts the user for a password that allows device access, regardless whether the computer runs the Device Control client. The password protects the encryption key, which is exported to the device during encryption.
My Computer Page
You launch the Encrypt Medium utility from the Windows My Computer page.
Prerequisites:
Attach a removable storage device for encryption.
You use this page and task steps only when you have a device continuously attached to the computer running the Device Control client. For example, you attach device that you decrypt and decide to re- encrypt without removing the device from the computer.
Attention: If you detach and reattach the device to the computer running the Device Control client, the Encrypt Medium will automatically launch, and you will not see this page.
- Depending on your operating system, select Start > My Computer or Start > Computer.
The My Computer page opens. - Right-click the name of the device listed under Devices with Removable Storage.
- Select Encrypt Medium.
- Click Next.
Depending upon the encryption method options authorized by your administrator:- The Select Access Method page opens for access to portable and non-portable encryption.
- The User Access to Device page opens for access to enforced portable encryption.
- The Start Encryption page opens for access to enforced non-portable encryption.
Important: If you are encrypting a device that is 128 GB or larger, access to portable encryption will not be available.
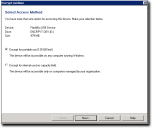
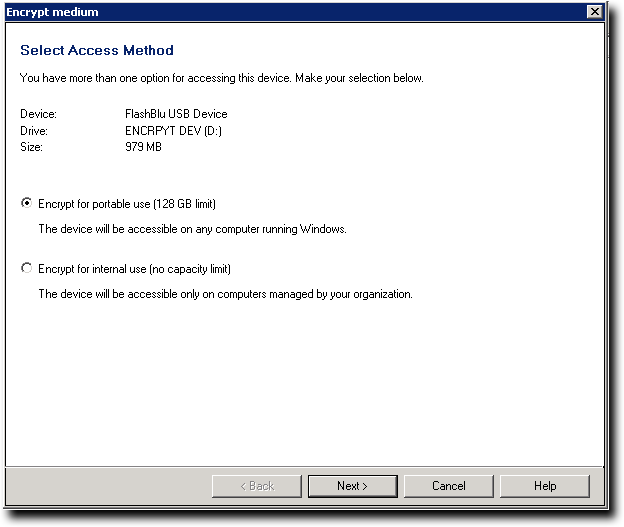
Select Access Method Page
The Select Access Method page provides options for encrypting devices based on device volume size.
The Select Access Method page is only available for the non-portable (internal use only) and the combined portable and non-portable encryption access options that are configured by the network administrator.
- Specify a user access method by selecting one of the following options shown on the Select Access Method page.
- Click Next.
The User Access to Device page opens, if you are using the portable encryption access method. If you are using the non-portable access method, the Data Integrity page opens if the device contains data, you have Read permission, and the default option to retain data during encryption is enabled.
|
Option |
Description |
|---|---|
|
Encrypt for portable use (128 GB limit) |
Allows use of an encrypted device on any computer running Microsoft®Windows®. This encryption access method is called Portable. |
|
Encrypted for internal use (2 TB limit) |
Allows use of devices only inside your network on computers that run are managed by Device Control. This encryption access method is called Non-portable. |
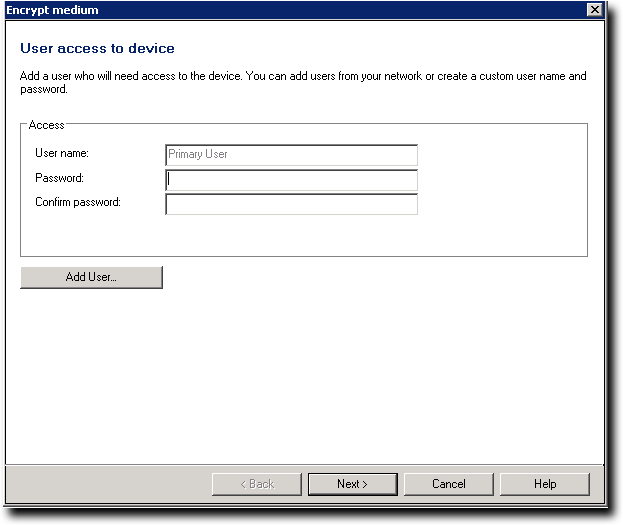
User Access to Device Page
The User Access to Device page allows you to specify a user name and password to provide easy access to the encrypted device.
- Type a user name in the User name field.
- Type a Password in the corresponding field, and then retype the password to Confirm in the corresponding field.
- If you wish to add other users for access to the encrypted device, click Add User.
Attention: When your device is larger than 128 GB or you are using non-portable encryption, you can only add one user and you must use the preset Primary User user name.
- Click Next, if you are not adding other users for access to the encrypted device.
The Data Integrity page opens.
Important: The first password user is always named Primary User, which is compatible with previous versions of Device Control.
The Add User page opens.
Add User Page
The Add Additional User page allows you to add users by user types that can access the encrypted device.
Options for adding users are shown on the Add Additional User page.
Important: At least one user who is allowed access to the encrypted device must be listed.
- To add a Windows Active Directory user:
- Select Add Windows user.
- Click OK.
The Select Users or Groups dialog opens. - To add a Windows user in the Enter the object names to select field, enter the names of the users to add to the list, using one of the following formats:
- To verify the user name, click Check Names.
The user name is verified and underlined when correctly entered. - Click OK.
Object Name
Example
Display Name
FirstName LastName
UserName
User1
ObjectName@DomainName
User1@Domain1
DomainName\ObjectName
Domain\User1
- To add a unique user name and password:
- Type a user name in the Name field.
Important: The first password user is always named Primary User, which is compatible with previous versions of Device Control.
- Type a Password in the corresponding field, and then retype the password to Confirm in the corresponding field.
- Click OK.
The user name(s) are added to the list shown in the User List page. You may continue to add users to the device using the previously described steps. You may also remove users from the list by clicking on the Recycling Bin icon to the left of a user name.
- Type a user name in the Name field.
After Completing This Task:
After reviewing the user names added to the User List page, click Next and the Data Integrity page opens.
Attention: When the device does not contain any data, or your administrator has preselected one of the Data Integrity options, either the Secure Unused Space page or the Start Encryption page opens next.
User List Page
The User List page provides the opportunity to review the user access list and add other users as necessary.
The user name(s) added to the user access list is shown on the User List page.
- Review the user access list on the User List page.
- [Optional] Click Add User to add more users.
- [Optional] Click the Recycle Bin icon to remove users.
- When you are finished, click Next.
The Data Integrity page opens.Attention: If you have no data stored on the device you are encrypting and the policy to erase unused storage space is enforced by your administrator, the Start Encryption page opens next.
Data Integrity Page
The Data Integrity page provides options to save or delete files during the encryption process that are currently stored on the device.
If the policy to automatically retain data stored on the device is enforce by your administrator, this page is not available.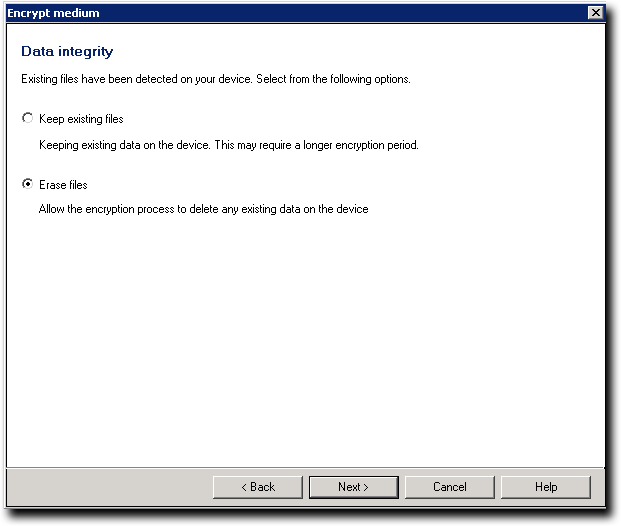
- Select one of the following options:
- Click Next.
The Secure Unused Space page opens.Attention: If you have no data stored on the device you are encrypting and the policy to erase unused storage space is enforced by your administrator, the Start Encryption page opens next.
|
Option |
Description |
|---|---|
|
Keep existing files |
Saves and encrypts all files stored on the device, during the encryption process. This option extends the time required to encrypt the device. |
|
Erase files |
Deletes all files stored on the device, during the encryption process. This option extends the time required to encrypt the device. |
Restriction: If the option to Keep existing files or Erase Files is shaded, then that option is preselected by the administrator and cannot be changed.
Secure Unused Space Page
The Secure Unused Space page provides the option to permanently erase files and securely remove data from unused sectors on the device to prevent unauthorized data recovery.
- Select Erase fragments in unused space on device (requires a longer encryption period) to erase data from the unused sectors on the device.
This is the most secure method for data encryption by preventing unauthorized attempts to recover confidential or sensitive information that may have been deleted by a user but still resides on the device. - Click Next.
The Start Encryption page opens.
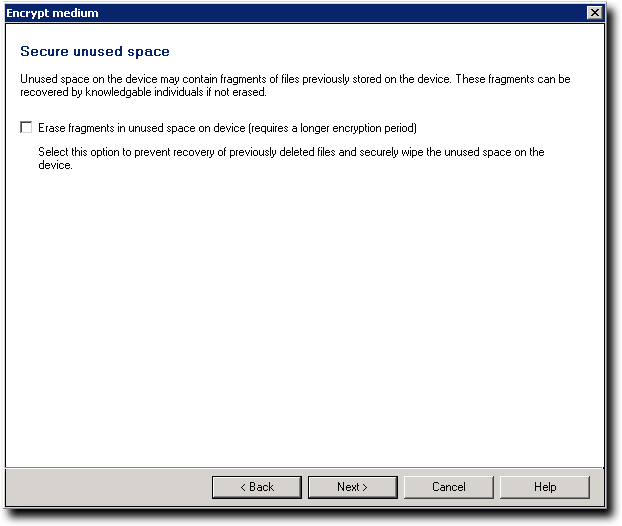
Important: This step is entirely optional. You may proceed without choosing to erase data from the unused space on the device.
Start Encryption Page
The Start Encryption page shows a summary of the users and encryption method options selected for encrypting the specified device.
- Review the device encryption summary.
The Start Encryption page lists the names and types of users allowed to access the device. - When you are satisfied with the list of users allowed to access the device, click Encrypt.
The RTNotify warning dialog opens. - Click OK.
The Encrypt Medium dialog opens, showing a progress bar for the encryption process. - Click Close.
The device is encrypted for the users specified.Attention: If a valid digital certificate cannot be retrieved for the Windows user you are adding, you receive the following message in the Encrypt Medium dialog: No certificates found; user will not be added.