Working with Jobs
You can perform a number of tasks related to Discovery Scan Jobs and Agent Management Jobs from the Job Results page. You can perform most of these tasks regardless of the tab selected. However, certain tasks are specific to certain tabs.
To perform tasks associated with jobs, click a toolbar button. Some buttons are unavailable until one or multiple jobs are selected from the page list.
The following list displays the task that you can perform from the Job Results page.
- Discovering Assets
- Installing Agents by Agent Management Job
- Uninstalling Agents by Agent Management Job
- Copying Jobs
- Viewing Job Configurations
- Deleting Jobs
- Exporting Job Result Data
- Canceling Jobs
- Viewing a Job Log
- Viewing Job Results
- Pausing Jobs
- Resuming a Paused Job
- Merging Jobs
Discovering Assets
Discover Assets jobs are Discovery Scan Jobs that let you customize scheduling, discovery methods, and discovery options.
To schedule a discover assets job from any tab on the Job Results page, select Discover > Assets from the toolbar.
For additional information, refer to Discovering Assets by Discovery Scan Job.
Installing Agents by Agent Management Job
Within Ivanti Endpoint Security, there are various pages in which you can install agents on endpoints using an Agent Management Job. To create an Agent Management Job on the Job Results page, select Discover > Assets and Install Agents from the toolbar.
For additional information, refer to Installing Agents by Agent Management Job.
Uninstalling Agents by Agent Management Job
Within Ivanti Endpoint Security, there are various pages in which you can uninstall agents on endpoints using an Agent Management Job. To create an Agent Management Job that uninstalls agents from the Job Results page, select Discover > Assets and Uninstall Agents from the toolbar. You can perform this task from any tab.
For additional information, refer to Uninstalling Agents by Agent Management Job.
Copying Jobs
On occasion, you may want to create a job (Discovery Scan Job or Agent Management Job) that is identical to a preexisting completed job. Rather than creating a new job and recreating its configuration, you can copy that preexisting job with the desired configuration values already in place.
Copy jobs from any tab on the Job Results page.
- Based on the type of job you want to copy, select an item from the navigation menu. Use one of the following methods to select jobs for copying.
Method
Step
To copy Discovery Scan Jobs:
Select Review > Asset Discovery Job Results.
To copy Agent Management Jobs:
Select Review > Agent Management Job Results.
- Select the tab that lists the job you want to copy:
- Scheduled
- Active
- Completed
- Select the job you want to copy.
The Copy button becomes active.Tip: When the Name check box is selected, all items become checked. However, you may only copy one item at a time.
- Click Copy.
Depending on which job you selected, one of the following dialogs opens:- Copy Discover Assets Job
- Copy Install Agents Job
- Copy Uninstall Agents Job
- If copying an Agent Management Job, dismiss the security credential acknowledgment by clicking OK.
- [Optional] Edit the job configuration.
If the job you are copying requires credentials (for either agent management or credential validation), you will have to re-enter the credentials for security purposes.
When editing the Copy Discover Assets Wizard, you can select or clear the Use existing credential set check box, which is available on the Credentials page. This option, which is unavailable during regular discover assets job configuration, lets you retain or discard the credential set entered during source job configuration. If you discard the credential set, you can enter a new credentials set or use no credentials.
- Click Save.
The copied job is saved and moved to the applicable Job Results page tab.
Viewing Job Configurations
Ivanti Endpoint Security can display a job's configuration details in a read-only dialog. View this dialog when you want to see a job's configuration without changing it.
View job configurations from any tab on the Job Results page.
- Based on the type of job you want to view, select an item from the navigation menu. Use one of the following methods to select jobs for viewing.
Method
Step
To view Discovery Scan Jobs:
Select Review > Asset Discovery Job Results.
To view Agent Management Jobs:
Select Review > Agent Management Job Results.
- Select the tab that lists the job configuration you want to view:
- Scheduled
- Active
- Completed
- Select the job you want to view.
The View button becomes active.When the Name check box is selected, all items become checked. However, you may only view one item at a time.
- Click View.
Depending on the type of job you are viewing, one of the following dialogs opens in a read- only format:- View Discover Assets Job
- View Install Agents Job
- View Uninstall Agents Job
Use the dialog buttons to scroll through wizard pages.
Deleting Jobs
When a Discovery Scan Job or an Agent Management Job is no longer necessary, delete that job to completely remove its record from Ivanti Endpoint Security. Deleting jobs differs from canceling jobs. Deleted jobs are removed from the Job Results page altogether; canceled jobs are moved to the Completed tab.
Delete jobs from any tab on the Job Results page.
- Based on the type of job you want to delete, select an item from the navigation menu. Use one of the following methods to select jobs for deleting.
Method
Step
To view Discovery Scan Jobs:
Select Review > Asset Discovery Job Results.
To view Agent Management Jobs:
Select Review > Agent Management Job Results.
- Select the tab that lists the job configuration you want to delete:
- Scheduled
- Active
- Completed
- Select the job you want to delete.
The Delete button becomes active.When the Name check box is selected, all items become checked in the list and the Delete button becomes active.
- Click Delete.
A dialog appears, asking you acknowledge the deletion. - Acknowledge the deletion by clickingOK.
The job is deleted from the list.
Exporting Job Result Data
To export the list of Discovery Scan Jobs and Agent Management Jobs that are listed on any Job Results page tab to a comma separated value (.csv) file, click the toolbar Export button. Exporting data lets you work with that data in other programs for reporting and analytical purposes.
For additional information, refer to Exporting Data.
Canceling Jobs
Cancel a Discovery Scan Job or an Agent Management Job that you do not want to complete but still want to keep a record of. Canceling jobs differs from deleting jobs. Canceled jobs move to the Completed tab; deleted jobs are removed from the Job Results page altogether. You can cancel jobs with a status of scheduled, paused, or running.
Cancel jobs from the Scheduled and Active tabs.
- Based on the type of job you want to cancel, select an item from the navigation menu. Use one of the following methods to select jobs for canceling.
Method
Step
To cancel Discovery Scan Jobs:
Select Review > Asset Discovery Job Results.
To cancel Agent Management Jobs:
Select Review > Agent Management Job Results.
- Select the tab that lists the job(s) you want to cancel:
- The Scheduled tab
- The Active tab
- Select the job(s) you want to cancel.
The Cancel button becomes active.When the Name check box is selected, all items become checked within the list and the Cancel button becomes active.
- Click Cancel.
- Click OK to confirm the cancellation.
The selected job is canceled and moved to the Completed tab.
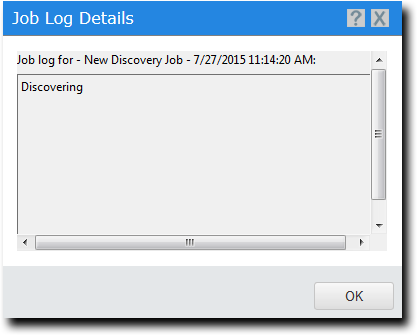
Viewing a Job Log
During activity, jobs record any substantial events or errors that occur. These logs are helpful when troubleshooting network, server, or agent issues. Not all jobs record logs.
View job logs from the Active or Completed tabs. Active job logs may not be complete because scanning or agent installation is not finished.
- Based on the type of job log you want to view, select an item from the navigation menu. Use one of the following methods to select job logs for viewing.
Method
Step
To view Discovery Scan Job job logs:
Select Review > Asset Discovery Job Results.
To view Agent Management Job logs:
Select Review > Agent Management Job Results.
- Select the tab that lists the job containing the log you want to view:
- The Active tab
- The Completed tab
- Select the job containing the log you want to view.
If a log is available, the Log button becomes active.When the Name check box is selected, all items become checked. However, you may view only one log item at a time if it is available.
- Click Log.
If more than one job is selected, or if the selected job does not have a log, then Log is unavailable.
The Job Log Details dialog opens.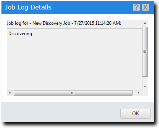
Viewing Job Results
You can see the results for a job after it completes or while it runs. However, viewing the results for an active job will display only partially completed results. View results by clicking job name links, which open the applicable job's Results page.
Access job results from the Active and Completed tabs.
- Based on the type of results you want to view, select an item from the navigation menu. Use one of the following methods to select job results for viewing.
Method
Step
To view results for Discovery Scan Jobs:
Select Review > Asset Discovery Job Results.
To view results for Agent Management Jobs:
Select Review > Agent Management Job Results.
- Select the tab that lists the job for which you want to view results:
- Active
- Completed
- Click the job name link for the job results you want to view.
Scheduled jobs have no job name links.
The Results page for the job you selected opens. The Results page for active jobs is partially complete because the job is still active. More job information appears as you refresh the page.
Pausing Jobs
While Discovery Scan Jobs or Agent Management Jobs are active, they can be temporarily paused. Only active jobs can be paused.
Pause jobs from the Active tab.
- Based on the type of results you want to pause, select an item from the navigation menu. Use one of the following methods to select job results for pausing.
Method
Step
To pause Discovery Scan Jobs:
Select Review > Asset Discovery Job Results.
To pause Agent Management Jobs:
Select Review > Agent Management Job Results.
- Select the Active tab.
- Click the job(s) you want to pause.
The Pause button becomes active.Tip: When the Name check box is selected, all items become checked in the list and the Pause button becomes active.
- ClickPause.
The selected job is paused.
Resuming a Paused Job
Resume paused jobs to continue their activity. Only paused jobs can be resumed.
Prerequisites:
-
A pause job is present in the Active tab.
Resume paused jobs from the Active tab.
- Based on the type of results you want to resume, select an item from the navigation menu. Use one of the following methods to select job results for resuming.
Method
Step
To resume Discovery Scan Jobs:
Select Review > Asset Discovery Job Results.
To resume Agent Management Jobs:
Select Review > Agent Management Job Results.
- Select the Active tab.
- Click the paused job(s) you want to resume.
The Resume button becomes active.When the Name check box is selected, all items become checked in the list and the Pause button becomes active.
- ClickResume.
The selected job is resumed.
Merging Jobs
Merging completed jobs lets you view the results for two different jobs on one page. This feature is convenient for when you want to review multiple jobs' results without having to navigate between jobs.
You can only merge completed jobs that have a status of Finished. Merge completed jobs from the Completed tab. You can merge an unlimited number of completed jobs.
Agent Management Jobs that install agents and Agent Management Jobs that uninstall agents cannot be merged.
- Based on the type of jobs you want to merge, select an item from the navigation menu. Use one of the following methods to select job results for merging.
Method
Step
To merge Discovery Scan Jobs:
Select Review > Asset Discovery Job Results.
To merge Agent Management Jobs:
Select Review > Agent Management Job Results.
- Select the Completed tab.
- Select the job(s) you want to merge.
More than one job must be selected to merge jobs. When the Name check box is selected, all items become checked in the list and the Merge button becomes active.
- ClickMerge.
The Merge Jobs dialog opens.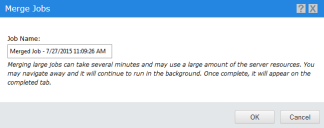
- [Optional] Type a new name for the job in the Job Namefield.
By default, new merged jobs are named Merged Job, followed by the server-side date and time, formatted according to the server’s locale setting.
- Click OK.
The merged job appears in the list.
