Service Manager powered by HEAT
Setting Up Hours of Operation
•About Hours of Operation (HOP)
•Creating an Hours of Operation Schedule
•Modifying the Hours of Operation
•Example: Creating an Hours of Operation Field
•Example: Setting Up Hours of Operation for Off Hours
About Hours of Operation (HOP)
Use the Business Hours workspace to define the operational calendar for your company, including daily hours and schedules. For example, you can determine the incident response time for a technician or execute a business rule that escalates a call that has been open for a number of hours.
Business hours define how response times (such as those in escalations) are calculated. These response times are typically based on a specific hours of operation definition.
Add exemptions, such as holidays or days when the office is closed, to the calendar. You can have multiple lists, each with a unique name.
Viewing Business Hours
The Business Hours workspace lists the default hours of operation schedules.
1.From the Configuration Console, click Configure > Organization Profile > Business Hours to open the Business Hours workspace.
2.Select a schedule to see its details.
Creating an Hours of Operation Schedule
1.From the Configuration Console, click Configure > Organization Profile > Business Hours to open the Business Hours workspace.
2.Click Add New.... The system displays the Add Hours of Operation page.
Add Hours of Operation Page

3.Enter information into the fields.
| Field | Description |
|---|---|
| Name | A unique name for the hours of operation schedule. |
| Whole day | Applies the schedule to a 24-hour day. |
| Overnight | Adds this service as an overnight (after business hours) service. |
|
Start End |
The start and end times (if you did not select Whole day) of your operation. |
| Time Zone | Your time zone. Choose from the drop-down list. |
| Recurrence pattern |
The number of occurrences. Select the pattern options according to the chosen interval. Select the interval (daily, weekly, monthly, yearly). |
| Range of recurrence |
The start and end date ranges for this schedule. No end date End after (enter number) occurrences End by (enter date) |
Hours of operation cannot span over multiple days.
4.Click Save. The system displays the yearly calendar with active days highlighted in blue.
Adding Recurring Exceptions
You can add exemptions to the hours of operation as a recurring pattern, or by entering individual dates.
There are two types of exceptions: working time and non-working time. Use these exceptions to include or exclude the period for business hours.
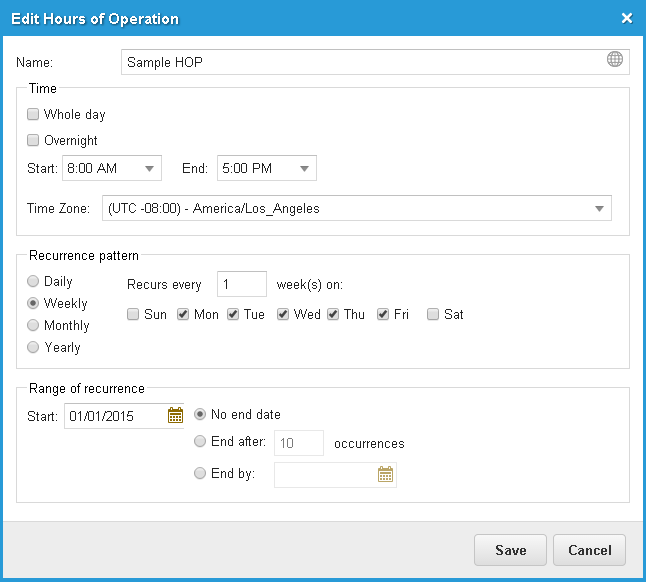
For example, say that your organization has defined weekly hours of operation for Monday to Friday from 8am to 5pm.
Hours of Operation Example 1
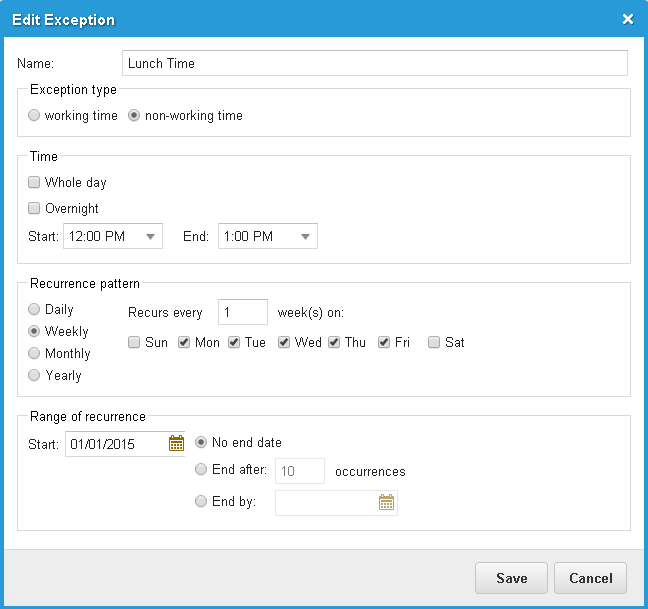
However, you have one hour for non-working time, from 12pm to 1pm. So you have the following non-working time exception:
Hours of Operation Example 2
In this example, the first Saturday of every month is also a working day, so there is a working time exception.
Hours of Operation Example 3

For the exception of working on a Saturday, there is an exception for the Saturday lunch period:
Hours of Operation Example 4

Follow these steps to create an exception:
1.From the Configuration Console, click Configure > Organization Profile > Business Hours to open the Business Hours workspace.
2.Click the name of a schedule. The system displays the schedule page.
3.Click Recurrent to add a recurrence pattern. The system displays the Add Exception page.
4.Enter information into the fields.
| Fields | Description |
|---|---|
| Name | A unique name for the exception. |
| Exception type |
The exception type. You can select one of these: Working time Non-working time |
| Whole day | Applies the recurrence to a 24-hour day. |
| Overnight | Adds this recurrence as an overnight (after business hours) service. |
|
Start End |
The start and end times (if you did not select Whole day) of your operation. |
| Recurrence pattern |
The number of occurrences. Select the pattern options according to the chosen interval. Select the interval (daily, weekly, monthly, yearly). |
| Range of recurrence |
The start and end date ranges for this schedule. No end date End after (enter number) occurrences End by (enter date) |
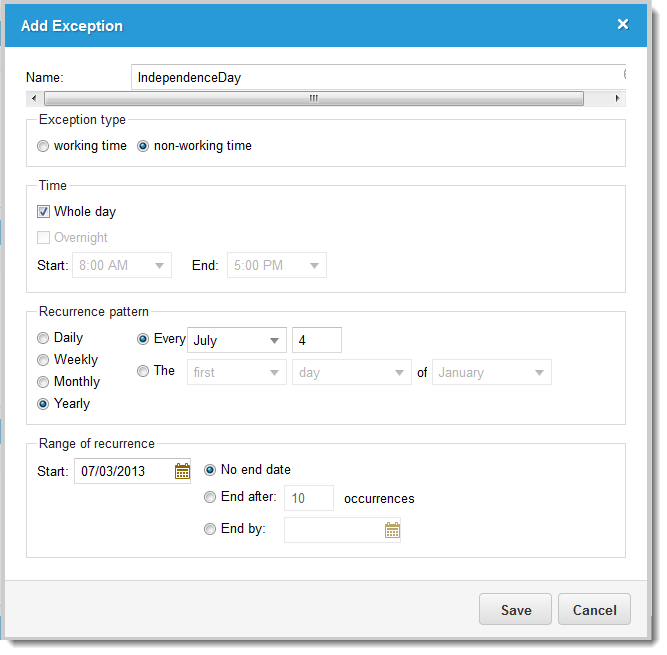
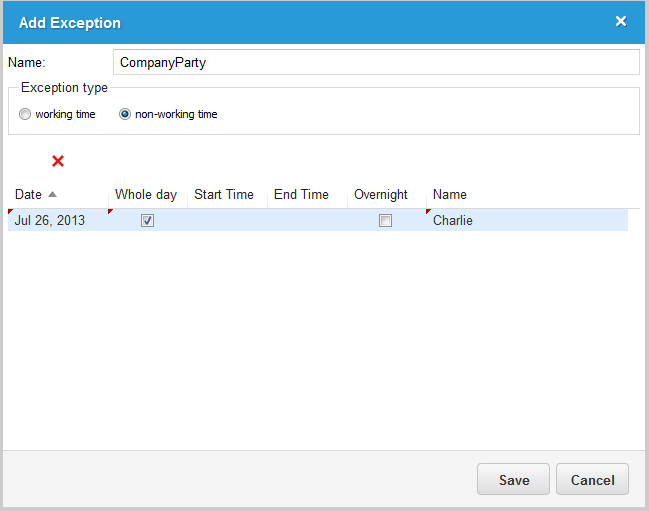
Add Exception to Hours of Operation
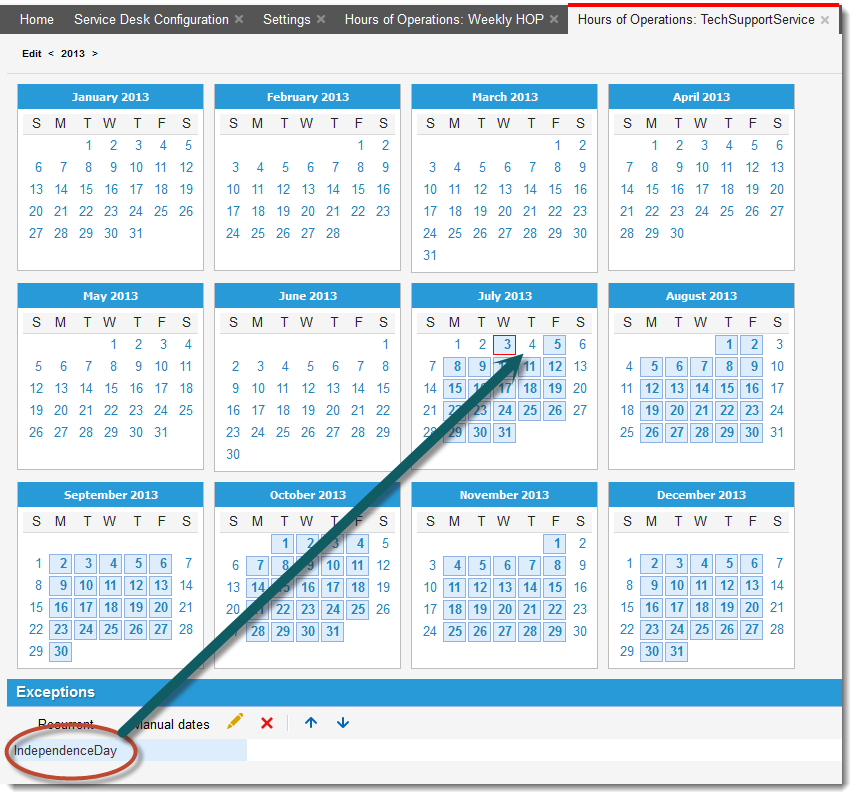
5.Click Save. The system no longer highlights the day and the exception appears at the bottom of the page.
Results of Exception to Hours of Operation
Adding Manual Exceptions
1.From the Configuration Console, click Configure > Organization Profile > Business Hours to open the Business Hours workspace.
2.Click the name of a schedule. The system displays the schedule page.
3.Click Manual dates to add a manual exception, such as a half-day.
4.Enter information into the fields.
| Field | Description |
|---|---|
| Name | A unique name for the exception. |
| Exception type |
The exception type. You can select one of these: Working time Non-working time |
5.Click the add icon  to add a row, then enter the date information.
| Field | Description |
|---|---|
| Date | The date of the exception. |
| Whole day | Applies the exception to a 24-hour day. |
|
Start Time End Time |
The start and end times (if you did not select Whole day) of your operation. |
| Overnight | Adds this exception as an overnight (after business hours) service. |
| Name | Optional. Name each row of the exception for future reference. |
6.Click the delete  icon to remove a row.
Delete an Exception from Hours of Operation
7.Click Save.
On the calendar, the system displays the hours of operation settings with an orange background. The system displays exemption settings with a pink background and lists the exemption at the bottom of the window.
Modifying the Hours of Operation
1.From the Configuration Console, click Configure > Organization Profile > Business Hours to open the Business Hours workspace.
2.Click the name of the schedule to modify. The system displays the schedule page.
3.Click the edit  icon. The system displays the Edit Hours of Operation window.
4.Enter information into the fields as described in Creating an Hours of Operation Schedule.
5.Click Save.
Example: Creating an Hours of Operation Field
This example shows how to create a field to hold the hours of operation. You can create a field to contain a value for the hours of operation to add to a form for any business object.
Adding this field enables users to designate hours of operation from a drop-down list for each record.
1.From the Configuration Console, click Build > Business Objects to open the Business Objects workspace.
2.Open the Change business object.
3.Click the Fields tab.
4.Click Add new.... The system displays a list of field types.
5.Click Text. The system displays the Setting Field Details page.
6.Enter information into the fields.
Setting Field Details for the Change Business Object

| Field | Description |
|---|---|
| Field Name | A unique name for your field, such as CompanyHours (with no spaces). |
| Display Name | The name that users see, such as Company Hours (spaces allowed). |
| Description | Optional. A description of how this field is used. |
| Field Type | The field type. From the drop-down list, select Unicode Text. |
| Text Length | The text length. Select Variable, max 100. This is based on the FRS_def_hours_of_operation default business object. |
| Validated |
Enables users to choose the value from a drop-down list. If you do not select this option, users can manually enter an incorrect value which can cause related actions (such as workflows) to not operate as expected.
We recommend that you always select this option. |
| Field Annotations | Do not set this value. |
| Field Attributes |
Field attributes. Select the following: Nullable Stored |
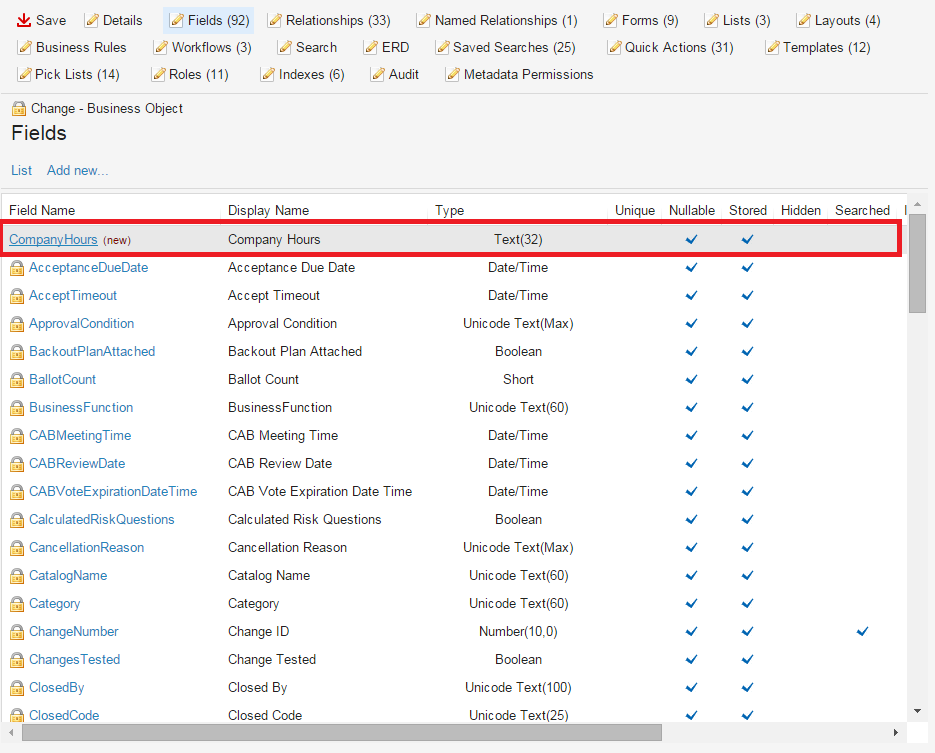
7.Click Add This Field. The new field now appears in the field list.
Sample Change Business Object Field List
Example: Setting Up Hours of Operation for Off Hours
You might want to determine the amount of time spent resolving an incident when an incident gets entered into the system after the hours of operation ends for the day and is resolved before the next hours of operation interval begins. The gap between the hours of operation intervals could be anywhere from minutes to months, and cannot be calculated.
In this case, use an if-then expression to calculate the duration. For example:
'$(if((HOPCalcDuration("Midnight", CreatedDateTime, ResolvedDateTime) / 60) > 0) then (HOPCalcDuration("Midnight", CreatedDateTime, ResolvedDateTime) / 60) else <Whatever appropriate>)'
Where
•Midnight is the name of the hours of operation schedule.
•Whatever appropriate is what to use as an alternative expression.
Was this article useful?
The topic was:
Inaccurate
Incomplete
Not what I expected
Other
Copyright © 2017, Ivanti. All rights reserved.