Service Manager powered by HEAT
•Working with the Self Service Mobile User Interface
•Using the Self Service Mobile User Interface on Mobile Devices
•Using the Service Catalog Mobile Workspace
•Creating Attachments in the Mobile Self Service User Interface
•Using the Save For Later and Cart Features in Self Service Mobile
Working with the Self Service Mobile User Interface
•About the Self Service Mobile User Interface
•Accessing the Self Service Mobile User Interface
About the Self Service Mobile User Interface
The Self Service Mobile role allows you to view the Self-Service Portal on laptops, mobile devices, and tablets.
Anyone who is assigned to the Self Service Mobile role can access the Self Service Mobile user interface. The web-based home page has an adaptive interface that is enabled by this role.
The Self Service Mobile user interface allows you to create, track, resolve, and close incidents and requests for service. You can also access the Service Catalog, FAQs, announcements, and Knowledge Base articles.
You can create service requests or incidents using the Self Service Mobile user interface. An added feature is that you can save an item and complete and submit it later. Unsubmitted requests will appear in a basket on the top right of the screen.
Accessing the Self Service Mobile User Interface
We recommend using Google Chrome when using the mobile user interface.
The Self Service Mobile user interface is not supported on, and cannot be used with, the following browsers: Microsoft Internet Explorer 8 (IE8), Microsoft Internet Explorer 9 (IE9), and native/embedded Android browsers.
To access this role, do the following:
1.Log in to the Service Manager Application.
2.From the drop-down list under your default role, select Self Service Mobile. The system changes the interface to the Self Service Mobile user interface.
Using the Self Service Mobile User Interface on Mobile Devices
Use the Self Service Mobile role to view pages on mobile devices such as tablets or phones. The user interface is similar but you can tap and swipe on the screen to see your choices. On tablets you may need to click on the title bar to move the display. Some parts may allow you to scroll the available list.
The Self Service Mobile user interface is responsive, simplified, and intuitive. Access the interface by logging in to Ivanti Service Manager as a Self Service Mobile user. You can view the interface on a variety of iOS and Android devices. The following three icons are helpful when navigating the pages.
| Icon | Use |
|---|---|
|
|
Tap to list, then select from the available menu items. |
|
|
Tap to enable search. |
|
|
Tap to see a list of available filters, then select from the choices available within a module. |
1.From a computer or mobile device, log into the Service Desk Console.
2.Select the Self Service Mobile role to load the pages.
3.When you log in, the system displays the Self Service Mobile user interface Home page as configured for your environment. Click or tap any option to open that page.
4.The following interface options allow you to see or hide the left pane. The Pin option does not appear on tablet or phone interfaces.
| Icon | Description |
|---|---|
|
|
Click or tap the Menu icon to open and close the left menu pane. On mobile devices the menu closes after you select an option. See The following is a list of possible options for the menu. In most instances you can view the same items as if you were logged into the Ivanti Service Manager application with the Self Service User role. for a list of menu options. |

|
For desktops and laptops, click the Pin icon to keep the menu pane open. If the menu icon is deselected, the menu pane closes after each selection. |

|
Administrators can configure the application by changing their role to Administrator and clicking the Configure icon. |
5.The following is a list of possible options for the menu. In most instances you can view the same items as if you were logged into the Ivanti Service Manager application with the Self Service User role.
| Menu Option | Description |
|---|---|

|
The default location. You see this page when you log into the Self Service Mobile user interface. This page contains a dashboard. Click a title bar to open that page. |

|
Displays a list of available services. The services you see are the same as when you are logged into HEAT using the Self Service User role. For more information about the choices and how to use search and filtering, see Using the Service Catalog Mobile Workspace. |

|
Displays a list of Knowledge Base articles. Enter a term in the Search field to search both the title and the content of all Knowledge articles. Filter your choices by using the All Categories, All Types, Any Rating, or Sort By drop-down lists. |

|
Displays frequently asked questions. Enter a term in the Search field to search both the title and the content of all FAQ articles for that term. Limit the search to a category by selecting an option from the All Categories drop‑down list. |

|
Displays incidents or requests created by you or assigned to you. Filter the available items by using the All, Sort by, or Sort Dir options. |

|
Displays system alerts. Click or tap an alert to see specifics. Depending on your installation, Alerts may also appear on the Self Service Mobile user interface home page. |

|
Displays various levels and types of announcements. Click or tap an announcement to see more information. Enter a term in the Search field to search all announcements. |

|
Searches for items that are configured for your environment. Usually these include announcements, FAQs, and Knowledge Base articles. Filter the search to a single category by using the All Types drop‑down list. Filter the date range by selecting an option from the All Ages drop‑down list. |

|
Changes your language or default login role. |

|
Logs you out of Ivanti Service Manager. |
Using the Service Catalog Mobile Workspace
The Service Catalog workspace lists all request offerings but also allows you to search for items and to filter the view or the search. Filter your search or view by that item or category.
•The Searches drop‑down list contains a list of available searches. Click or tap the delete icon  to clear the search.
•The Search field allows you to search for a specific term by a word or phrase in a service request title or description, such as "Active" or "HR".
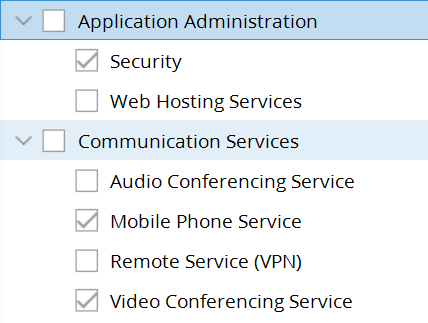
•The Category check boxes allow you to filter the view or the search results. For example, if you want to find a specific employee change form, searching for Forms displays all of the types of forms such as requests for network access, password reset, time off, address change, and so on. Filter the search using category to only show HR Services forms.
•Clear the category filter by checking All Categories.
•Some sections may contain multiple related choices. Click the arrow to expand the selection and to view the full list. Other filters may be available based on how the filters are configured for your system.
Example of Multiple Filtering Choices
Creating Attachments in the Mobile Self Service User Interface
You can use the camera on your device to take a photograph and attach it to an incident.
When using the Self Service Mobile user interface, you can only attach one item for iOS devices. Depending on your system configuration, you may be limited to the types of files (such as MOV) that you can attach.
1.Create an incident using the New Issue or Report An Issue icon and save it.
2.In the Form Submitted window, tap View Created Request to reopen the incident.
3.Scroll to the Attachments section and select Browse. If you are using the interface from a laptop you see a list of files that you can attach (such as PDF, .doc, or .xls files). The attachments can be viewed from devices with the appropriate apps or capability to view the attachments
4.If your device is camera-enabled you can select from the options to do the following:
•Take Photo or Video: Takes a new photo or video to attach to the incident.
•Photo Library: Lets you select an existing photo or video.
•iCloud Drive: Lets you attach files that are saved or shared in an iCloud drive.
Administrators can limit or change the types of allowed attachments (such as .MOV) from the Configuration Console, by clicking Configure > Security Controls > Allowed file extensions.
Using the Camera on iOS 8
Privacy settings on devices using Safari with iOS 8 may prevent you from using the camera function. The camera opens but the screen remains blank and only the Cancel button is enabled. If this occurs, use the following steps to re-enable the camera function:
1.From the Apple device go to Settings > Privacy > Camera.
2.Turn on access to the camera for Safari.
Was this article useful?
The topic was:
Inaccurate
Incomplete
Not what I expected
Other
Copyright © 2017, Ivanti. All rights reserved.