Service Manager powered by HEAT
Resolving a Problem
A problem can be resolved with a temporary workaround. However, entering a resolution does not always mean that the problem is closed.
Adding a Root Cause to a Problem
Root cause analysis is fundamental to problem management. We recommend that when setting a problem status to resolved, you add a root cause for the problem.
A problem should have only one root cause.
1.From the problem record, find the related knowledge article, then click Update to Known Error. See Working with Problems.
Problem Record
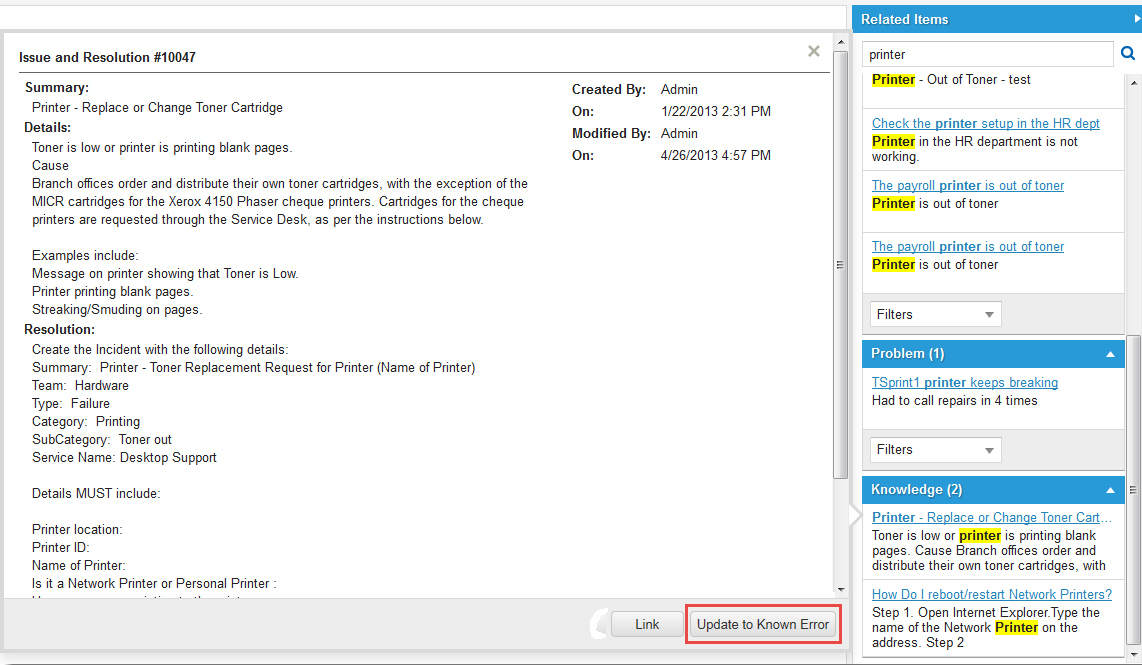
The problem type is set to Known Error, the status is set to identified, and the Root Cause tab appears. If appropriate, create a new reference document. See Service Manager powered by HEAT.
2.Select the Root Cause tab and check the following:
| Field | Description |
|---|---|
| Root Cause | A description of the root cause. By default, the description says "Refer to linked knowledge article." |
| Identified On | This date is automatically generated when you save the record. You can also click the calendar and select the date and time when the cause was identified. |
If you link a knowledge article to the problem during problem matching, the Root Cause field references the linked knowledge article and the Identified On field is set to the date you linked the knowledge article.
3.Click Save.
Resolving a Problem
A validation on save rule that states that a problem cannot be marked resolved or closed unless all associated change records are in the implemented, closed, canceled, denied, or deferred states (or the change is not in the logged, requested, pending approval, or scheduled states) is disabled by default.
If you need to enable this validation rule, ask your administrator to enable it for the problem business object.
Follow these steps to set a problem to the resolved state:
1.Within a problem record under the Details tab, do one of the following:
•In the Resolution field, enter a description of how the problem was resolved, then click Resolve via Resolution from the toolbar.
•In the Workaround field, enter a description of the workaround, then click Resolve via Workaround from the toolbar. Once the workaround information is documented, this information is accessible to all roles and modules with access to the problem record.
2.Under the Resolution tab, in the Closure Category field, choose the category for the resolution from the drop-down list.
3.Click Save.
The system creates a new FAQ. The information from the Error Message field of the problem is the FAQ question and the information from the Resolution field is the FAQ answer.
•The Issue and Resolution Article button on the toolbar is enabled from where you have the option of creating a knowledge article.
•The cost is updated by rolling up the cost of the associated tasks.
•The time specified in the Actual Effort field of each completed task is also rolled up to show the total time spent on the problem, as shown in the Time field on the Details tab.
Was this article useful?
The topic was:
Inaccurate
Incomplete
Not what I expected
Other
Copyright © 2017, Ivanti. All rights reserved.