Service Manager powered by HEAT
Printing Reports
In general, you use the print function within your browser to print reports.
•Creating a Custom Print Report
•Seeing What is Included in the Print Quick Action
Printing a Report
Follow these steps to print a report:
1.Select a report and run it.
2.Run the print option from your browser.
For example, within Google Chrome, Mozilla Firefox, or Microsoft Internet Explorer, press Ctrl + P on your keyboard or click Print from the browser menu.
Ensure that your browser allows pop-ups or you might not be able to print a report.
Creating a Custom Print Report
To make a report available in the Report Name drop-down list within the Run Report quick action, do the following:
1.Create a report template that contains all of the fields to print (see Creating Reports and Report Templates). Ensure that the RecID (or primary key of the object) is one of the parameters.
2. Create a report using the report template that you just created. Be sure to do the following:
• Select Can Run from the Run Report quick action.
•Publish to the role that will be using the Print Report quick action.
Sometimes the time in a report will be off by one hour from the time shown in a record. This is a known issue. See About Reports and Daylight Savings Time.
Printing a Record
Quick actions are used to print individual records. When you run the Quick Action > Print command, the system runs a report and sends it to the printer. Many default reports are included with Ivanti Service Manager. For example, if you have customized the Incident business object to include other child business objects, then you need to customize that report to include additional data.
1.Log into the Service Desk Console.
2.Open a business object.
3.From the Action Menu, select Print. The system displays a list of reports, depending on which business object you are in. See Default Reports for a list of reports furnished with Ivanti Service Manager.
4.Select a report from the list. The system runs the report.
Ensure that your browser allows pop-ups or you might not be able to print a report.
5.Do one of the following:
•From your browser menu, choose Print.
•Press Ctrl+P on your keyboard.
Seeing What is Included in the Print Quick Action
1.Log into the Service Desk Console.
2.Open a business object.
3.From the Action Menu, select Edit Actions. The system displays the Quick Action Center.
4.Click the Your Actions tab.
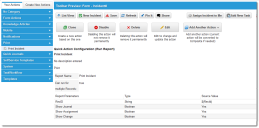
5. Click the Print header and then select Print business object (such as incident, change, or knowledge). The system displays the parameters for this quick action. For example, the following shows the Print Incident parameters:
Print Incidents Quick Action Parameters
Was this article useful?
The topic was:
Inaccurate
Incomplete
Not what I expected
Other
Copyright © 2017, Ivanti. All rights reserved.
