Service Manager
Exporting Data
Follow these steps to set up a connection to the server receiving the data.
1.Access the Data Integration Wizard by going to the Configuration Console and clicking Extend > Integration Tools.
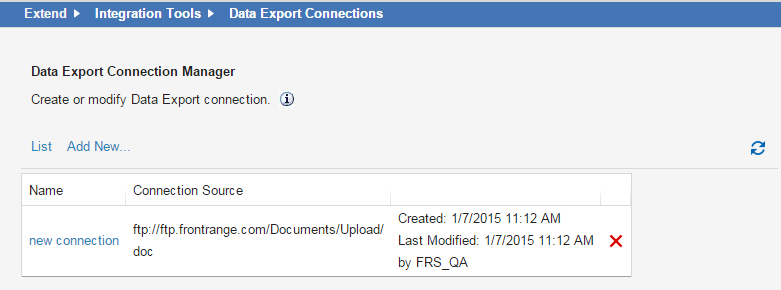
2.Click Start next to Data Export. The Data Export Connection Manager workspace appears. Any configured connections are listed.
Data Export Connection Manager
3.Click Add New.... The Data Export Connection Setting page appears.
Data Export Connection Settings
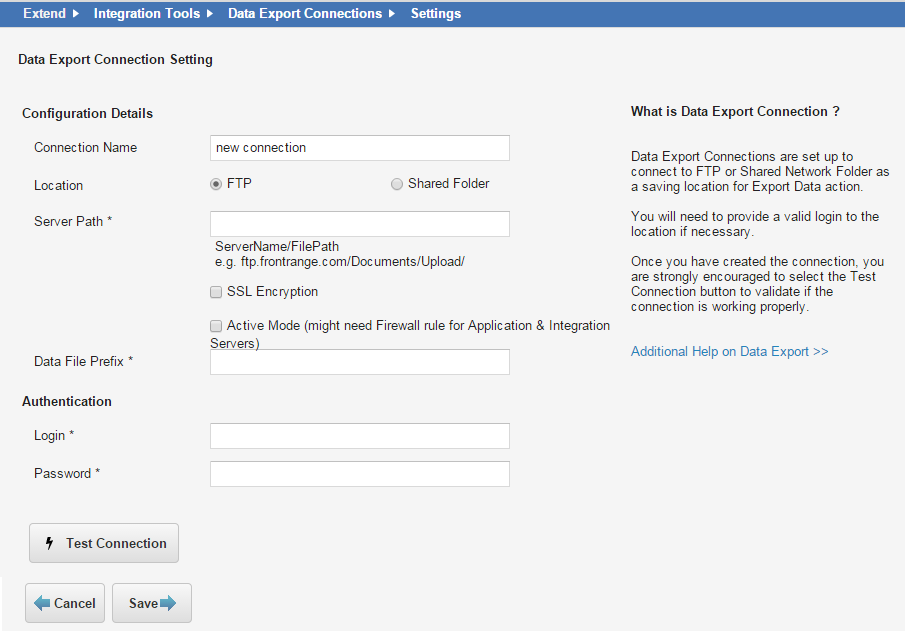
4.Enter information into the fields.
| Field | Description |
|---|---|
| Connection Name | A descriptive name for your connection. |
| Location |
The location type: FTP: Select this option to connect to a file server and not a web server to transfer data. The FTP protocol is used to upload files from a workstation to a specified FTP server. Shared Folder: Connects to a file in a shared folder. (File share is only available for on-premise deployments.) |
| Server Path | Enter the server path, such as Servername\Filepath. VPN access is required when Service Manager accesses the hosting server. When using the server name instead of an IP address, ensure that the IP address is known to Service Manager. Be sure to use a forward slash (\). Do not include the name of the file. |
| Secure Mode | |
| SSL Encryption |
Appears when FTP location is selected. Creates a secure connection. |
| Active Mode (might need Firewall rule for Application & Integration Servers) |
|
| Data File Prefix | The beginning or entire name of the data file. |
| Authentication | |
| Login | The user name used to access the server. |
| Password | The password used to access the server. |
5.Click Test Connection. If your connection is set up correctly, a Success confirmation message appears. Click OK.
6.Click Save to save your settings. The connection appears on the Data Export Connection list.
Was this article useful?
Copyright © 2019, Ivanti. All rights reserved.