Service Manager
Linking Incidents
While working on an incident, you can determine whether an incident is part of an existing change, problem, release, or other record. For example, you may notice that several incidents have been logged against the same configuration item. On further review, you will determine that the incidents are actually part of the same problem.
Although there are no set default restrictions, an incident should have only one configuration item type (such as a problem) associated with it. However, some record types might have multiple related incidents (such as problem, change, or knowledge).
If there is no existing problem linked to an incident, but the incident is part of a problem, a new problem can be created to link to the incident. The problem is created in a logged state until it is reviewed and diagnosed.
1.Log in to the Service Desk console.
2.Open the Incident workspace.
3.Open an incident.
4.In the Asset section, click Link. The Assets dialog box opens.
5.Find the record to link, then click Select. (See Using Record Search.) The item is displayed in the Assets area.
Sample Linked Asset
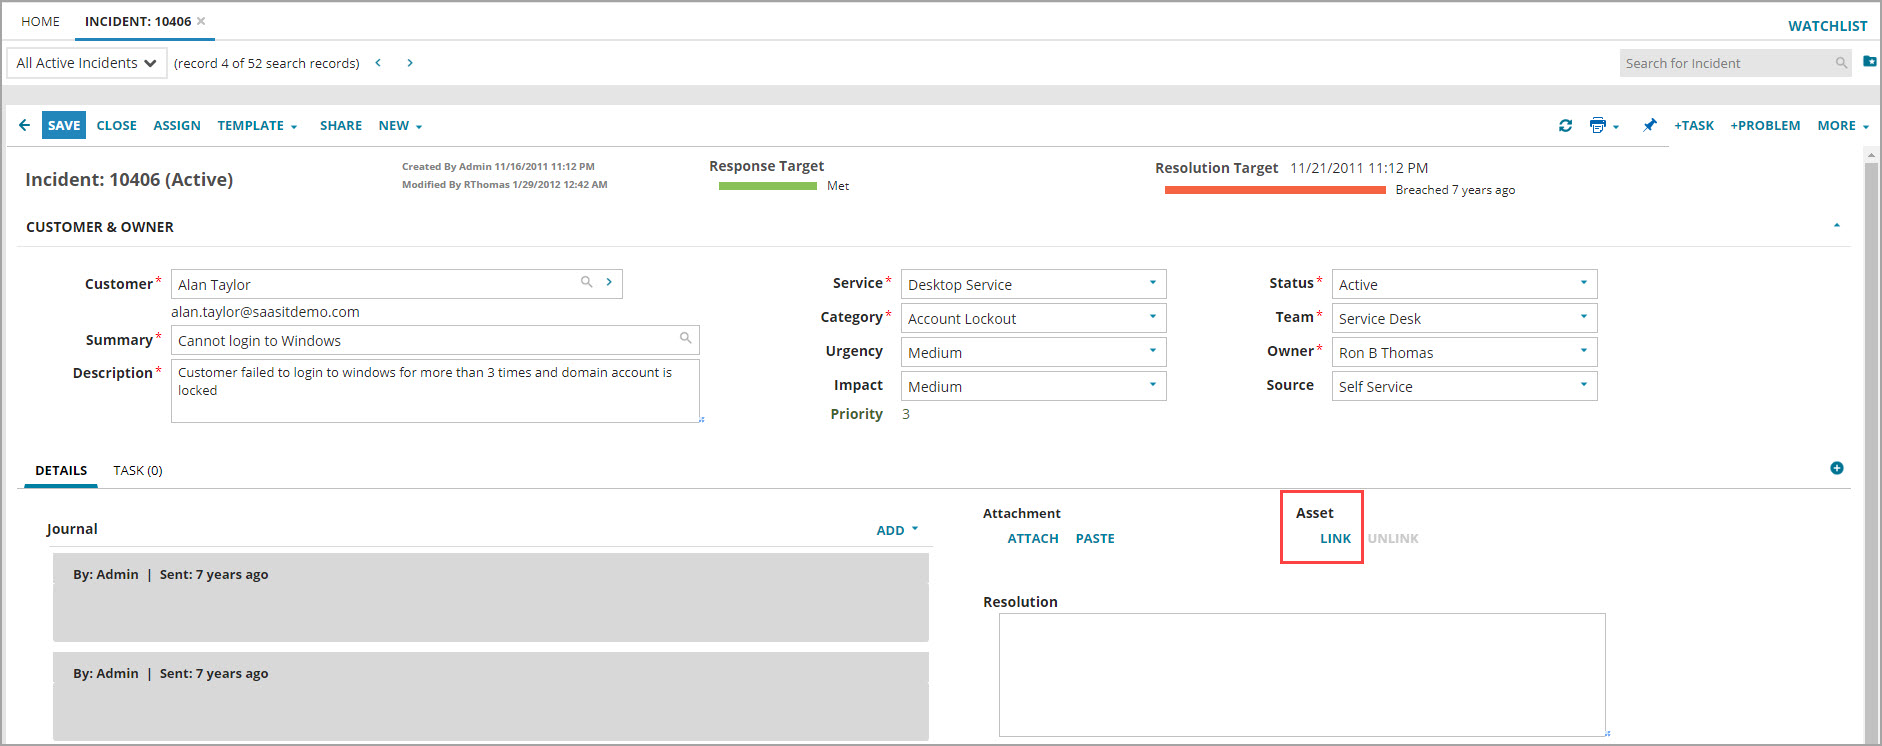
6.Click Save.
• The record is linked to the incident. If the linked record is a problem, change, configuration item, or knowledge article, the item also appears under the corresponding tab in this record.
• The incident also appears under the Incident tab of a linked problem, change, configuration item, or knowledge record.
•When the application changes a change or problem to closed, it updates the related incident to resolved.
Linking an Incident to a Master Incident
1.Log in to the Service Desk console.
2.Open the Incident workspace. A list of incidents is displayed.
3.Open an incident.
4.In the Master Incident tab, click the link toolbar icon to display a list of all master incidents.
5.Select a master incident from the list to link this incident to the master incident.
6.Click Save.
Unlinking an Incident from a Master Incident
1.Log in to the Service Desk console.
2.Open the Incident workspace. A list of incidents is displayed.
3.Open a master incident.
4.Click the Related Incidents tab. All incidents that are linked to the master incident open.
5.Highlight the incident to unlink and click Unlink.
6.Click Save.
Resolving Linked Incidents from a Master Incident
When you resolve a master incident, you can choose to resolve all of the incidents that are linked to it. However, if a linked incident is already resolved or closed, the system does not override those statuses.
1.Log in to the Service Desk console.
2.Open the Incident workspace. A list of incidents is displayed.
3.Open a master incident.
4.Click the Resolution Details tab.
5.Enter information in the fields, such as adding resolution notes in the Resolution field.
6.Check Update Related Incident Resolution.
7.Click Save. The application updates the fields in the linked incidents with the values that you entered for the master incident. For the linked incidents, it also adds the text ***Resolved through master incident number*** in the Resolution field on the Resolution Details tab.
Demoting a Master Incident
When you demote a master incident to a regular (non-master) incident, the application also unlinks all of the linked incidents.
1.Log in to the Service Desk console.
2.Open the Incident workspace. A list of incidents is displayed.
3.Open a master incident.
4.From the Action Menu, click Master Incident > Demote Master Incident.
5.At the confirmation message, click Yes. The master incident is demoted to a regular (non-master) incident.
6.Click Save.
Was this article useful?
Copyright © 2019, Ivanti. All rights reserved.