My Items
You can use the My Items workspace to track your submitted service requests and reported incidents. If needed, you can also submit a new service request or incident from this page.
You can track the same list of items from your My Open Items list in the Home workspace.
(From the list view, click a record to view it's status and other details.
Click Back to My Items List to return to the list view.
You can filter the list view as needed. Note that an administrator can view all of the items in this list:
•To search for a specific item, enter a keyword in the Search My Items field and click the ![]() icon. The matching results will display.
icon. The matching results will display.
•To focus the search, use the search drop-down list to select a category of Request, Issue, and so on.
•To clear all search criteria, click the ![]() icon.
icon.
)
1.From the workspace menu, click My Items.
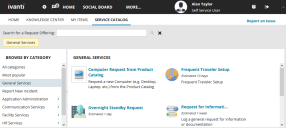
2.Click New Service Request in the upper-right area of the page. The Service Catalog workspace opens. 
3.Browse by category in the left navigation pane. When you find the correct item to place a request for, select it in the main pane.
4.In the form displayed, enter information into the fields as required. If the form is more than one page, click Continue (in the bottom right) to progress through the fields. Each form is different, depending on the request type you selected.
5.After entering all required information, click Review & Submit. Review the information for accuracy.
6.To make any changes before submitting, click Edit/Back. Note that once the request is submitted, you can't go back and edit the form.
7.Click Submit. The request will display in the list view where you can track it.
You may receive email updates from the Service Desk or Help Desk requiring additional information about the request. If this occurs, respond within the period of time indicated in the email; otherwise, the request will automatically close without resolution.
You can update a service request that's in progress by adding a note or an attachment (such as an image, document, and so on) to it. Those additions become a permanent part of the request record that you can't delete.
1.From the workspace menu, click My Items.
2.From the list view, open the request you want to update.
3.Click the Service Request Progress tab.
•In the Add a New Note field, enter your note and click Add Note.
•In the Add an Attachment field, click the ![]() icon to select a file to attach.
icon to select a file to attach.
4.Click Back to My Items List. The request will update with the new information.
Next time you open this service request and click the Service Request Progress tab, you'll see a timestamp with your note and/or the attached file.
1.From the workspace menu, click My Items.
2.Click New Issue in the upper-right area of the page. A form is displayed.
3.Before selecting a template and entering information into the fields, browse the Possible Solution panel on the right to see if you can resolve the issue on your own. If one of the solutions works, click Resolve (bottom right of the panel) to close the incident.
4.If no solution works, click the Template drop-down list to find a template that matches your problem. Use None if no template is found.
5.Enter a Summary title for this incident and thoroughly describe the problem in the Description field. In the Urgency field, select the level of urgency that this problem presents.
6. Click Save Incident.
Once saved, the issue becomes an incident with an ID that you can track.
You may receive email updates from the Service Desk or Help Desk requiring additional information about the incident. If this occurs, respond within the period of time indicated in the email; otherwise, the incident will automatically close without resolution.
To help the Service Desk or Help Desk resolve an incident, you may need to add a note or attachment to it. You can only do so after logging the incident. Once you add a note or an attachment, it becomes a permanent part of the incident record that you can't delete.
1.From the workspace menu, click My Items.
2.Find the incident in the list view and open it.
•In the Attachments section, click Browse and select a file to attach.
•In the New Notes text box, enter your note.
3.Click Save, then click Back to My Items List.
You can close any incident you've created, regardless of its current status. Typical reasons include resolving it on your own, deciding that no further investigation is needed, or determining that it's closed after the Service Desk or Help Desk has updated the status to Resolved.
1.From the workspace menu, click My Items.
2.From the list view, open the incident.
3.Click Close Incident at the bottom of the form.
4.Click Back to My Items List. The incident status changes to Closed.
After an incident is closed, you may receive a survey email requesting feedback about how effectively your issue was resolved. Your survey response will be stored with the incident.
