Self Service Mobile Portal
If you are assigned the Self Service Mobile user role, you can view the Self Service Mobile portal on a variety of iOS and Android devices, such as smart phones and tablets. The Self Service Mobile portal is a web-based user interface that is similar to the classic application, except the pages are sized to display appropriately on a mobile device.
Google Chrome is the recommended browser for viewing the Self Service Mobile portal. The following browsers are not supported: Microsoft Internet Explorer 8 (IE8), Microsoft Internet Explorer 9 (IE9), or native/embedded Android browsers.
If you're using a smart phone to access the Self Service Mobile portal, you will first need to download the Ivanti Neurons for ITSM app for free on your device from either the Google Play Store or Apple App Store.
• When you use Ivanti Neurons for ITSM on mobile devices including tablets, only mobile-based user roles are available. If you want to login to non-mobile based user roles, use your desktop or a laptop.
• The user interface for Ivanti Neurons for ITSM is designed to be flexible, supporting desktop, tablet and mobile form factors. When viewing in desktop, it is recommended to view in 1280 x 1024 resolution.
Accessing the Self Service Mobile Portal
When you log in to Neurons for ITSM as a Self Service Mobile user, the Enterprise Self Service Welcome page is the landing page. You will need to select a department to be able to access the Self Service Mobile portal. The Self Service Mobile portal will display content (Service Catalogs, Announcements, FAQs, My Items, and Knowledge Articles) specific to the department you selected.
For example, if you select Human Resources on the Enterprise Self Service Welcome page, you are redirected to the Self Service Mobile portal which displays content specific to Human Resources only.
When you log in to Neurons for ITSM as a Self Service Mobile user, the Self Service Mobile portal is the landing page. All Self Service content is available here without any department-based categorization, unlike when the Enterprise Self Service Welcome page is enabled.
Navigating the Self Service Mobile Portal
Once you are logged into the Self Service Mobile portal, you will notice that the interface may have a different look and feel from the image below. Based on how your administrator has setup and the device you're viewing it from, the colors and the exact modules might not be the same for all user roles.
All procedures described in the Self Service help also apply to the Self Service Mobile portal, with slight differences. For example, instead of clicking items and scrolling the window, you may need to tap and swipe the screen when performing actions.
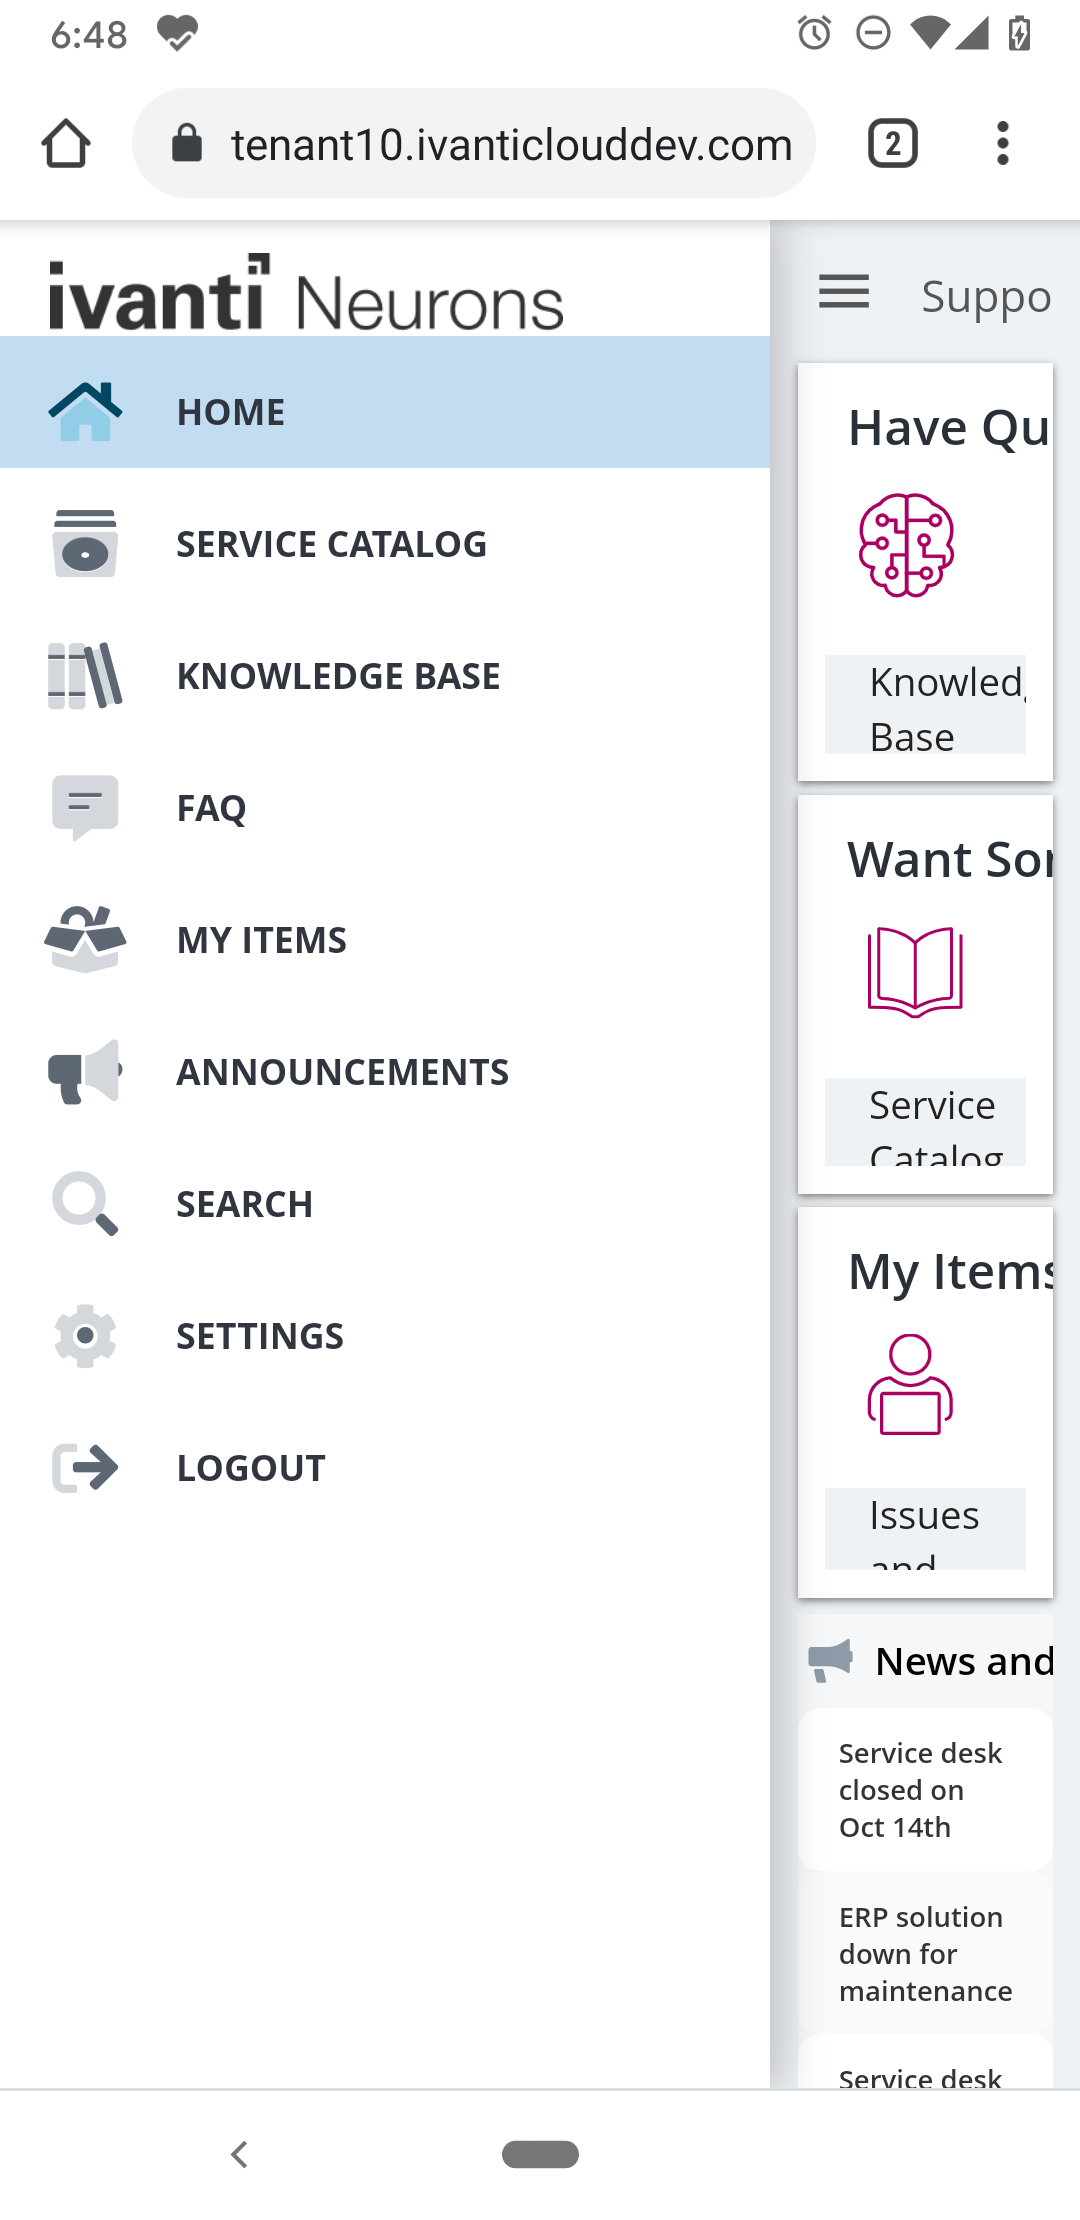
Navigate the portal using the left menu panel:
![]() – Expand or collapse the menu panel. On smart phones, the menu closes after you select an option.
– Expand or collapse the menu panel. On smart phones, the menu closes after you select an option.
![]() – The default page when you log in to the portal—use it to access the Service Catalog, browse knowledge articles, access your submitted incidents and requests, and so on.
– The default page when you log in to the portal—use it to access the Service Catalog, browse knowledge articles, access your submitted incidents and requests, and so on.
![]() – Open the Service Catalog to submit a service request or report an incident. For details, Service requests and incidents.
– Open the Service Catalog to submit a service request or report an incident. For details, Service requests and incidents.
![]() – View all published knowledge articles. Click Search
– View all published knowledge articles. Click Search ![]() icon to find specific titles or content by using keywords. Click
icon to find specific titles or content by using keywords. Click ![]() to focus the search by using one of the drop-down lists for filtering or sorting.
to focus the search by using one of the drop-down lists for filtering or sorting.
![]() – Find answers or solutions to FAQs before reporting an incident. Search
– Find answers or solutions to FAQs before reporting an incident. Search ![]() for specific titles or content by entering keywords. Focus the search by filtering from the All Categories drop-down list.
for specific titles or content by entering keywords. Focus the search by filtering from the All Categories drop-down list.
![]() – View all incidents or service requests created by you (and for some user roles, assigned to you). Search
– View all incidents or service requests created by you (and for some user roles, assigned to you). Search ![]() for specific incident titles or content by using keywords. Focus
for specific incident titles or content by using keywords. Focus ![]() the search by using one of the drop-down lists for filtering or sorting.
the search by using one of the drop-down lists for filtering or sorting.
![]() – View announcements, which are messages sent out to the entire organization. Click Search
– View announcements, which are messages sent out to the entire organization. Click Search ![]() icon to find specific announcements by using keywords.
icon to find specific announcements by using keywords.
![]() – Use keywords to search for items that are configured for your environment—these usually include announcements, FAQs, and knowledge articles. You can filter results by Categories and Date and sort by ascending or descending order.
– Use keywords to search for items that are configured for your environment—these usually include announcements, FAQs, and knowledge articles. You can filter results by Categories and Date and sort by ascending or descending order.
![]() – Change your personal settings, as allowed by your administrator. You may have privileges to change the default language of the application, default login role, and so on.
– Change your personal settings, as allowed by your administrator. You may have privileges to change the default language of the application, default login role, and so on.
![]() – Log out of the application.
– Log out of the application.