Working with Multisort Feature
In addition to simple sorting (that is, sorting by one column), a multisort feature is available by default in all lists. You can access the multisort feature in the list view by using either of the following:
Using the Multisort Feature
1.Log in to the application.
2.Open the workspace for which you wish to group records. For example, open the Incident workspace.
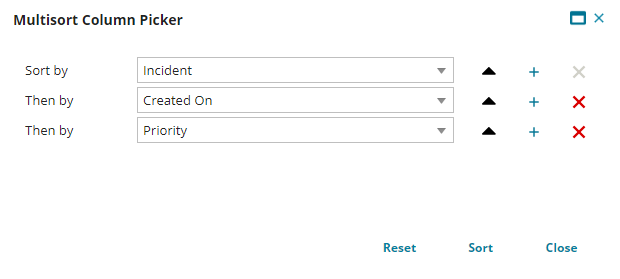
3.Click Multisort to display the Multisort Column Picker dialog box.
4.In the Sort by field, select a sort choice from the drop-down list.
5.Click the arrow icon beside the Sort By field to change sort order (either ascending or descending).
6.Add additional sort choices by clicking the plus  icon.
icon.
7.Select the sort option in the additional sort fields.
8.Remove any sort choices by clicking the delete icon.
icon.
9.Click Sort to complete your action.
10.Click Close to close the Multisort Column Picker.
Multisort Column Picker Dialog Box
Resetting the Multisort Feature
To reset the multisort feature, do one of the following:
•Click Reset in the Multisort Column Picker dialog box.
•Click on any column header.
•Click the Reset List Personalization icon in the footer of the list.
This does the following:
•Clears the controls (such as drop-down lists and sort order buttons) in the Multisort Column Picker dialog box.
•Resets the sorting in the list behind the dialog box.
Adding a Multisort Button to the List Toolbar
The Multisort feature is not applicable by default to all business objects. For those business objects where the Multisort button is not visible by default, you can it to the List view toolbar.
Following are the steps to add the Multisort button to the list toolbar. This example uses the Incident workspace:
1.From the Configuration console, click Build > Business Objects.
2.Select the business object for which you wish to add the Multisort button. This example uses Alert business object.
3.Click the Layouts tab.
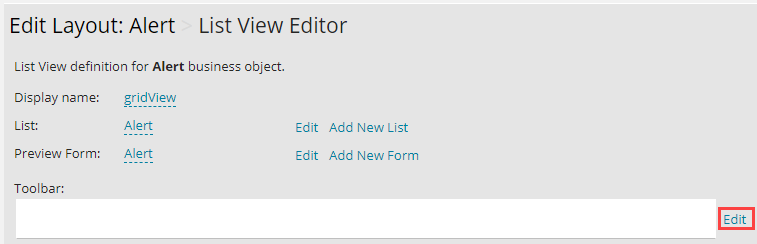
4.Open a layout associated with your business object. This example uses Alert. The Edit Layout: Alert page is displayed.
5.Click gridView from the Views in this layout section. The Edit Layout: Alert List View Editor page is displayed.
6.Click Edit on the right-hand side of the Toolbar section.
Edit Button
7.In the Toolbar Editor, drag and drop the Multisort option on the toolbar section.
Drag Multisort

8.Click Save.
9.To verify the changes:
| a. | Return to the Service Desk console. |
| b. | Open the Alert workspace and verify that the Multisort icon displays. You may need to refresh the browser. |
Multisort also works on hidden columns. Even if you hide certain columns, you can still use multisort on them although you cannot see the column in the list.
Using the Multisort Feature with a Keyboard Shortcut
You can use a keyboard shortcut to invoke the multisort feature by doing the following:
1.Log in to the application.
2.Open the workspace for which you wish to group records.
3.Click the first column header to sort. This sets the first column to be sorted.
4.Press the CONTROL key and click the second column header to sort. This sets the second column to be sorted.
5.Set additional columns for sorting by repeatedly pressing the CONTROL key and clicking on headers.
You can click the first column header with or without pressing the CONTROL key. It always results in a single column sort. However, you must press the CONTROL key to perform a second level sort criteria; otherwise, it performs a single column sort again.