Configuring Ticket Classification for Upgraded Customers
Follow the below steps to configure ticket classification feature for Neurons for ITSM 2021.3 release upgraded customers.
- Log in to Ivanti Neurons for ITSM with the Administrator user role.
- Click Configure Application to go to the Configuration Console.
- From the Configuration Console, click Build > Business Objects > Incident to open the Incident Business Object.
- Click Forms > Incident.CustomerOwnershipForm.
- Drag and drop below fields and controls to the form and configure Control Properties as shown below.
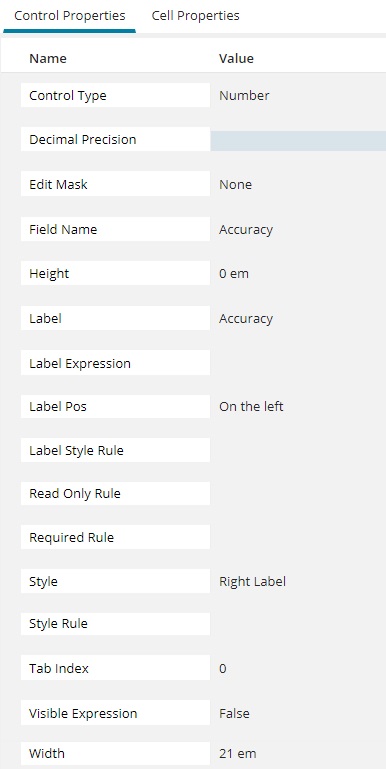
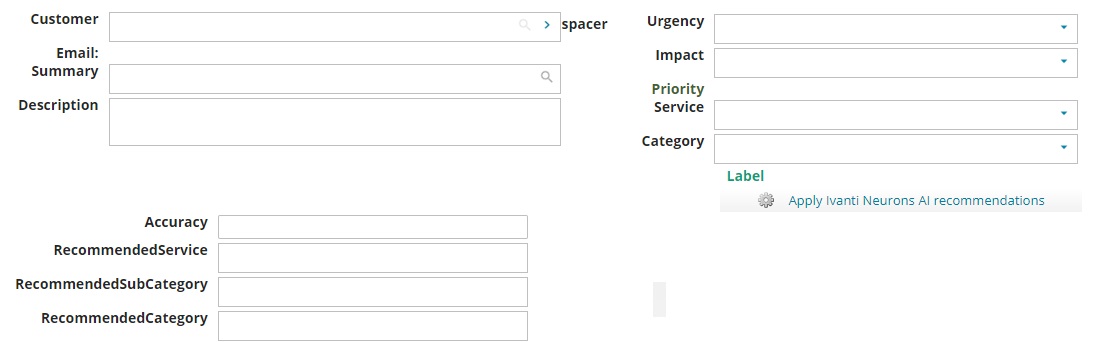
- Accuracy: set Visible Expression to "False".
-

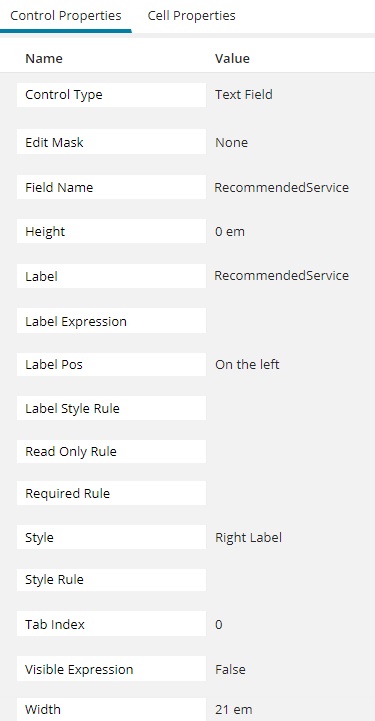
- RecommendedService: set Visible Expression to "False".
-
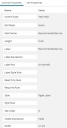
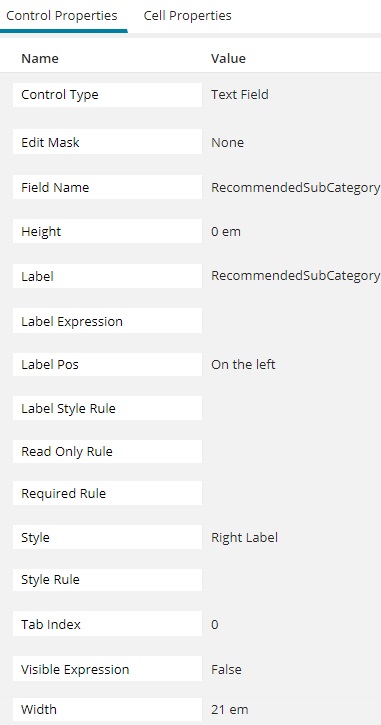
- RecommendedSubCategory: set Visible Expression to "False".
-
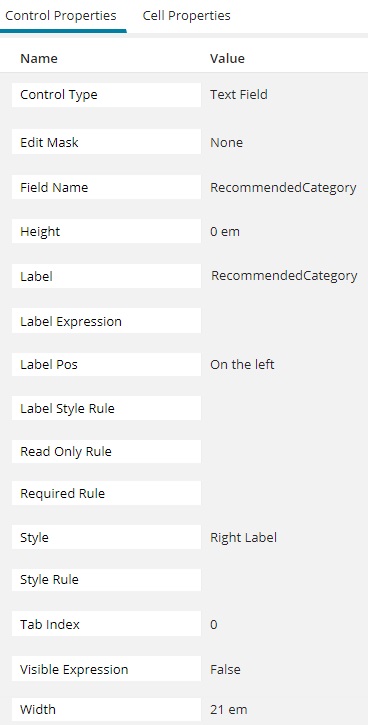
- RecommendedCategory: set Visible Expression to "False".
-
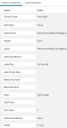
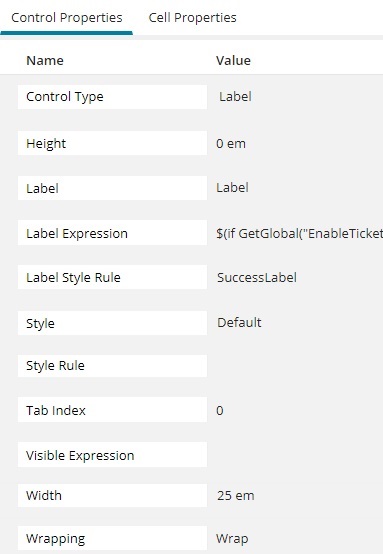
- Label: set Label Style Rule as "SuccessLabel" and Label Expression as shown below.
-
- $(if GetGlobal("EnableTicketClassification") &&
- CheckIfTicketClassificationIsEnabledForLayout("IncidentLayout.ServiceDesk" "Incident.CustomerOwnershipForm") &&
- (RecommendedCategory != "" &&
- RecommendedCategory != null) &&
- (RecommendedService != "" &&
- RecommendedService != null) &&
- (RecommendedCategory == Category &&
- RecommendedService == Service) then "Ivanti Neurons AI recommendations applied."
- else "")
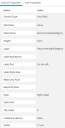
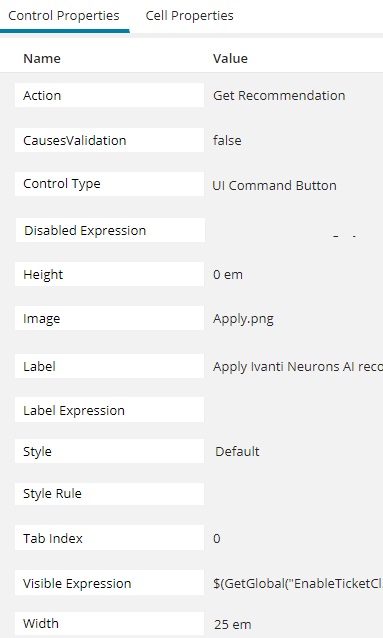
- Command Button: set Action as "Get Recommendation", Label as "Apply Ivanti Neurons AI recommendations” and Visible Expression as shown below.
-
- $(GetGlobal("EnableTicketClassification") &&
- CheckIfTicketClassificationIsEnabledForLayout("IncidentLayout.ServiceDesk", "Incident.CustomerOwnershipForm") &&
- RecommendedCategory != "" &&
- RecommendedCategory != null &&
- RecommendedService != "" &&
- RecommendedService != null &&
- (RecommendedCategory != Category || RecommendedService != Service))
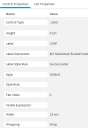
- Click Save. You can change UI as per user experience. Below is an example.
-

-
Click the Business Rules tab. The application displays a list of business rules.
-
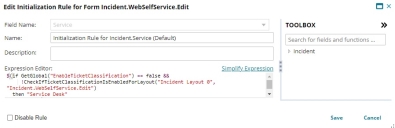
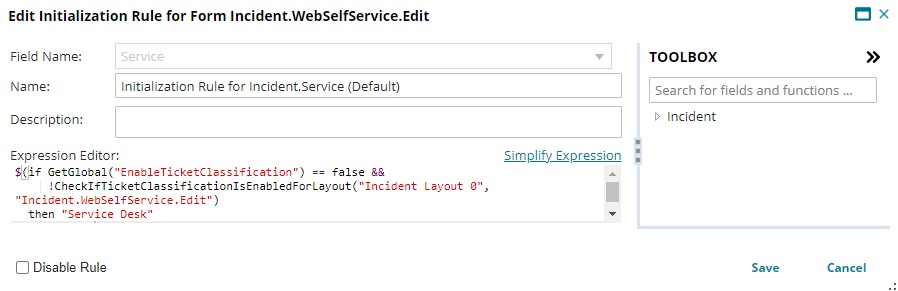
From the Initialization Rules section, click Add Initialization Rule. The application displays the Add Initialization Rule window.
- Set the Initialization Rule for Incident.Service field value for Self Service user form (Incident.WebSelfService.Edit) as below.
- $(if GetGlobal("EnableTicketClassification") == false &&
- !CheckIfTicketClassificationIsEnabledForLayout("Incident Layout 0",
- "Incident.WebSelfService.Edit")
- then "Service Desk"
- else null)
-
- Click the Layout tab and determine the layout to configure the ticket classification.
- Open the layout. For example, select IncidentLayout.ServiceDesk for the Service Desk Analyst role.
- Click formView or FormEdit to open the Form View Editor.
- Select Enable Ticket Classification.
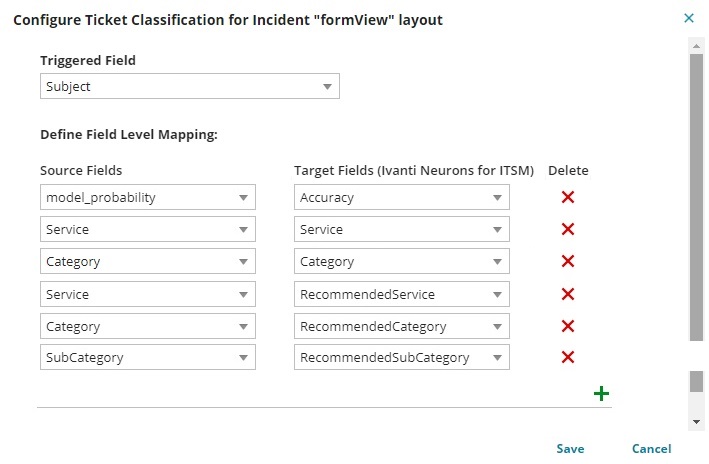
- Click Edit Ticket Classification Settings. The application displays the Configure Ticket Classification for Incident "formView" layout dialog box.
- Edit the below changes accordingly. See "Enable the layout to use ticket classification feature for a user role" section in Configuring Ticket Classification for more information.

- Click Save.
- Repeat Steps 11 through 16 for other layouts if required.
- Click Build > Global Constants to open the Global Constants window.
- Set the EnableTicketClassification value to True.
- Click Save.
If you use different forms and layout other than those listed in the above configuration steps, then you must perform the above steps on those forms and layouts and the expression needs to be updated accordingly.