Working with Action Fields
Working with Action Fields in the Classic Action Designer
Working with Action Fields in the Graphical Action Designer
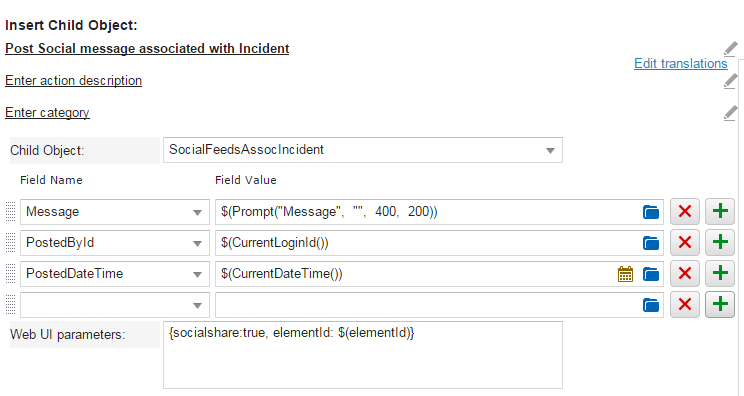
If the specific type of action requires current business object mapping, you can include fields and values. Additional fields give you more control over the results of your action.
Sometimes the fields and buttons do not appear until you select a business object reference. For example, when creating the Insert Child Object action, you must select the child business object reference before the field options appear.
Some actions allow you to include fields and values.
| Field | Description |
|---|---|
| Field Name |
To enter a field name, do one of the following: Begin typing the field name. As you type, a list of field names displays from which you can select a field. Choose a field from the drop-down list. Click the folder icon to the right of the field. In the resulting dialog, expand the Fields folder and select a field. |
| Field Value |
Enter an expression, built-in function, or a value. Click Edit Expression |
 to open the Expression Editor. In the Classic Action Designer you can also drag and drop a field or relationship from the
 Working with Action Fields in the Classic Action Designer
This section describes how to add, modify or remove a field for an action in the Classic Action Designer.
Adding a Field to an Action
1.From the Configuration Console, click Build > Automation Tools > Quick Actions to open the Actions Manager workspace. The list of business objects that have actions appears.
2.Click Add/Edit to see the actions for the business object. The application displays the Action Designer selection popup.
3.Select Classic Action Designer
4.Open an action from either the Your Actions or the Create New Actions tab.
5.Click add  . A new blank field is inserted below the line you clicked.
Adding a Field to an Action
6.Enter the field parameters as needed.
7.Repeat to add more fields.
8.Click Save.
Modifying a Field for an Action
1.From the Configuration Console, click Build > Automation Tools > Quick Actions to open the Actions Manager workspace. The list of business objects that have actions appears.
2.Click Add/Edit to see the actions for the business object. The application displays the Action Designer selection popup.
3.Select Classic Action Designer
4.Open an action from either the Your Actions or the Create New Actions tab.
5.Click in the field to modify.
6.Make your changes.
7.Click Save.
Removing a Field from an Action
1.From the Configuration Console, click Build > Automation Tools > Quick Actions to open the Actions Manager workspace. The list of business objects that have actions appears.
2.Click Add/Edit to see the actions for the business object. The application displays the Action Designer selection popup.
3.Select Classic Action Designer
4.Open an action from either the Your Actions or the Create New Actions tab.
5.Click delete  . The field disappears from the interface.
6.Click Save.
Working with Action Fields in the Graphical Action Designer
This section describes how to add, modify or remove a field for an action in the Graphical Action Designer.
Adding a Field to an Action
1.From the Configuration Console, click Build > Automation Tools > Quick Actions to open the Actions Manager workspace. The list of business objects that have actions appears.
2.Click Add/Edit to see the actions for the business object. The application displays the Action Designer selection popup.
3.Select Graphical Action Designer
4.Open an action from either the Your Actions tab, or drag an action from the New Actions tab onto the Design Area.
5.Select the action block on the Design Area to view the Settings section.
6.In the Settings section, select the Block tab.
7.Click Add Field below the last field displayed in the Block tab. A new blank field is inserted.
8.Enter the field parameters as needed.
9.Repeat to add more fields.
You can drag fields up/down to change the position order in the list. Select Drag Row  on the field you want to move and drag into position.
10.Click Save.
Modifying a Field for an Action
1.From the Configuration Console, click Build > Automation Tools > Quick Actions to open the Actions Manager workspace. The list of business objects that have actions appears.
2.Click Add/Edit to see the actions for the business object. The application displays the Action Designer selection popup.
3.Select Graphical Action Designer
4.Open an action from either the Your Actions tab, or drag an action from the New Actions tab onto the Design Area.
5.Select the action block on the Design Area to view the Settings section.
6.In the Settings section, select the Block tab.
7.Click in the field to modify.
8.Make your changes.
9.Click Save.
Removing a Field from an Action
1.From the Configuration Console, click Build > Automation Tools > Quick Actions to open the Actions Manager workspace. The list of business objects that have actions appears.
2.Click Add/Edit to see the actions for the business object. The application displays the Action Designer selection popup.
3.Select Graphical Action Designer
4.Open an action from either the Your Actions tab, or drag an action from the New Actions tab onto the Design Area.
5.Select the action block on the Design Area to view the Settings section.
6.In the Settings section, select the Block tab.
7.Click delete at the right of a field entry. The field disappears from the interface.
8.Click Save.